
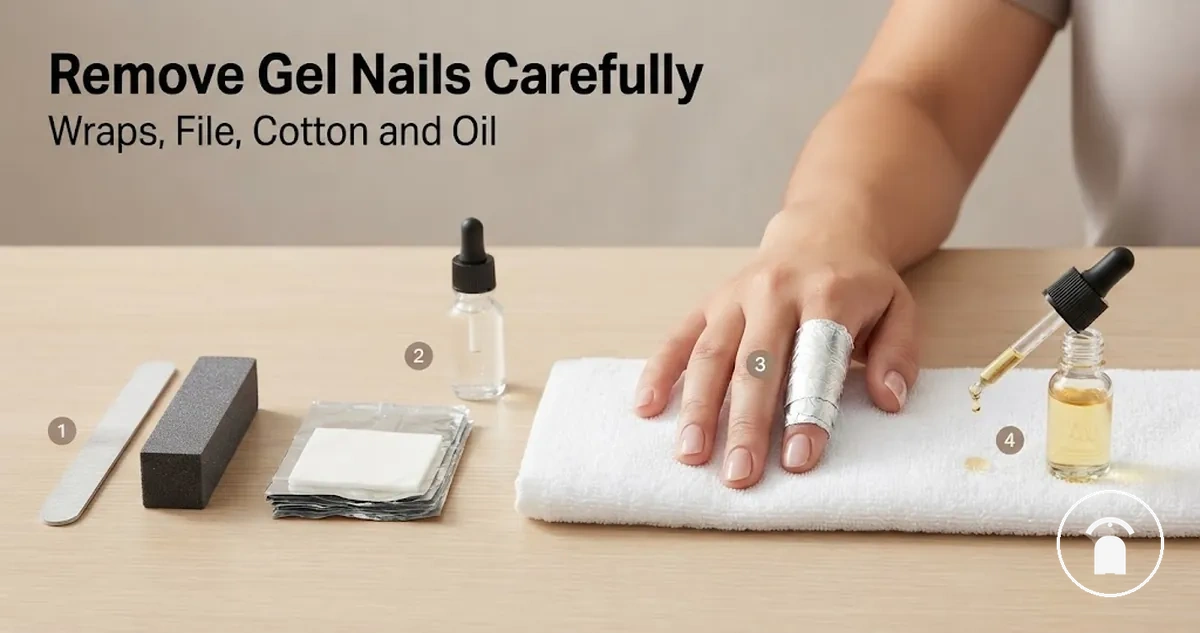
Safe Gel Nail Kit Removal at Home
Safe gel nail kit removal at home uses a soak-off gel process that softens gel polish with acetone, allowing gentle release while protecting the natural nail plate, cuticle area, and surrounding skin. A gel nail kits setup for removal should use remover wraps, controlled acetone contact, and careful checking rather than forceful pressure on attached gel.
Gel polish removal works by allowing acetone to soften compatible soak-off gel before the softened layer is released.
Gel polish removal works by allowing acetone to soften compatible soak-off gel before the softened layer is released. The American Academy of Dermatology Association advises against picking or peeling gel nail polish because forceful removal can damage the nail. The practical implication is that the gel layer should be checked for softening before tools apply pressure to the natural nail.
At home gel nail kit removal has limits when the product type is unknown or does not respond to acetone.
At home gel nail kit removal has limits when the product type is unknown or does not respond to acetone. A soak-off gel layer that remains attached after one soak cycle should be reassessed and may require repeat soaking rather than scraping, while hard gel or other non-soak-off systems may require a different removal approach. For example, if a user completes one acetone soak cycle and the gel remains firmly attached, the observable result is resistance during gentle checking, so the safer action is to stop applying force and reassess the product type.
Protecting the natural nail during gel polish removal depends on preparation, patience, and recognising stopping conditions.
Protecting the natural nail during gel polish removal depends on preparation, patience, and recognising stopping conditions. Prepare the removal setup, apply acetone through remover wraps, check for gentle release, and avoid actions that increase damage risk such as pulling attached gel away from the nail plate.
Table of Contents
What Safe Gel Removal Should Protect
Safe gel removal protects the natural nail, nail plate, cuticle area, surrounding skin, and gel bond by using softening and gentle release rather than scraping pressure or over-filing. The main safety goal of gel nail kit removal is to reduce mechanical force against the nail surface while allowing compatible gel polish to loosen.
The American Academy of Dermatology Association advises against picking or peeling gel nail polish because forceful removal can damage the nails.
Damage risk increases when attached gel is removed through peeling, scraping pressure, or excessive filing instead of allowing the gel bond to soften. The American Academy of Dermatology Association advises against picking or peeling gel nail polish because forceful removal can damage the nails. Acetone exposure should be controlled around the cuticle area and surrounding skin because repeated contact can contribute to dryness or irritation.
- Nail plate: Protect the natural nail plate thickness by avoiding over-filing and pressure that removes or weakens the nail surface while gel remains attached.
- Cuticle area: Protect the cuticle area by limiting unnecessary acetone exposure and avoiding tools that press against the skin around the nail.
- Surrounding skin: Protect surrounding skin by checking for dryness, irritation, or discomfort during the soak-off process and adjusting the removal approach when needed.
- Gel bond: Protect the gel bond by allowing softening and gentle release before using a tool, rather than forcing resistant gel away from the nail.
Softened gel release and forced gel removal create different outcomes: softened gel reduces resistance before removal, while forcing gel increases scraping pressure against the nail surface. This protection approach supports safe home use by keeping removal decisions based on gel response, nail condition, and controlled handling rather than force.
When Gel Polish Is Ready to Soak Off
Gel polish is ready to soak off when the product type is suitable for an acetone-based soak-off process and the gel shows signs of softening without requiring force against the natural nail. Safe gel nail kit removal decisions should consider soak-off gel behaviour, acetone response, nail sensitivity, and visible damage before removal begins.
If the gel remains resistant after softening, rewrap or reassessment is safer than increasing scraping pressure.
Gel condition provides readiness signals, but individual signs do not confirm that every gel layer is suitable for the same removal approach. Lifting edges can show separation while attached sections still resist release, chipped gel can expose uneven areas that need careful assessment, and thick gel or an unknown product type may respond differently to acetone. If the gel remains resistant after softening, rewrap or reassessment is safer than increasing scraping pressure.
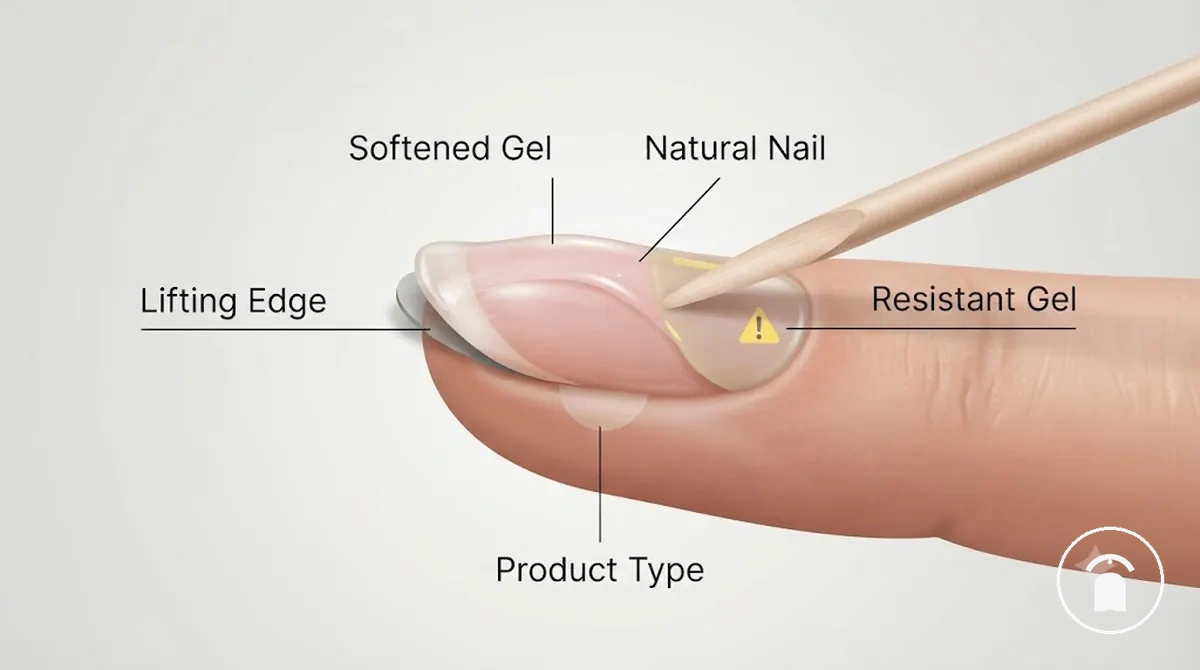
- Lifting edges: Check whether lifted areas release after softening or whether attached gel still shows resistance.
- Chipped gel: Assess chipped areas carefully because visible separation does not confirm that the complete gel layer is ready to release.
- Thick gel: Check acetone response and softening behaviour rather than using thickness alone as a readiness indicator.
- Product type: Identify whether the gel behaves like soak-off gel because hard gel and other resistant products may require a different removal route.
- Nail sensitivity and visible damage: Pause the process when the natural nail shows sensitivity or visible damage that requires more cautious handling.
Before soaking begins, gel polish removal readiness should be judged by product type, gel response, and nail condition. A cautious decision reduces the need for force when the gel bond remains attached or the removal behaviour is uncertain.
Removal Tools and Materials to Prepare
Removal tools for gel nail kit removal should be prepared before starting so each item has a clear purpose, safe-use condition, and role in the soak-off process. A prepared removal setup includes acetone, cotton pads, remover wraps, support tools, and aftercare materials to help reduce unsafe improvisation during gel polish removal.
The removal items in a kit can be grouped by purpose, and tools should be cleaned after use through cleaning removal tools to keep the removal setup organised.
Organising removal tools before use helps control acetone contact, filing pressure, and tool handling because each item supports a specific step rather than replacing the gentle release process. The removal items in a kit can be grouped by purpose, and tools should be cleaned after use through cleaning removal tools to keep the removal setup organised.
| Item | Purpose | Safe-use condition | Risk if misused |
|---|---|---|---|
| Acetone | Softens compatible soak-off gel during the removal process. | Use controlled contact during soaking and limit unnecessary exposure to surrounding skin. | Repeated contact may contribute to dryness or irritation of the skin around the nail. |
| Cotton pads | Hold acetone against the gel surface during softening. | Use enough material to maintain contact with the gel layer. | Poor contact can reduce softening and encourage excess pressure during removal. |
| Remover wraps | Secure acetone-soaked cotton pads around the nail. | Maintain contact while allowing comfort checks during the soak-off process. | Loose positioning can reduce consistent acetone contact. |
| Nail clips or foil | Help keep cotton pads and wraps positioned on the nail. | Apply only enough pressure to hold materials in place. | Excess pressure can create discomfort around the nail area. |
| Nail file | Supports light surface preparation when required before soaking. | Use controlled filing pressure on the gel surface and avoid filing into the natural nail. | Over-filing can increase nail surface stress. |
| Buffer | Helps smooth the nail surface after removal steps when needed. | Use gently and avoid repeated pressure on one area. | Excessive use can affect the nail surface. |
| Orange stick or pusher | Supports gentle release of softened gel. | Use only when the gel has softened and releases without force. | Forcing attached gel can increase scraping pressure and damage risk. |
| Cuticle oil | Supports aftercare for the cuticle area after removal. | Apply as part of post-removal care. | Skipping aftercare may leave surrounding skin feeling dry. |
| Skin barrier | Helps limit direct acetone contact with surrounding skin. | Apply around the nail area before controlled acetone exposure. | Unprotected skin may experience increased dryness or irritation. |
| Timer | Helps track soak intervals and checking points. | Use it as a reminder to check gel response rather than as a fixed removal rule. | Ignoring gel response can lead to unnecessary pressure during removal. |
| Cleanup materials | Support an organised removal area after the process. | Keep used materials and tools separated after use. | Poor organisation can increase the chance of incorrect tool handling. |
Acetone, Cotton Pads, Wraps, and Clips
Acetone, cotton pads, wraps, and clips work together as a soaking contact system that supports gel softening by maintaining acetone contact with the gel surface. Acetone provides the softening liquid, cotton pads hold the liquid against the nail, wraps create a seal around the contact area, and clips help maintain positioning during soak time.
During soak time, check the surrounding skin for dryness or irritation and reassess the gel softening before repeating contact.
The effectiveness of this contact system depends on saturation, seal, pressure, skin exposure, and checking the gel response rather than applying more force. Cotton pads should remain sufficiently saturated for contact, while wraps and clips should keep the materials positioned without excessive pressure or discomfort. During soak time, check the surrounding skin for dryness or irritation and reassess the gel softening before repeating contact.
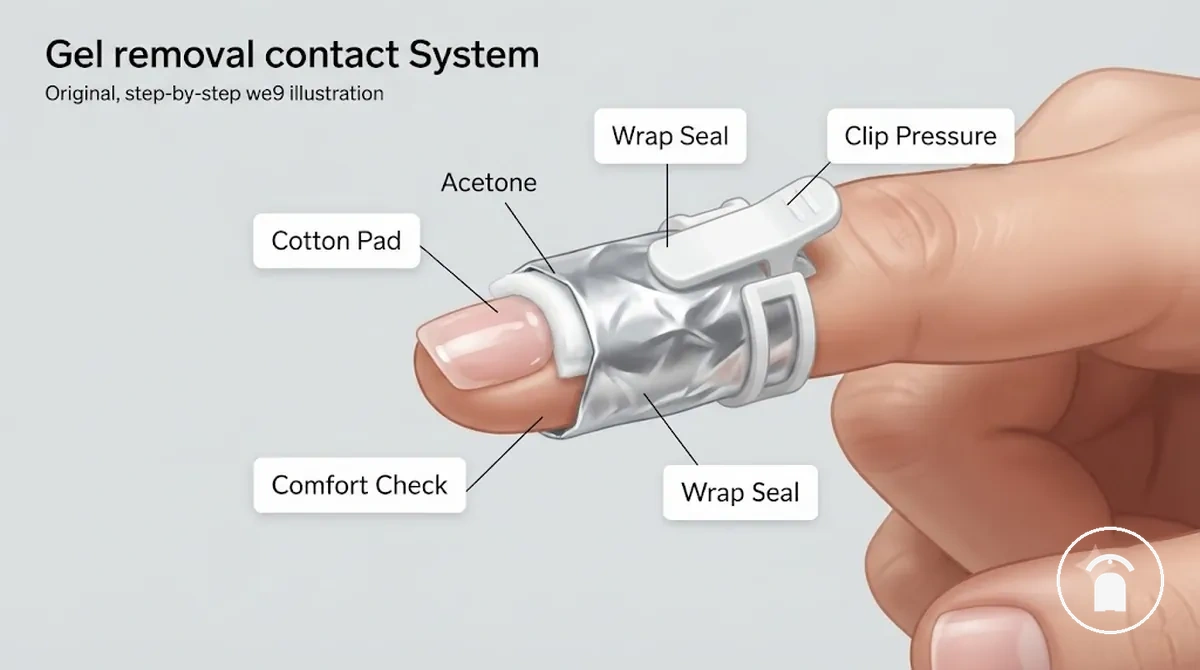
- Saturation: Cotton pads need enough acetone contact with the gel surface to support softening.
- Seal: Wraps or foil wraps should reduce slipping and help maintain contact around the nail.
- Pressure: Clips should hold the wrap in position without creating uncomfortable pressure.
- Soak time: Check softening progress during contact instead of treating time as a guaranteed removal result.
- Skin exposure: Monitor the skin around the nail and use a barrier approach when limiting acetone contact is needed.
Files, Pushers, and Skin Protection Tools
Files, pushers, and skin protection tools support gel nail kit removal by assisting the soak-off process without replacing softening or encouraging aggressive removal. A nail file, buffer, pusher, and skin barrier each have a specific role: light surface access, smoothing, gentle lifting of softened gel, and protection from acetone exposure.
Pressure control helps prevent unnecessary stress on the nail surface while maintaining safer removal conditions.
Pressure control helps prevent unnecessary stress on the nail surface while maintaining safer removal conditions. These tools should be used only according to the gel response, because resistance, excessive filing, or repeated pressure can increase the chance of nail thinning or skin discomfort.
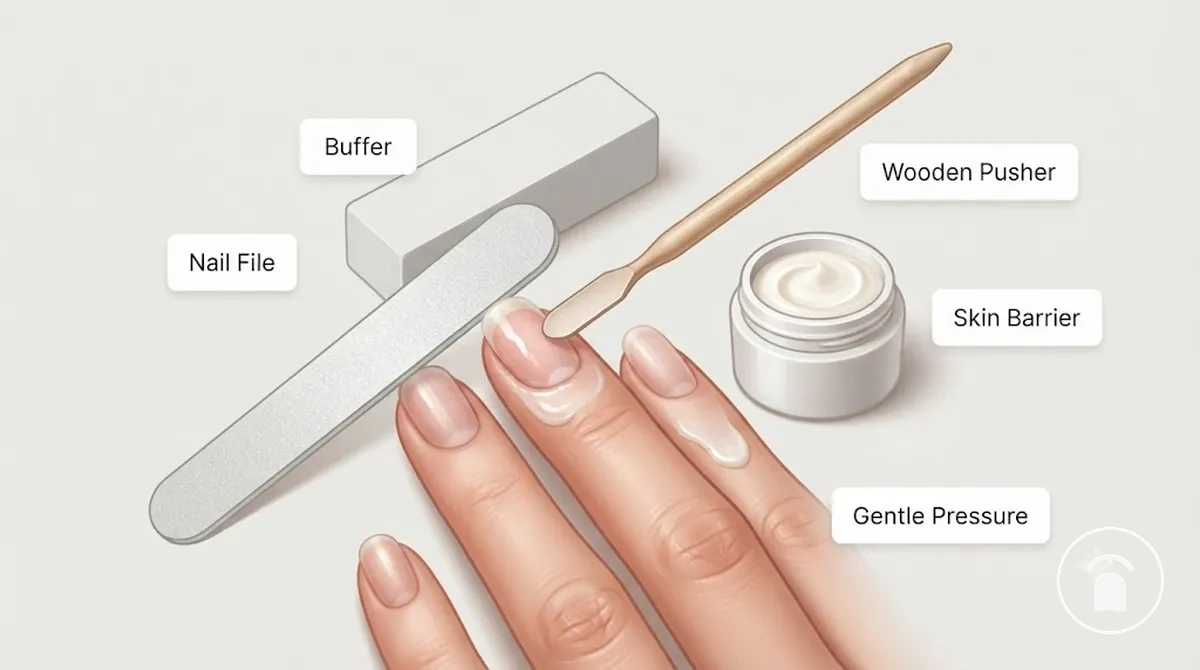
- Nail file: Supports light filing of the top surface when access is needed before soaking. Excessive grit or pressure can increase the risk of nail thinning.
- Buffer: Supports smoothing of the nail surface after removal steps. Overuse or repeated pressure can affect the nail surface.
- Pusher: Helps with gentle lifting of softened gel when the gel releases with minimal resistance. Using pressure against attached gel can increase damage risk.
- Skin barrier: Helps protect surrounding skin from acetone exposure and supports comfort during removal. Limited skin protection may contribute to dryness or irritation.
- Cleanup: Removes softened gel residue and keeps the removal area organised. Poor cleanup can increase unnecessary contact with leftover materials.
Safe Gel Polish Soak-Off Steps
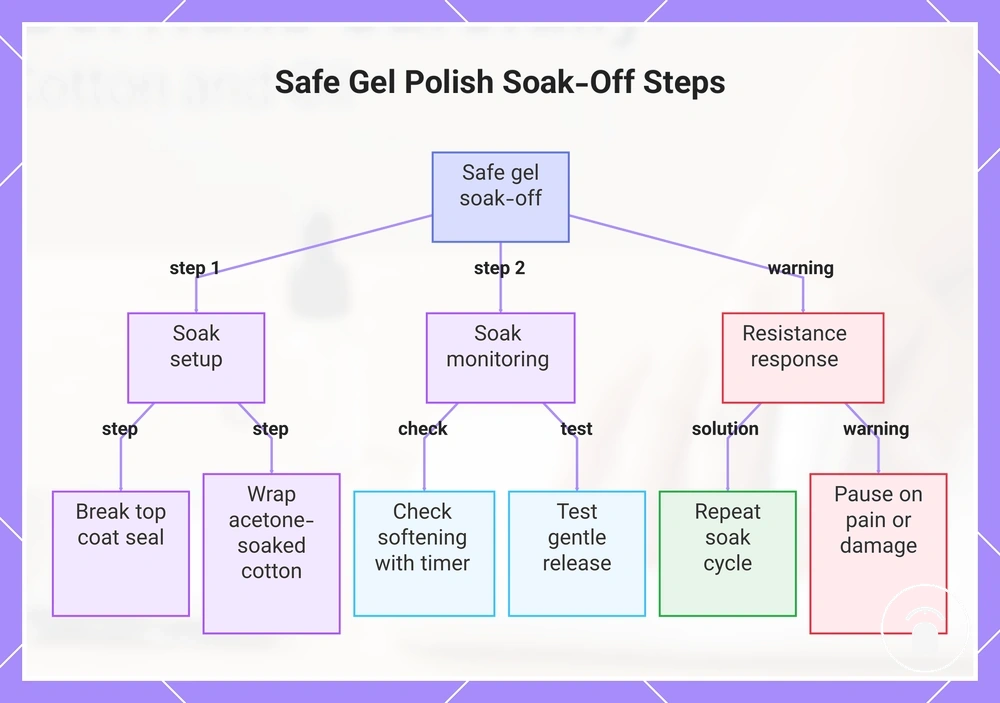
Safe gel polish soak-off steps follow a controlled removal sequence that depends on gel type, gel thickness, and the gel's response to acetone. The process uses acetone contact, wrapping, checking, and gentle release steps to soften the gel before removal rather than relying on pressure against the natural nail.
Checking the gel response during each soak cycle helps determine whether to continue, repeat soaking, or stop.
Checking the gel response during each soak cycle helps determine whether to continue, repeat soaking, or stop. If gel remains resistant, repeating acetone contact is a safer option than increasing pressure, and any pain, burning, visible nail damage, or unexpected reaction should be treated as a reason to pause.
- Break the top coat seal: Prepare the sealed gel surface when needed to improve acetone access. Use controlled filing pressure and check that the natural nail surface is not being affected.
- Create acetone contact: Apply acetone-soaked cotton to the gel surface so the acetone can begin softening the product. Check that contact is maintained without unnecessary skin exposure.
- Secure the wrap: Place the wrap around the acetone-soaked cotton to keep contact with the nail. Check that the wrap remains comfortable and does not create excessive pressure.
- Use a timer and check: Monitor the soak cycle and check whether the gel has softened. Treat the timer as a checking point rather than a guaranteed removal result.
- Test gentle release: Check whether softened gel releases with minimal pressure. Stop if the gel remains firmly attached or shows unexpected resistance.
- Repeat soaking when needed: Reapply the soak cycle if the gel has not softened enough for gentle release. Repeat soaking allows more softening time instead of increasing removal force.
- Complete final cleanup: Remove softened residue and check the nail surface after release. Stop the process if there is pain, burning, visible nail damage, or continued resistance.
This chart outlines the safe soak-off sequence, the key checkpoints, and the correct response when gel resists removal.
Gently Break the Top Coat Seal
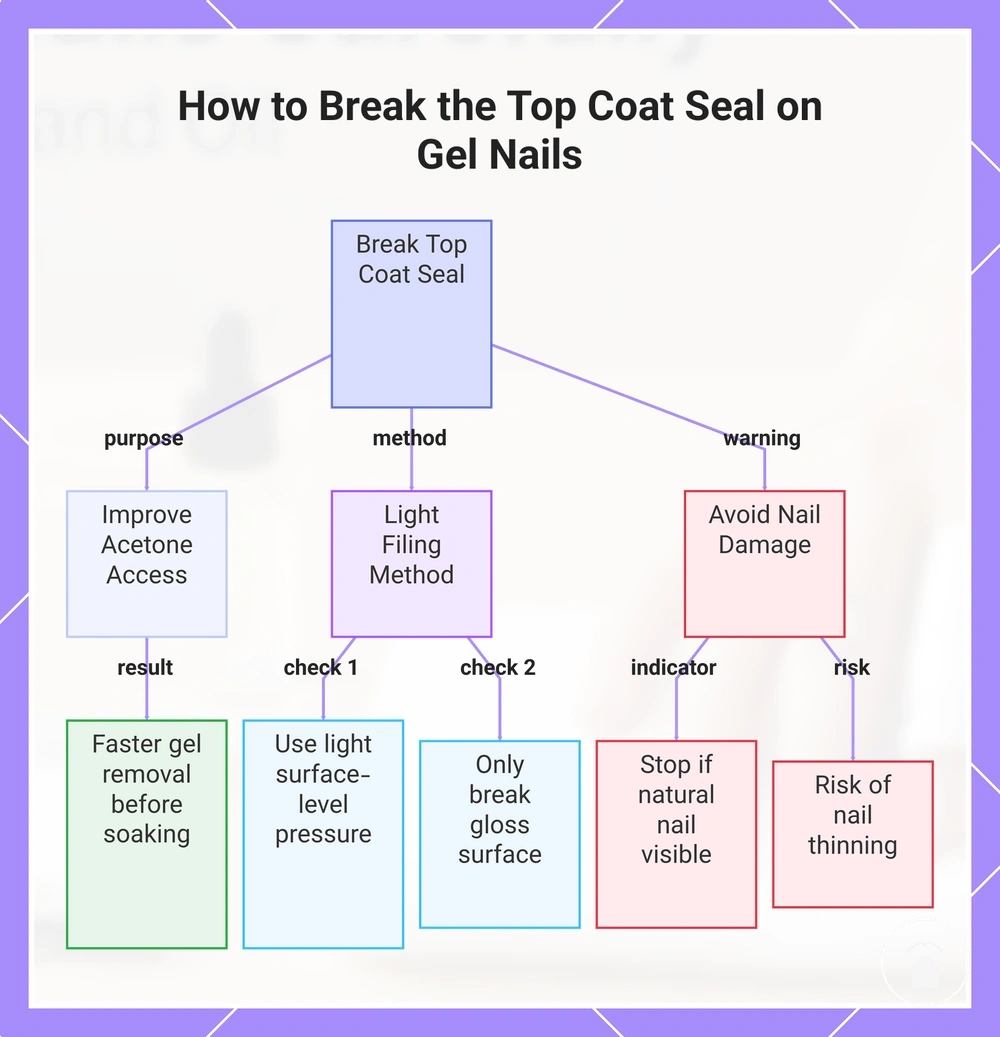
Breaking the top coat seal uses light filing on the gloss surface of the gel layer to improve acetone access before soaking. A nail file should make controlled contact with the top coat seal only, creating a less glossy surface while keeping the natural nail protected.
Use light pressure and surface-level filing rather than removing the gel layer.
Use light pressure and surface-level filing rather than removing the gel layer. If the natural nail becomes visible or filing begins to affect the nail surface, stop and reassess because excessive contact can increase the risk of nail thinning.
This chart shows the purpose, method, and warning for breaking the top coat seal on gel nails to improve acetone access and protect the natural nail.
This chart shows the purpose, method, and warning for breaking the top coat seal on gel nails to improve acetone access and protect the natural nail.
Wrap Nails With Acetone-Soaked Cotton
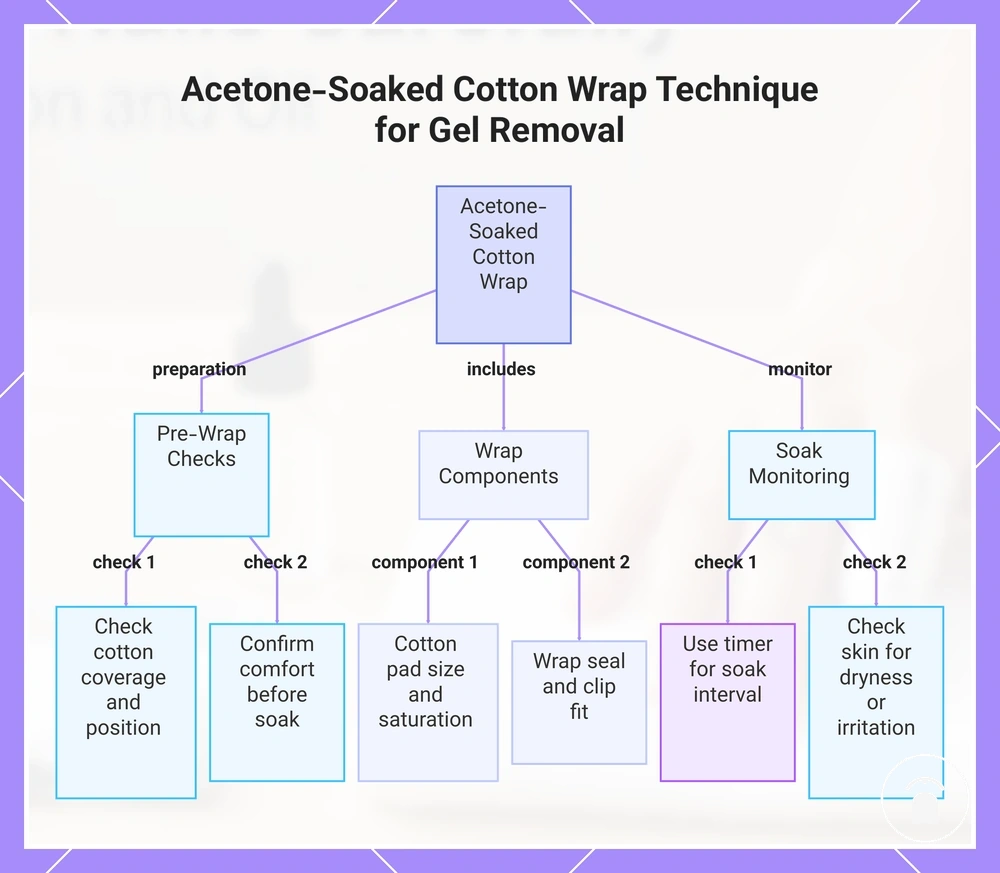
Wrapping nails with acetone-soaked cotton creates controlled contact between acetone and the gel surface during the soak-off process. The wrap, clip, and seal work together to keep the soaked pad positioned on the nail so acetone contact is maintained without using tightness or longer exposure as a removal shortcut.
Prepare each nail individually by checking cotton coverage, wrap position, and comfort before continuing the soak cycle.
Prepare each nail individually by checking cotton coverage, wrap position, and comfort before continuing the soak cycle. A stable seal should reduce slipping while allowing skin barrier use and checks for dryness, irritation, or discomfort during contact.
- Cotton pad: Use a pad size that covers the gel surface so acetone contact reaches the intended area without unnecessary skin exposure.
- Acetone saturation: Ensure the cotton is sufficiently soaked for contact with the gel while avoiding uncontrolled exposure.
- Wrap seal: Secure the wrap around the finger so the cotton remains positioned and the seal stays comfortable without relying on excessive tightness.
- Clip fit and timer: Use clips to maintain placement when needed and use a timer to check the soak interval rather than assuming time alone determines removal.
- Skin barrier and comfort: Check surrounding skin during the process and adjust the setup if dryness, discomfort, or irritation occurs.
This chart shows the steps and components for creating an acetone-soaked cotton wrap for controlled gel soak-off, including pre-wrap checks, wrap components, and soak monitoring.
Check Softening Before Pushing Gel Off
Softened gel should move with gentle pressure before pushing because resistance indicates that the gel may not be ready to release. Check the gel condition first, then decide whether a gentle lift is appropriate or whether the nail needs a rewrap to continue softening.
- Lifted edges: Lifted edges can show that gel is loosening, but they do not confirm that all attached gel is ready to release. Check whether the gel moves with gentle pressure before continuing.
- Flaking texture: A flaking texture can indicate that parts of the gel layer are breaking down. Check the surrounding gel before attempting a gentle lift.
- Softened layers: Softened gel should allow a gentle lift with limited resistance. If the gel remains attached, use a rewrap so the remaining gel can continue softening.
- Resistance: Resistance during a gentle lift is a stop signal. Rewrap the nail instead of applying more pressure because stuck gel has not reached a suitable release condition.
- Nail discomfort: Nail discomfort or sensitivity requires stopping the process and checking the nail condition before continuing.
Repeat Soaking Instead of Forcing Stubborn Gel
Repeat soaking is the safer next step when stubborn gel remains attached after the first soak cycle because resistance signals that the gel may need more softening rather than additional pressure. Reapply acetone, reseal wraps, and check again before attempting gentle release from attached gel.
Reapply acetone, reseal wraps, and check again before attempting gentle release from attached gel.
If resistance continues after a repeat soak cycle, stop and reassess instead of increasing pressure. Persistent hardness may indicate that the product type is not responding as a typical soak-off gel, and continuing to push against it can increase risk to the nail plate.
- Reapply acetone: Refresh the acetone contact when stubborn gel remains attached after the first soak cycle. Check again only after the gel has had more opportunity to soften.
- Reseal wraps: Rewrap the nail when the acetone-soaked material has shifted or contact has reduced. A secure seal helps maintain contact without relying on excessive tightness.
- Repeat the check: Test whether the gel shows a gentle release condition after the second soak cycle. Stop if resistance remains unchanged.
- Review product response: Consider whether the gel may not be a suitable soak-off type when it stays hard after repeated soaking. Stop rather than applying more pressure to attached gel.
- Stop for discomfort: Pause the process if nail discomfort, sensitivity, or continued resistance appears. Avoid actions that increase pressure against the nail plate.
Removal Limits for Hard Gel, Extensions, and Non-Acetone Methods
Not all gel systems remove the same way because product type determines whether acetone can soften the material for safe release. Soak-off gel polish is formulated to soften with acetone, while hard gel, builder gel, some extensions, and non-acetone removal methods can fall outside normal soak-off gel kit removal limits. According to product guidance from major gel manufacturers such as CND and OPI, only soak-off systems specifically formulated for acetone removal should be treated as standard soak-off products.
Not all gel systems remove the same way because product type determines whether acetone can soften the material for safe release.
If the product type is uncertain, reduce pressure and increase caution rather than experimenting with more force or longer scraping. Acetone resistance after a normal soak cycle is a practical boundary condition rather than evidence that additional pressure is appropriate, because resistant gel may indicate a hard gel, builder gel, or another extension system instead of a soak-off gel polish.
| Product or method | Expected acetone response | Safe home-use implication |
|---|---|---|
| Soak-off gel polish | Designed to soften with acetone before gentle release. | Continue only after the gel softens and releases with minimal pressure. |
| Hard gel or builder gel | Builder gel formulations differ, while hard gel commonly shows acetone resistance and often does not soften through a normal soak-off process. | Stop increasing pressure if resistance remains and reassess the product type before continuing. |
| Extensions | Response depends on the extension system, attachment method, and material rather than the appearance alone. | Confirm the extension type before attempting removal because not every extension follows a soak-off process. |
| Non-acetone remover | Non-acetone removers generally produce slower or limited softening and are not intended to replace acetone for every gel system. | Do not expect the same removal outcome as an acetone soak when the gel remains resistant. |
Resistant gel is a removal boundary rather than a signal to apply more force. When the gel remains firmly attached after repeated softening attempts or the product type cannot be identified, stop the removal process and verify the system before continuing, because uncertainty should increase caution instead of encouraging further experimentation.
Gel Removal Mistakes That Damage Nails
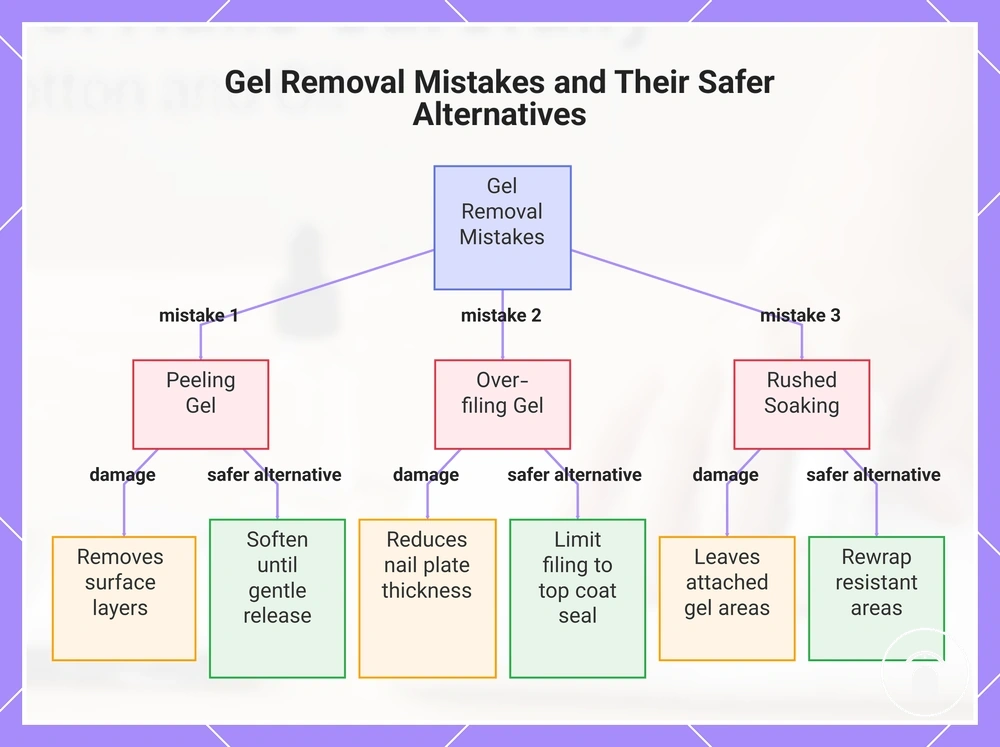
Gel removal mistakes increase nail damage risk when force, insufficient softening, excessive filing, or prolonged acetone exposure replaces controlled soak-off removal. Peeling, scraping, over-filing, rushed soaking, repeated pressure, skin overexposure, and ignoring nail sensitivity each require a different safer alternative rather than the same corrective action. :contentReference[oaicite:0]{index=0}
The likelihood and severity of damage depend on nail condition, pressure, exposure, and how often the mistake is repeated.
The correction rule is to stop when gel remains resistant or discomfort appears, then adjust the cause: allow more softening for attached gel, reduce file contact at the nail plate, or limit acetone contact with surrounding skin. The likelihood and severity of damage depend on nail condition, pressure, exposure, and how often the mistake is repeated. :contentReference[oaicite:1]{index=1}
- Peeling: Pulling attached gel can remove surface layers from the natural nail and increase thinning or roughness. Safer alternative: Allow the gel to soften until it releases with gentle pressure.
- Scraping: Scraping through resistance concentrates pressure on the nail plate. Safer alternative: Stop when the gel remains attached and repeat the softening step before checking again.
- Over-filing: Repeated or deep file contact can reduce nail plate thickness and create surface roughness. Safer alternative: Limit filing to the gel surface needed to break the top coat seal.
- Rushed soaking: Ending the soak before the gel softens leaves attached areas that require more pressure to move. Safer alternative: Check the gel response and rewrap resistant areas instead of increasing force.
- Repeated force: Repeated pushing against stuck gel increases mechanical stress on the same nail area. Safer alternative: Treat resistance as a stop signal and reassess the product type or softening response.
- Skin overexposure: Unnecessary acetone contact can contribute to dryness or irritation around the nail. Safer alternative: Keep acetone contact localised, use a skin barrier where appropriate, and pause if irritation develops.
- Ignoring nail sensitivity: Continuing after pain, burning, or increasing sensitivity can worsen an existing problem. Safer alternative: Stop removal and inspect the nail and surrounding skin before continuing.
This chart shows three common gel removal mistakes that damage nails, along with the damage they cause and the safer alternative for each.
Peeling, Scraping, and Over-Filing
Peeling, scraping, and over-filing increase mechanical force on the nail plate because bonded gel resists removal until it has softened. Peeling can lift layers of the natural nail, scraping increases pusher pressure against stuck gel, and over-filing with coarse file grit can contribute to nail plate thinning and surface roughness depending on filing pressure and nail condition. NailKnowledge advises that bonded gel should not be forcibly removed because mechanical removal can damage the nail surface. :contentReference[oaicite:0]{index=0}
NailKnowledge advises that bonded gel should not be forcibly removed because mechanical removal can damage the nail surface.
When stuck gel remains attached, treat the resistance as a signal to stop rather than increase pusher pressure or use rougher file grit. Repeat soaking for acetone-responsive gel and attempt a gentle lift only after the gel has softened, because softened gel separates with less mechanical force than bonded gel and reduces unnecessary stress on the nail plate.
Rushing Soak Time or Overexposing Skin
Rushing soak time can leave gel insufficiently softened, while unnecessary acetone contact can increase skin exposure and contribute to dryness or irritation signs. The safer balance is to maintain contact only while the gel is softening effectively, then pause when the wrap leaks, the surrounding skin becomes uncomfortable, or the gel no longer responds as expected. :contentReference[oaicite:0]{index=0}
- Soak time: Use gel softening as the decision criterion rather than following one universal duration. If attached gel still resists gentle release, use a controlled repeat soak instead of increasing pressure.
- Wrap seal: Maintain a secure wrap seal that keeps acetone contact on the gel without leakage onto surrounding skin. Adjust or replace the wrap if it shifts, loosens, or allows liquid to escape.
- Skin barrier: Apply a skin barrier around the nail when limiting unnecessary skin exposure is appropriate. Keep the barrier away from the gel surface so it does not interrupt acetone contact.
- Comfort check: Monitor for dryness, stinging, redness, or other irritation signs during contact. Pause and remove the wrap if discomfort develops or increases.
- Repeat soaking: Repeat soaking only when the gel still needs softening and the skin remains comfortable. Stop if repeated acetone contact increases discomfort or if the product remains resistant despite adequate contact.
Nail Aftercare After Gel Removal
Nail aftercare supports comfort, moisture, and hydration after gel removal by helping the natural nail and surrounding skin recover from temporary dryness caused by acetone and handling during the removal process. An effective aftercare routine includes cuticle oil, moisturizer, gentle smoothing only when needed, delaying reapplication when nails remain sensitive, and monitoring for continuing weakness or peeling. :contentReference[oaicite:0]{index=0}
Cuticle oil helps condition the cuticle area and reduce dryness, while moisturizer supports hydration of the surrounding skin and hands after acetone exposure.
Cuticle oil helps condition the cuticle area and reduce dryness, while moisturizer supports hydration of the surrounding skin and hands after acetone exposure. Gentle smoothing should be limited to light surface refinement when minor roughness remains because repeated buffing can increase surface wear rather than improve nail aftercare. :contentReference[oaicite:1]{index=1}
- Apply cuticle oil: Massage cuticle oil around each nail regularly to improve moisture and reduce dryness around the surrounding skin.
- Use moisturizer: Apply moisturizer to the hands and nails after washing and repeat throughout the day to maintain hydration.
- Smooth lightly: Perform gentle smoothing only when minor surface roughness remains, avoiding repeated buffing of the natural nail.
- Delay reapplication: Avoid immediate reapplication if sensitive nails, soreness, peeling, or visible weakness remain after removal.
- Monitor nail condition: Watch for continuing weakness, dryness, peeling, or discomfort before deciding that another gel application is appropriate.
Use nail condition rather than a fixed timetable when deciding whether to apply gel again. If sensitive nails, weakness, or peeling are still present, taking a break is generally more appropriate than immediate reapplication; the guidance in aftercare after removal explains how nail condition influences that decision. :contentReference[oaicite:2]{index=2}
Use nail condition rather than a fixed timetable when deciding whether to apply gel again.
Continue the aftercare routine until the nails and surrounding skin feel comfortable, hydrated, and free from noticeable soreness during everyday activities. If weakness, increasing peeling, persistent dryness, or ongoing sensitivity continues instead of improving, pause further gel use and reassess nail condition before another application. :contentReference[oaicite:3]{index=3}
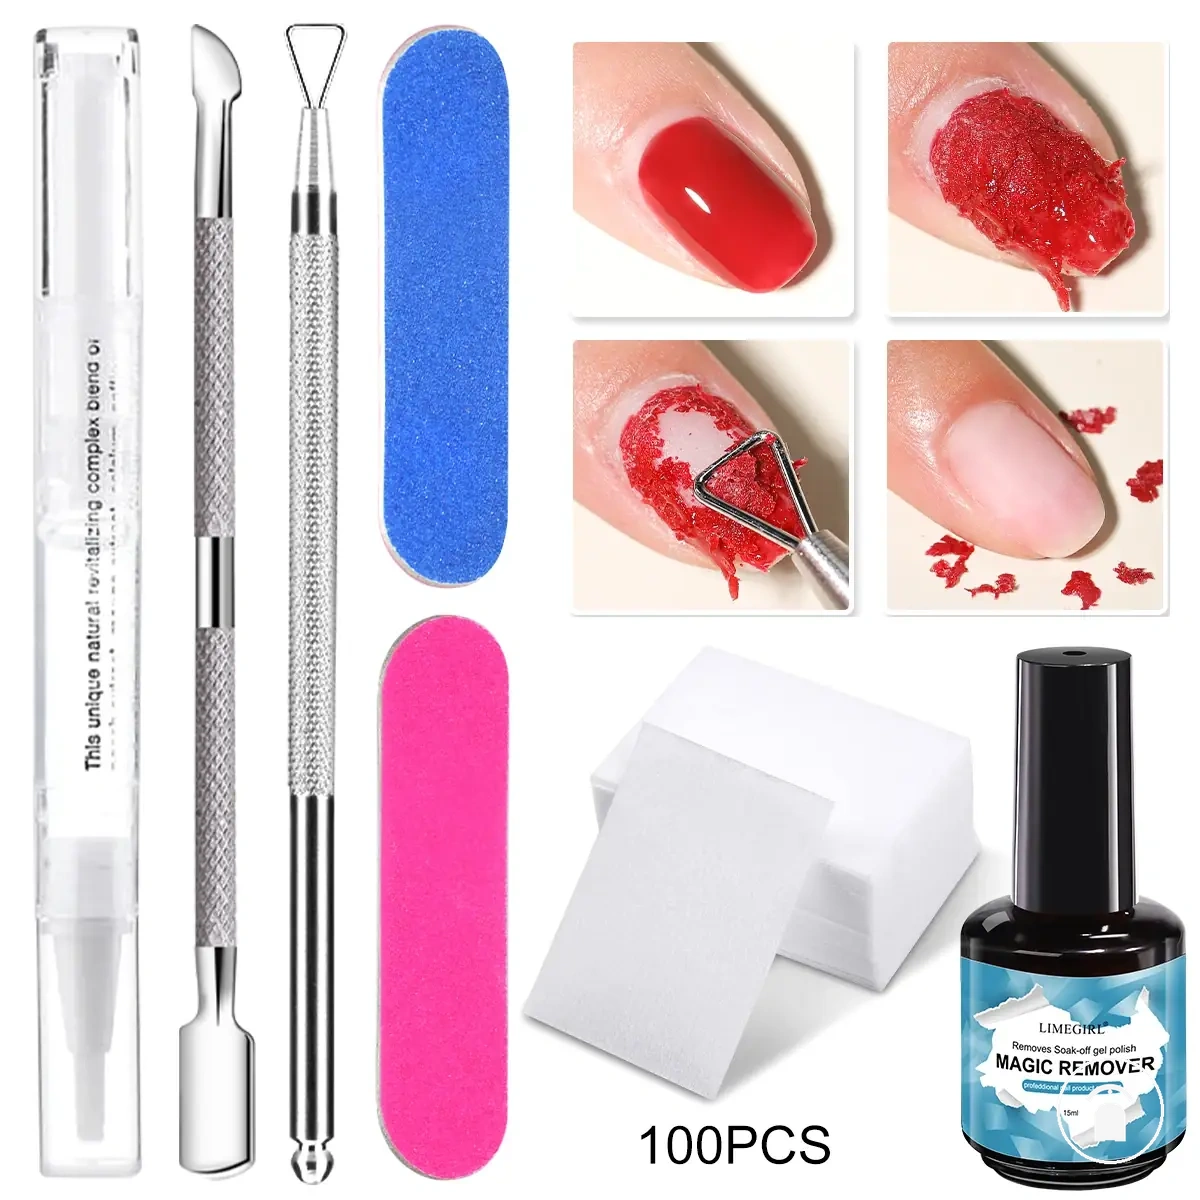
The products below are useful examples for comparing available options.
The products below are useful examples for comparing available options. Before buying, check that the compatibility criteria, key features, and product details match your needs.
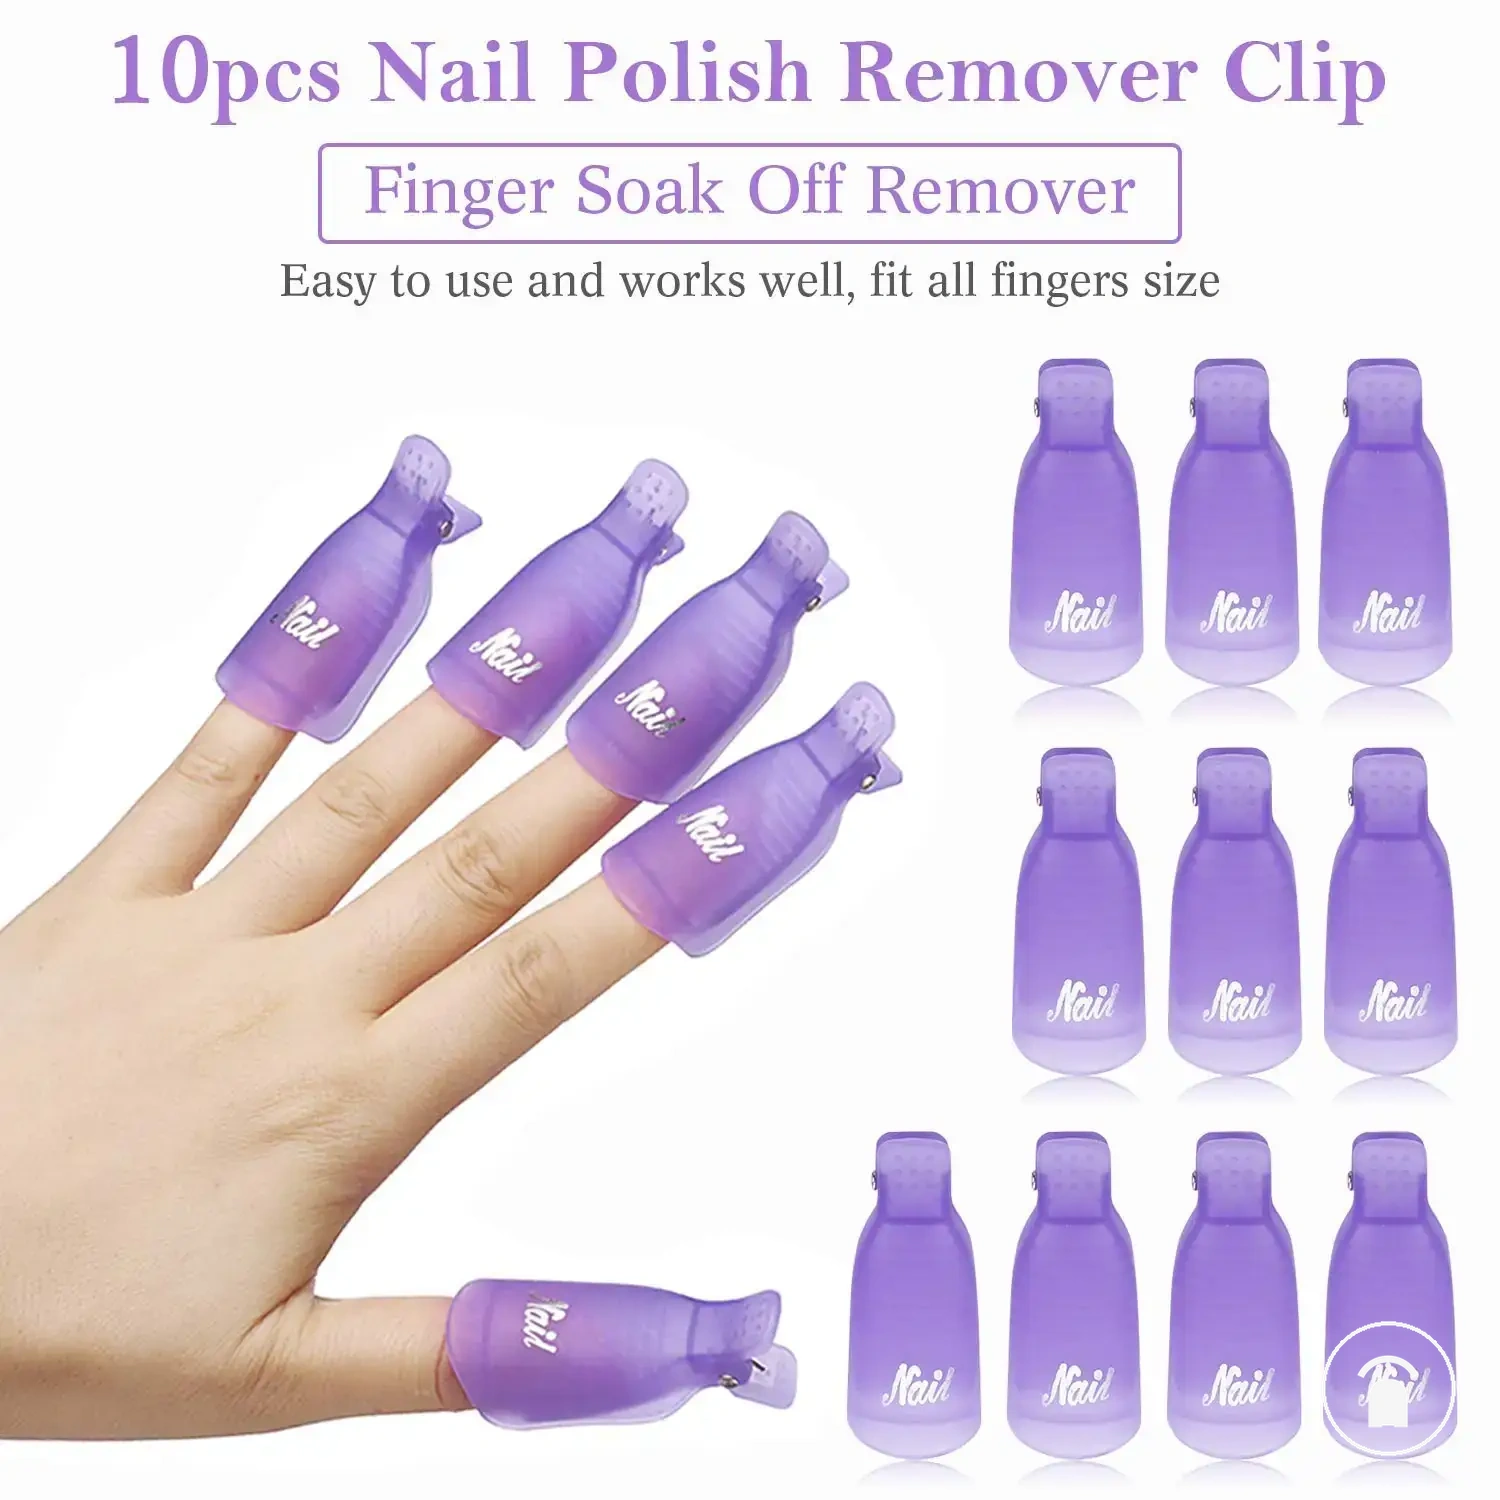
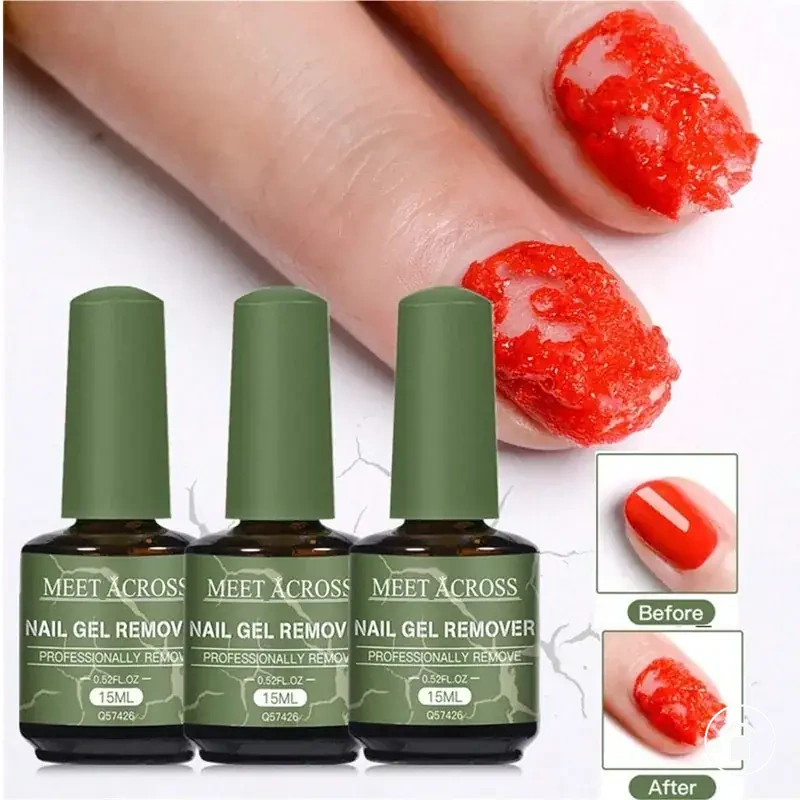
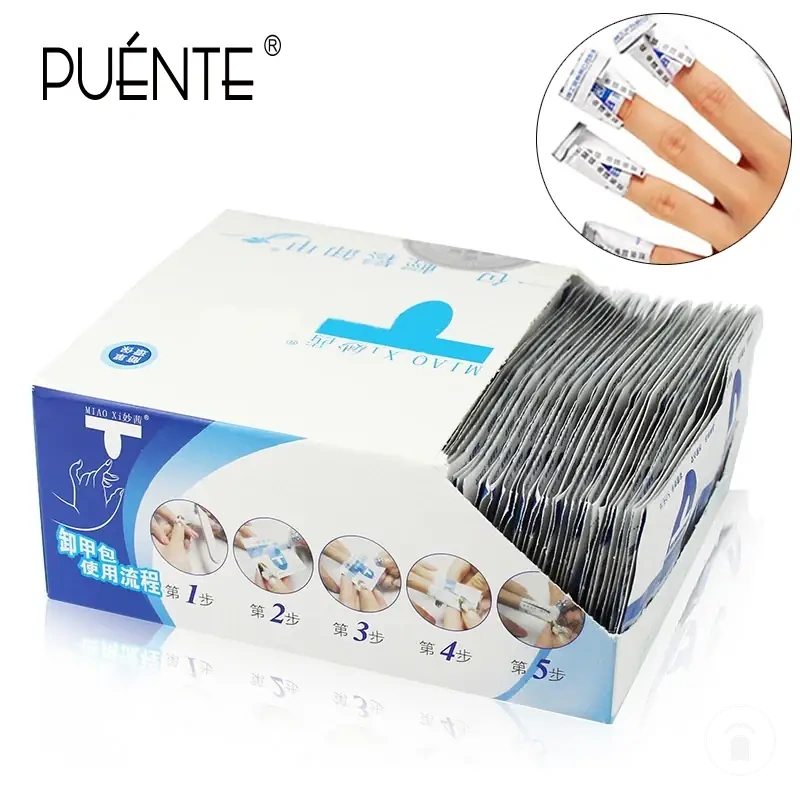
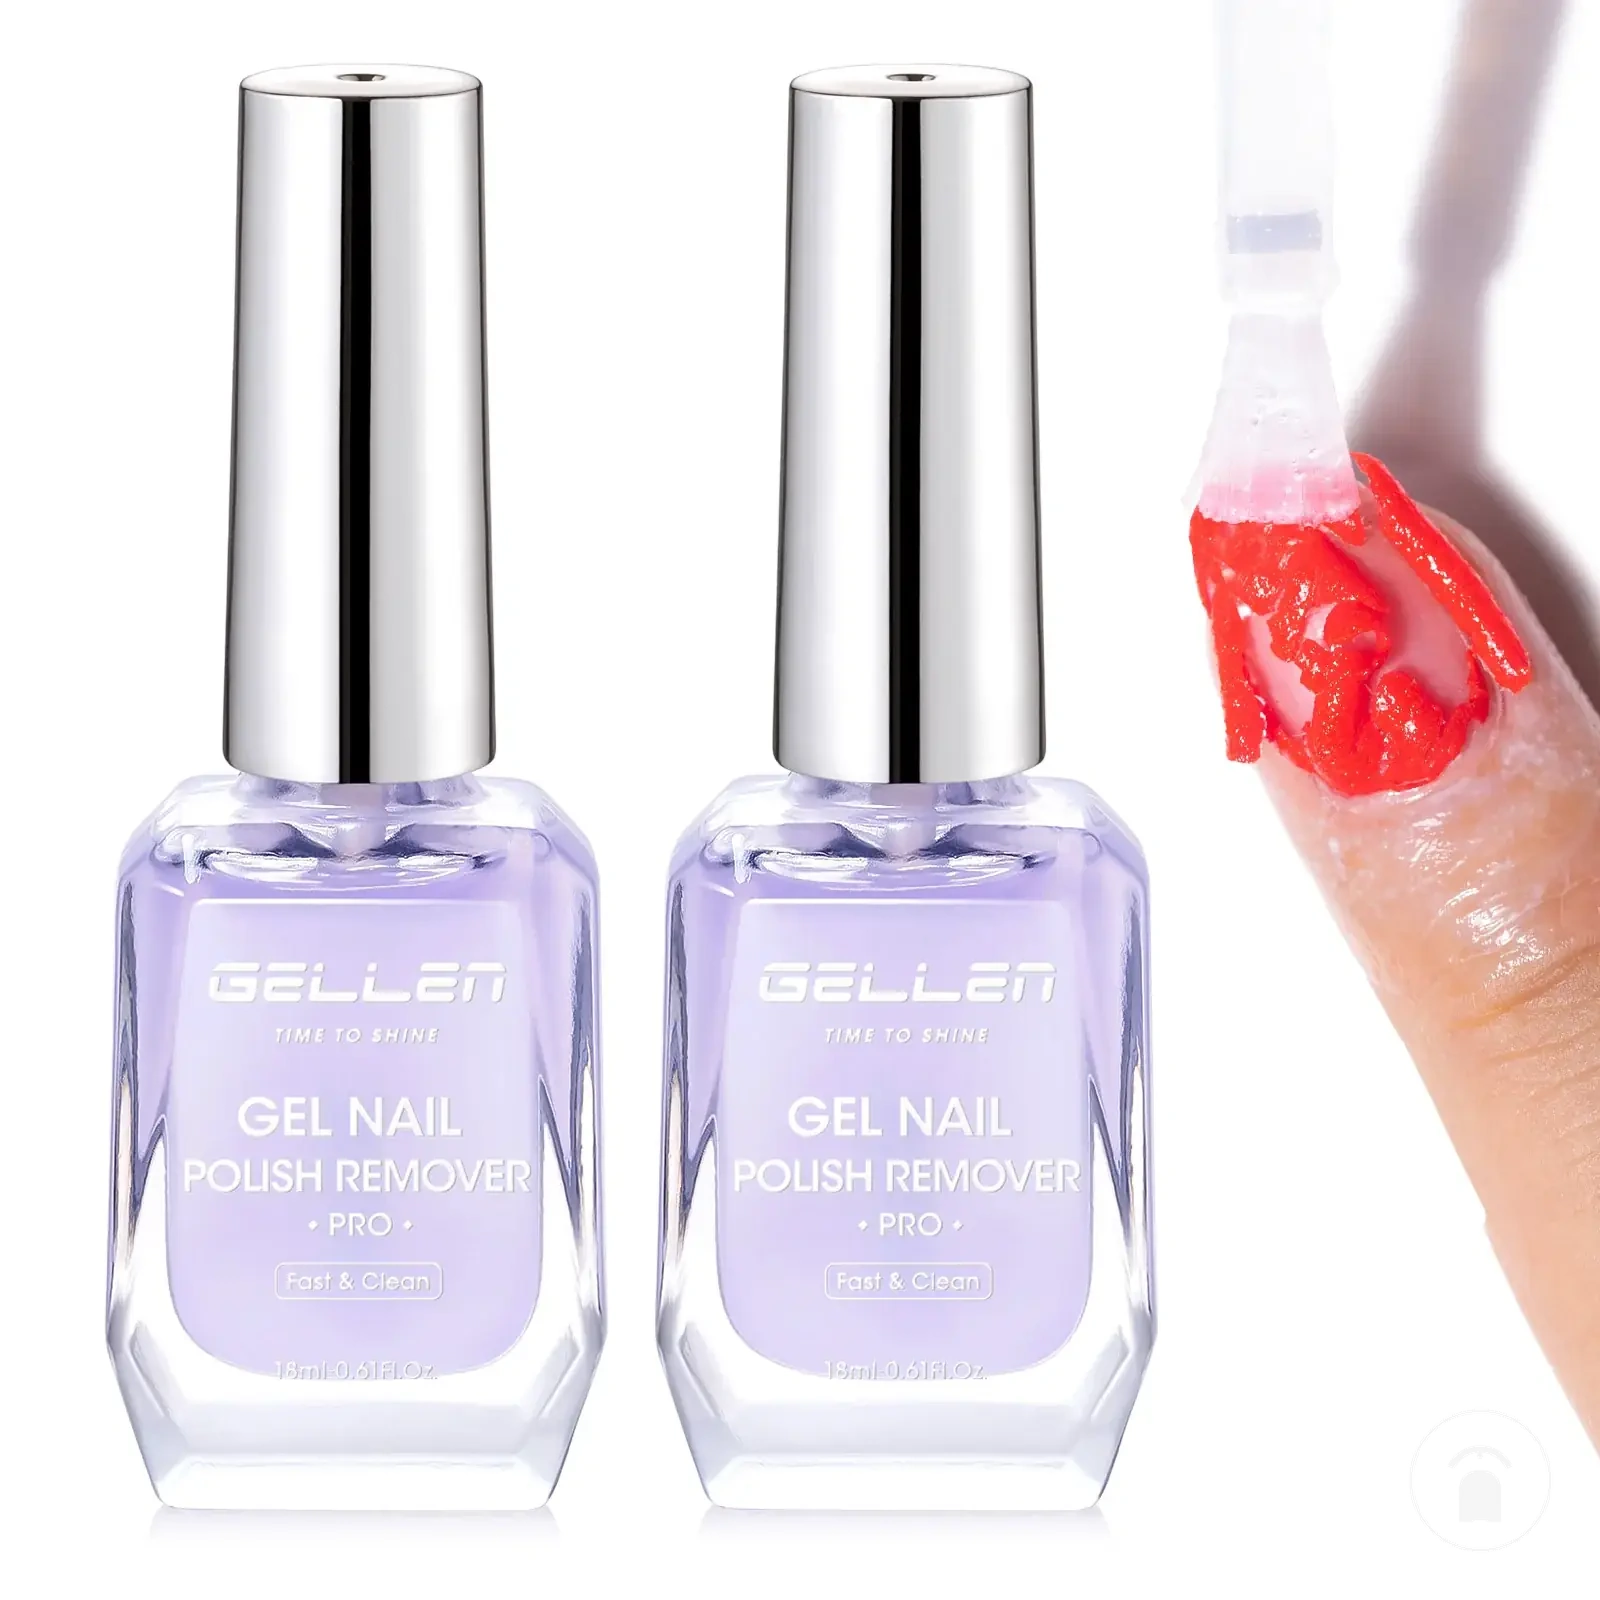
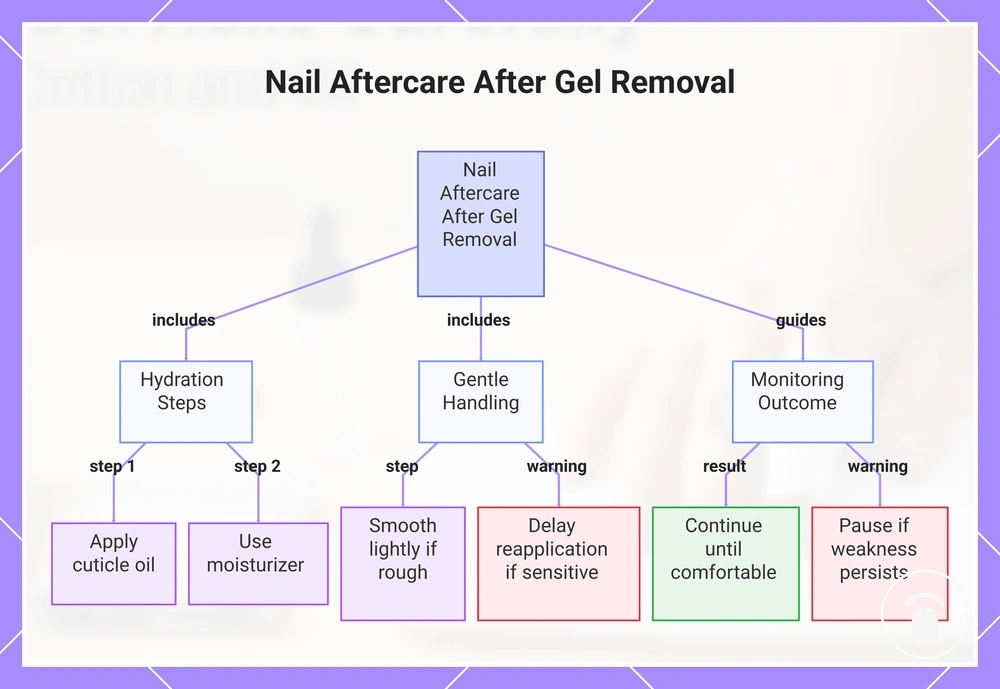
This chart shows the main aftercare steps, gentle handling guidelines, and monitoring decisions to support nail recovery after gel removal.
Rehydrate Nails, Cuticles, and Surrounding Skin
Rehydrate nails, cuticles, and surrounding skin after gel removal to reduce acetone dryness and support local comfort after washing. Cuticle oil can support the nail surface and cuticle condition, while moisturizer or hand cream can reduce dryness in the surrounding skin without reversing structural nail damage. :contentReference[oaicite:0]{index=0}
Rehydrate nails, cuticles, and surrounding skin after gel removal to reduce acetone dryness and support local comfort after washing.
Apply cuticle oil to the nail and cuticle area, then use moisturizer or hand cream on the surrounding skin and hands; repeat application when dryness returns after washing or daily activity. Keep post-removal care gentle, and pause further gel use if sensitivity, soreness, or visible damage remains rather than treating moisture support as proof that the nail is ready for reapplication.
When Weak or Sensitive Nails Need a Break
Weak nails or sensitive nails need a break before gel reapplication when soreness, thinning, peeling layers, splitting, filing sensitivity, or visible damage remains after removal. These conditions make immediate reapplication unsuitable because another preparation and removal cycle could add further mechanical or chemical stress to an already compromised nail surface. :contentReference[oaicite:0]{index=0}
Use current nail condition rather than a fixed recovery timeline to decide whether to pause gel use.
Use current nail condition rather than a fixed recovery timeline to decide whether to pause gel use. The criteria in weak nail suitability can support that decision, while persistent pain, signs of infection, or severe visible damage require professional advice rather than further home removal or reapplication. :contentReference[oaicite:1]{index=1}
- Soreness: Take a break if the nail remains sore during normal touch or daily use; resume only after the soreness has resolved.
- Thinning or peeling layers: Delay reapplication when the nail plate appears thinner or surface layers continue to peel, because additional preparation can increase surface wear.
- Splitting: Pause gel use when an edge or nail plate is splitting; covering the split does not remove the underlying weakness.
- Sensitivity to filing: Stop preparation if light filing causes discomfort, as this indicates that the nail is not ready for another application cycle.
- Visible damage: Avoid reapplication when cracks, raw areas, marked discolouration, or other visible damage remain.
- Repeated removal cycles: Take a longer break when closely repeated removal cycles coincide with worsening weakness, peeling, or sensitivity.