
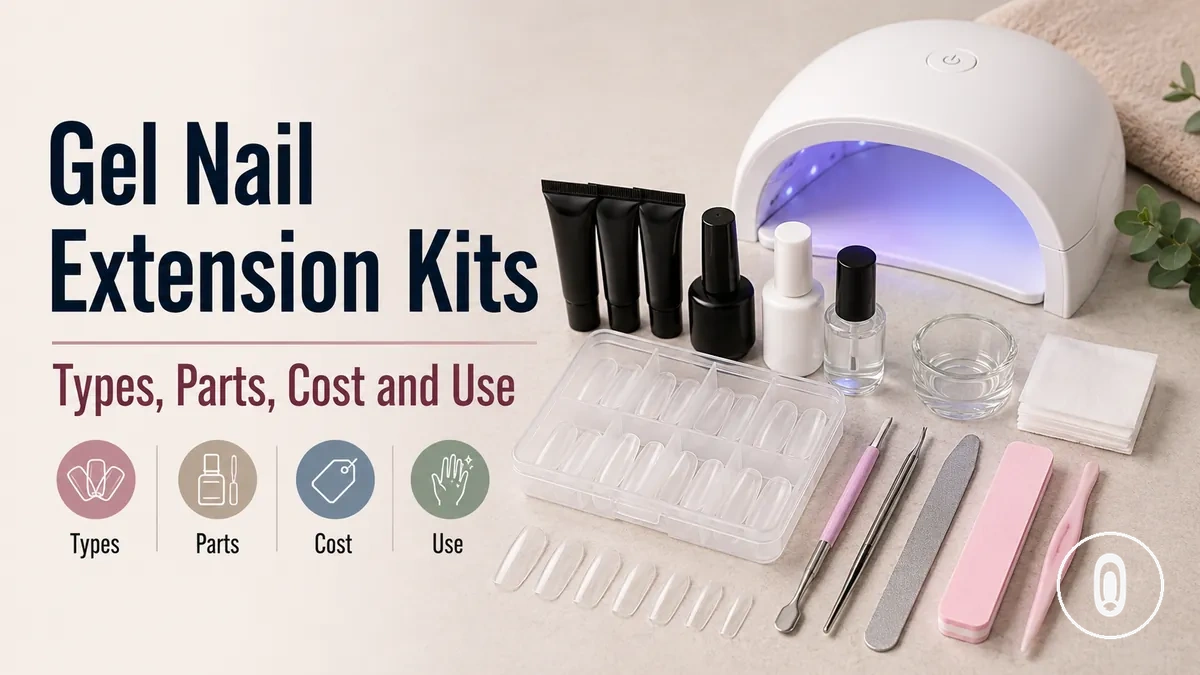
At-Home Gel Nail Extension Kits: Buying and Use Overview
An at-home gel nail extension kit is a grouped system for creating added nail length with gel nail tips, glue gel or another gel product, and a curing lamp. It may also include prep and finishing supplies that support adhesion and appearance. Unlike an ordinary gel polish kit, this kit category is designed around forming or attaching extensions. The page therefore treats the at-home gel nail extension kit as a decision topic rather than a single product choice.
A user comparing a DIY gel nail extension kit may find that two kits differ in more than the number of items included. One may focus on soft gel tips and a compact lamp, while another may provide broader kit components for prep, shaping, curing, and finishing. Suitability can depend on how well the tips fit, whether the lamp matches the gel system, how much preparation the process requires, and how clearly the parts work together. Parts, lamp, fit, use conditions, and value are the main evaluation dimensions.
The right kit is the one whose scope, compatibility, and completeness match the intended use and the user’s experience. Results may vary with prep, fit, curing conditions, product system, and application skill, so the next step is to clarify what this kit category includes and how it differs from nearby nail-kit formats.
What an At-Home Gel Nail Extension Kit Is
An at-home gel nail extension kit is a set of gel nail tips, adhesive gel or builder gel, a curing lamp, and prep supplies or finishing coat used to create nail extensions outside a salon. The kit brings these system parts together so they can work as a compatible extension system rather than as separate products. Its main function is to provide the core items needed for building and curing gel nail extensions.
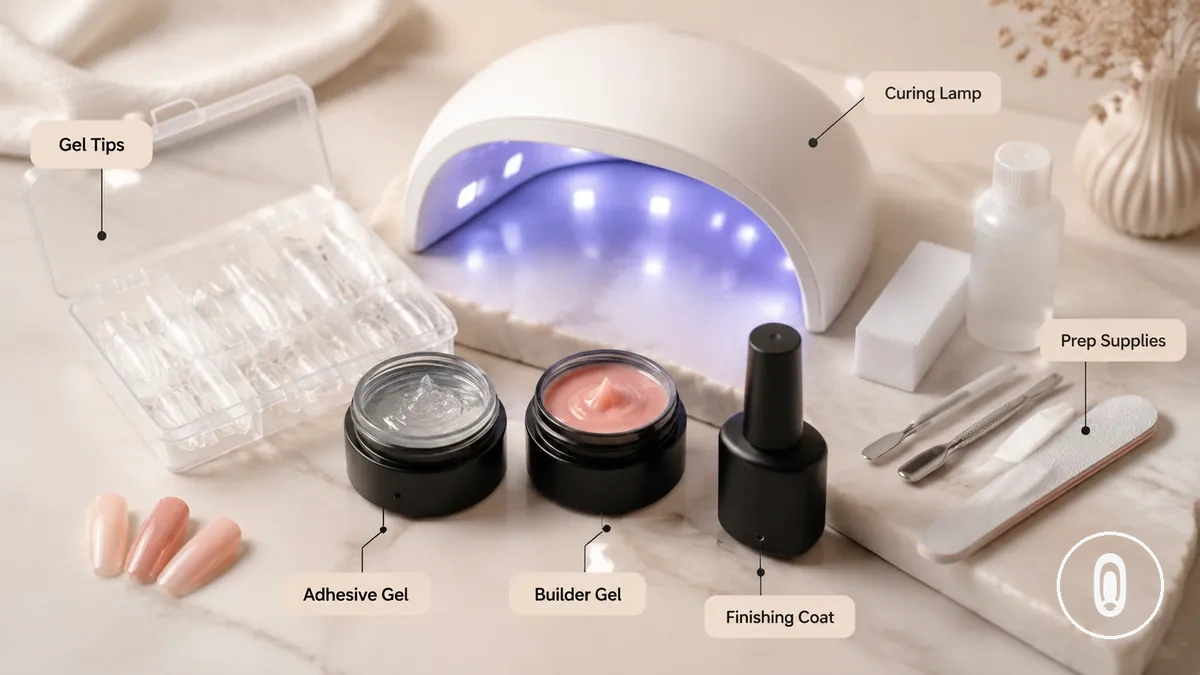
An at-home gel nail extension kit combines the materials needed to attach, cure, and finish gel extensions in one package. For a more detailed definition of what a gel nail extension kit is, it helps to understand how the included products function as a system rather than as separate items. While kit contents may vary, they commonly include gel nail tips, adhesive gel or builder gel, a curing lamp, prep supplies, and a finishing coat.
A complete extension kit is intended for creating nail extensions, while a gel polish kit is designed primarily for applying gel colour. Loose nail tip packs may also require separate gel products or curing equipment, so they are not typically considered a complete extension kit on their own.
What Comes in a Complete Gel Nail Extension Kit
A complete gel nail extension kit normally includes the main kit components needed to complete the extension workflow rather than just one or two products. Common components include nail tips, glue gel, a curing lamp, prep products, a top coat, and basic tools such as a file and buffer. Kit completeness is best judged by whether these parts support the full extension workflow.
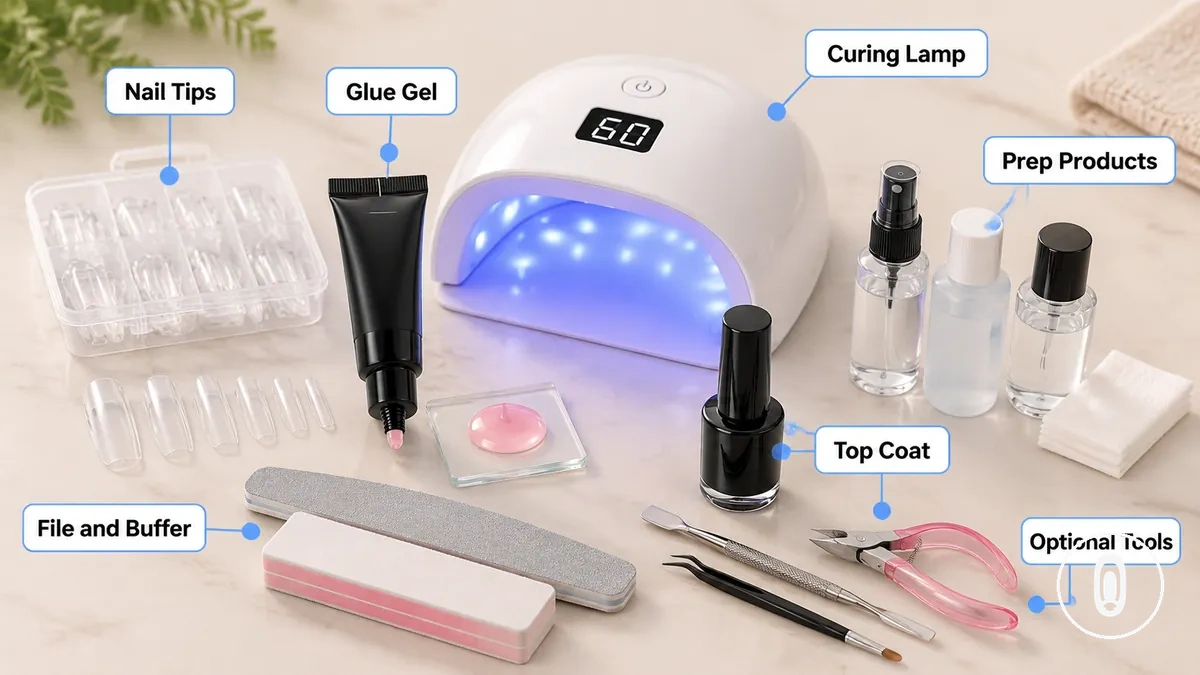
If a kit contains nail tips and glue gel but does not include a curing lamp, another compatible item may be needed before the system can be used as intended. Prep products, a file, a buffer, and a top coat also support different stages of the application process, while optional tools may add convenience rather than replace core kit components. Distinguishing required parts from optional tools helps reduce missing-supply risk when comparing kits.
Reviewing kit components by their purpose provides a clearer comparison than simply counting the number of included items. For more detail about kit parts and tools, it helps to understand how each component contributes to the overall extension workflow. Exact contents vary by kit.
The table below organises common kit parts by their function, whether they are usually required or optional, and why each part matters.
| Component | Main function | Usually required or optional | Why it matters |
|---|---|---|---|
| Nail tips | Create the extension shape | Usually required | Provide the base for the extension |
| Glue gel | Secure the nail tips | Usually required | Supports adhesion before curing |
| Curing lamp | Cure the gel system | Usually required | Allows compatible gel products to harden |
| Prep products | Prepare the nail surface | Usually required | Help reduce missing preparation steps |
| Top coat, file, buffer, optional tools | Finish, refine, and maintain the extension | Mixed: some usually required, others optional | Support finishing quality and reduce missing-supply risk |
Nail Tips, Glue Gel, Prep Products, and Finishing Coats
Nail tips, glue gel, prep products, and finishing coats each support a specific stage of the gel extension process. Together, they influence adhesion, shape, surface preparation, and the finished appearance. These consumables are best understood by the role each one plays.
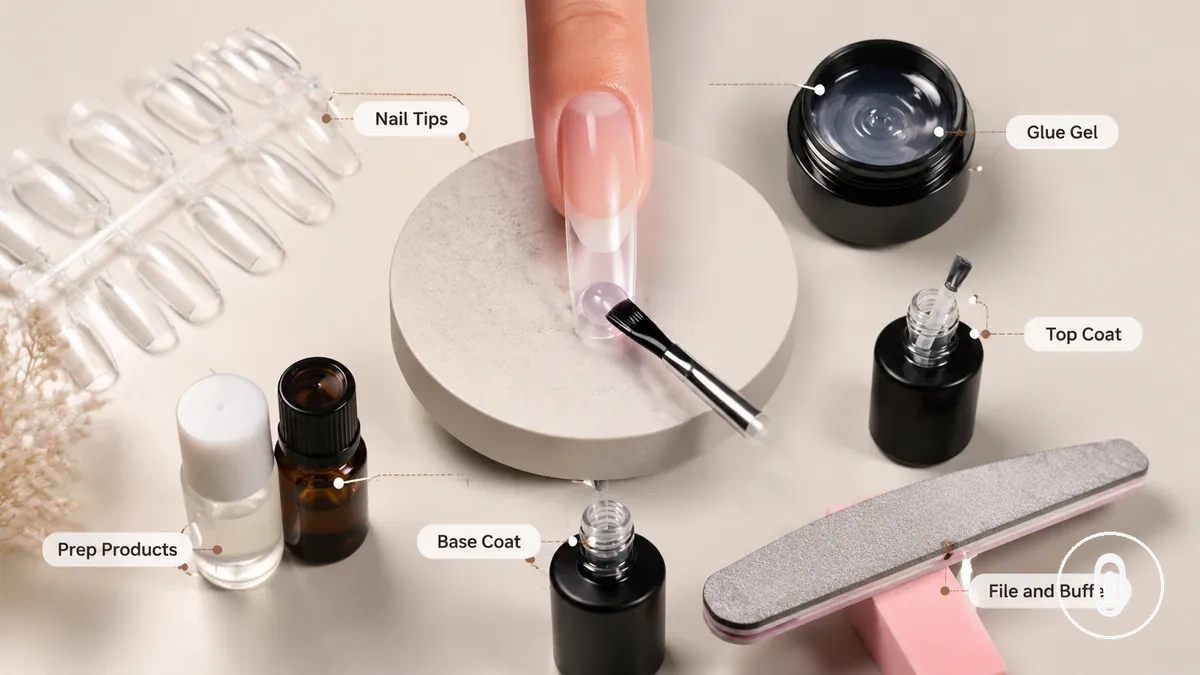
If one of the main consumables is missing or does not suit the intended gel system, the final finish may be less consistent. For example, selecting suitable nail tip shapes and sizes can help improve fit and contact area before curing. Matching the main consumables helps reduce finish-related issues caused by missing or mismatched items.
The following items each contribute to a different part of the extension process:
- Nail tips: Determine the extension shape, size, and contact area, which can affect overall fit.
- Glue gel or builder gel: Support adhesion during curing while helping position the nail tips with controlled application.
- Dehydrator or primer: Prepare the nail surface and may help reduce lifting risk when used as part of the prep process.
- Base coat: Provides the initial gel layer when included within the selected gel system.
- Top coat: Seals the finished extension and contributes to surface protection and final appearance.
- File and buffer: Refine the extension shape and smooth the surface before or after application as needed.
UV and LED Lamps in Gel Extension Kits
A UV lamp or LED lamp should be compatible with the gel formula used in the kit because curing consistency depends on the lamp and product working together. UV and LED Lamps in Gel Extension Kits differ in how they interact with gel formulas, so lamp and gel compatibility should be checked before use.
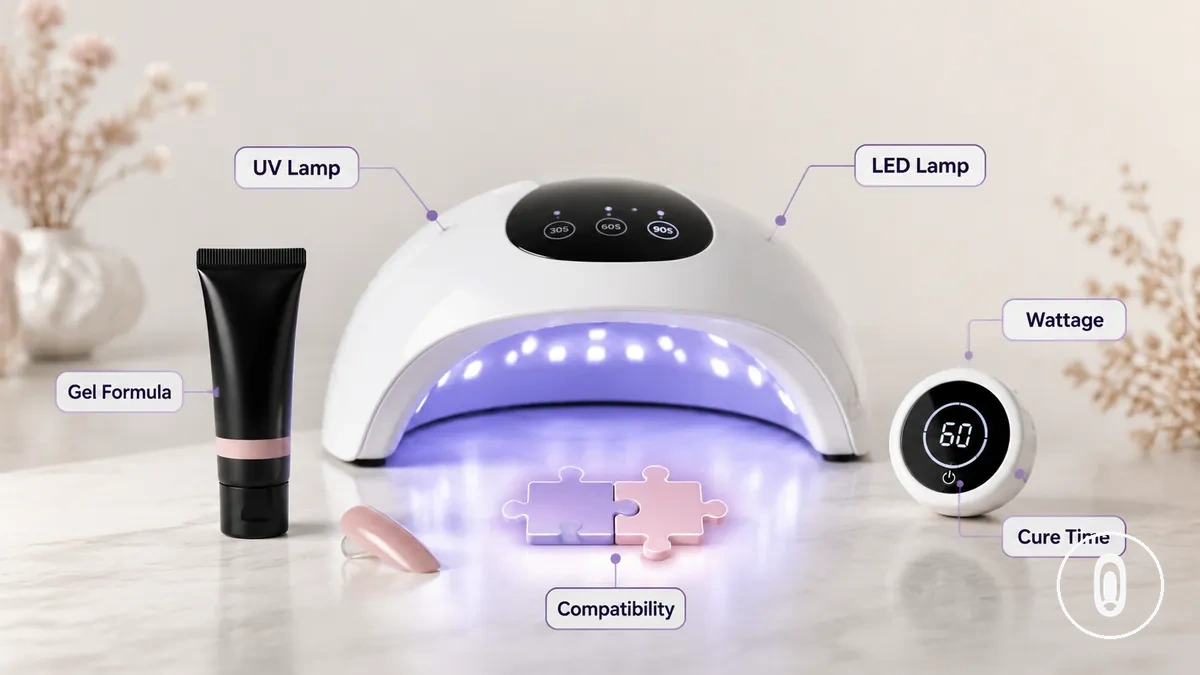
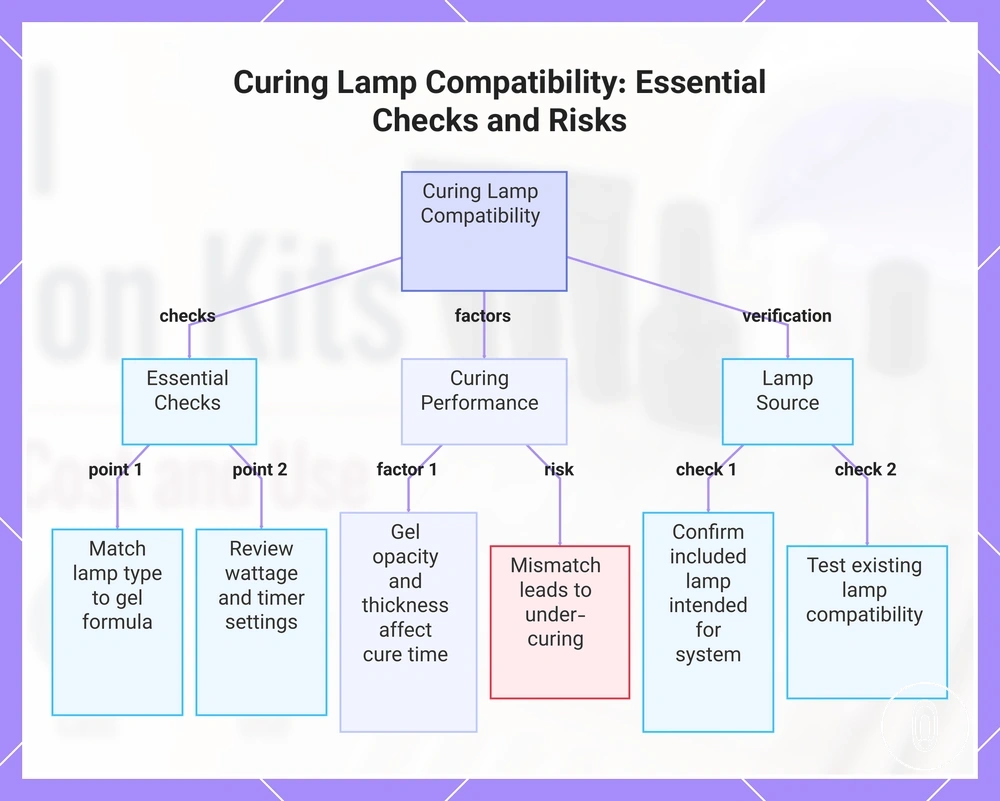
If gel appears tacky or shows signs of under-curing, the curing lamp, gel formula, or curing conditions may not be fully compatible. A kit supplied with a curing lamp is generally intended to be used with that lamp, while a kit without one may require a separate compatible UV lamp or LED lamp. Wattage, timer settings, and gel formula can all influence cure time, so following the product instructions helps reduce compatibility issues. Cure time varies by lamp type, gel formula, and curing conditions.
Check the following points to confirm lamp and gel compatibility:
- Verify whether the gel formula is intended for a UV lamp, LED lamp, or a compatible UV LED lamp.
- Check that the curing lamp supports the selected gel formula instead of assuming all lamps work with every gel.
- Review available wattage and timer setting options together with the product instructions.
- If the kit does not include a curing lamp, choose a separate compatible lamp for the intended gel system.
- If under-curing or tacky gel occurs, recheck lamp compatibility, exposure conditions, and the product instructions rather than relying on a fixed cure time.
Main Types of At-Home Gel Nail Extension Kits
The main types of at-home gel nail extension kits differ by application method, extension material, skill level, and removal behavior. A soft gel kit with full-cover tips, a builder gel kit, and a form-based kit each use a different approach to creating nail extensions. The most suitable option depends on the preferred application method, the desired level of shaping, and the expected learning curve.
A soft gel kit typically uses full-cover tips that are attached and cured as part of the extension system, while a builder gel kit creates structure by shaping builder gel during application. A form-based kit builds the extension over a form before curing and finishing, which may provide greater shaping flexibility but can involve a higher skill level. Trade-offs may also depend on fit, product system, curing lamp compatibility, preparation, and removal behavior.
The comparison below highlights the main differences between common kit formats. For a more detailed comparison of types of gel extension kits, it helps to review each format individually before choosing a system.
| Kit type | How it works | Main trade-off | Best-fit situation |
|---|---|---|---|
| Soft gel kit | Uses pre-shaped full-cover tips with a compatible gel system and curing lamp. | Fit depends on available tip sizes and correct application. | Suitable for users who prefer a structured starter kit with pre-formed extensions. |
| Builder gel kit | Builds the extension by shaping builder gel before curing. | May require a higher skill level and a longer learning curve. | Suitable for users who want greater control over nail structure and shape. |
| Form-based kit | Builds the extension over forms before curing and finishing. | Application may depend more on shaping technique and consistent practice. | Suitable for users seeking flexible extension shapes without relying on full-cover tips. |
Soft Gel and Full-Cover Tip Kits
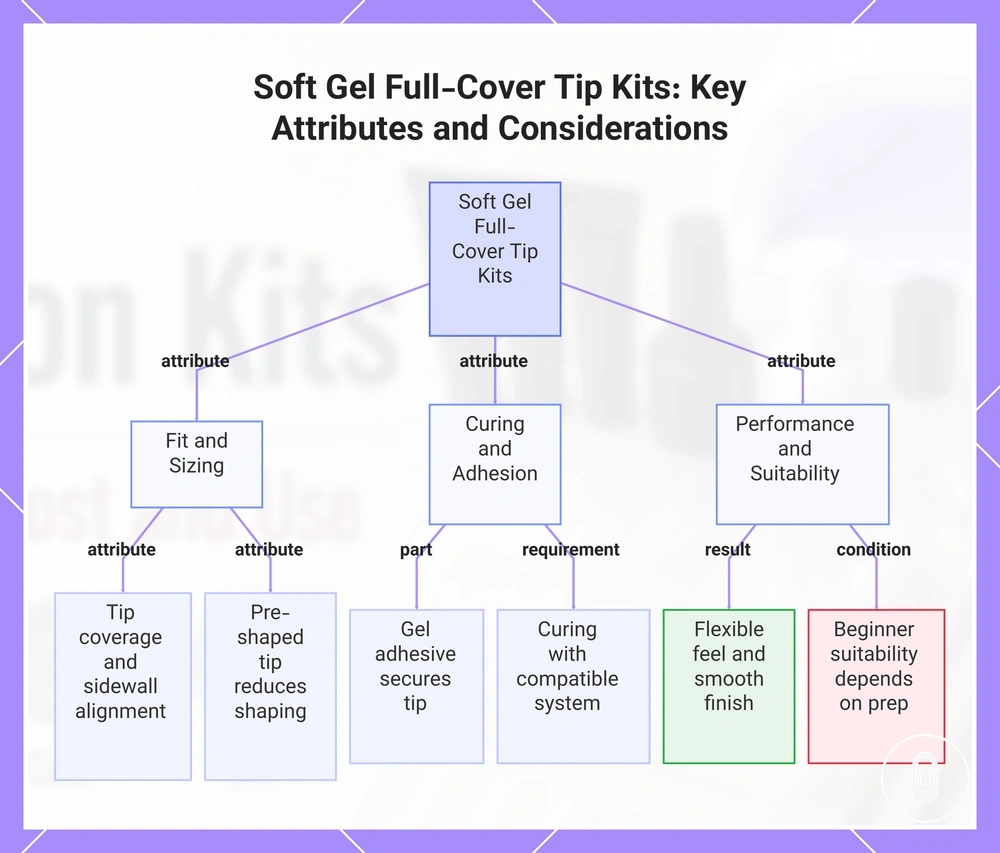
Soft gel tips with full-cover tips provide a pre-shaped extension format that covers the natural nail before curing with a gel adhesive. The pre-shaped tip can reduce the amount of shaping during application, but the final fit still depends on nail sizing, preparation, and curing. The main decision point is whether the tip matches the nail shape and sidewalls closely enough for the intended application.
Soft gel and full-cover tip kits are typically evaluated by these local attributes:
- Tip coverage: Full-cover tips span the nail surface, so fit depends on nail sizing and sidewall alignment.
- Pre-shaped tip: The pre-shaped structure can reduce shaping during application, although placement still requires care.
- Gel adhesive and curing: The tip is secured with gel adhesive and cured with a compatible curing system.
- Flexibility and finish: Soft gel tips may provide a flexible feel and smooth appearance when the product system, fit, and curing process work together.
- Beginner accessibility: A soft gel kit may suit beginners, but comfort, adhesion, and finish still depend on nail sizing, preparation, and correct curing rather than tip material alone.
This chart shows the main attributes of soft gel full-cover tip kits, including fit, curing, and user experience factors.
Builder Gel and Form-Based Kits
Builder gel and form-based kits suit users who want to shape the extension during application rather than attach a pre-formed tip. Builder gel is applied over nail forms to create a sculpted extension, so viscosity, shaping, and curing all influence the final structure. The main decision point is whether the added control matches the required learning curve and application technique.
The comparison below highlights the local difference between sculpted extensions and pre-formed tip systems.
| Builder gel and nail forms | Pre-formed tips |
|---|---|
| Builder gel is shaped over nail forms to build the extension. The result may depend on gel viscosity, structure building, curing, shaping, filing, and user skill. | Pre-formed tips provide an existing shape before curing, so less sculpting is typically required during application. |
Builder gel can provide more control over shaping because the structure is created during application, but the finished result still depends on the product system, curing process, preparation, and user experience. This trade-off makes form-based kits more technique-sensitive without making them a better choice for every user.
How to Choose a Gel Nail Extension Kit
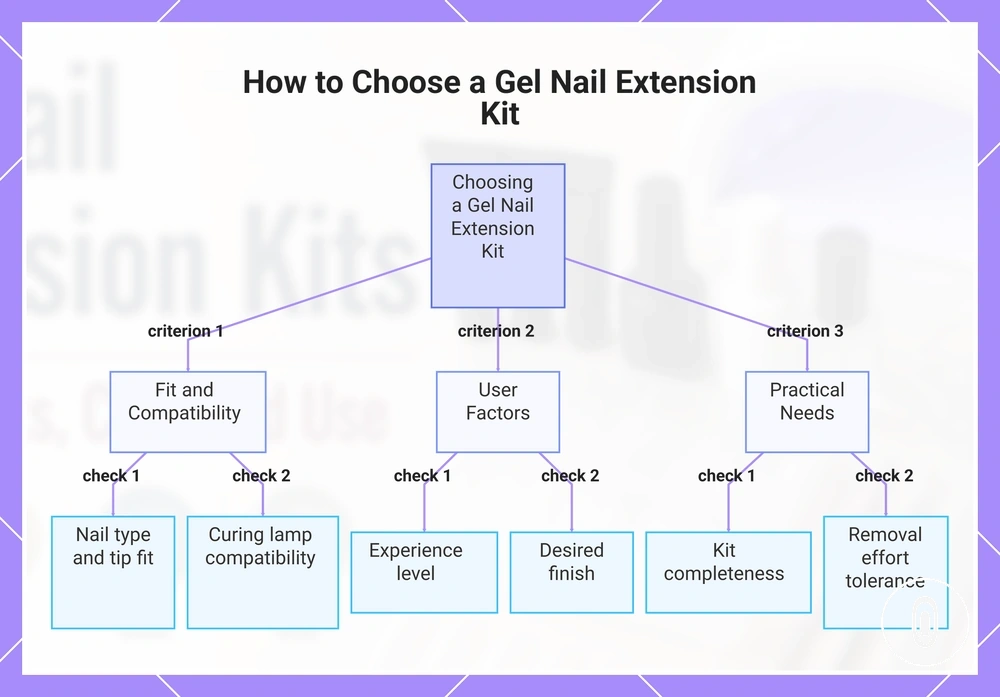
Choose a kit by matching it to your nail type, experience level, desired finish, and tolerance for preparation and removal work. A suitable choice depends on tip fit, kit completeness, curing compatibility, and user skill rather than the number of included items alone. The best decision is the one that matches your application needs and experience.
Use this checklist to compare kits before making a decision:
- Nail type and tip fit: Check that the available tip shapes and sizes are likely to suit your nail type, as tip fit can affect comfort and application.
- Experience level: A beginner-friendly starter kit may suit users who prefer a simpler workflow, while more customisable systems can involve a longer learning curve.
- Kit completeness: Confirm that the kit includes the main components you expect, such as tips, gel products, a compatible lamp if included, and basic prep tools.
- Curing compatibility: Verify that the curing lamp and gel system are intended to work together, as curing compatibility can influence application results.
- Removal needs: Consider how much maintenance and removal work you are prepared to manage before you choose a kit.
- Desired finish: Select a kit whose application method and structure match the nail shape, length, and finish you want to achieve.
For more guidance on choosing the right kit, compare these criteria against your intended use instead of relying on a single feature or kit format.
This chart groups the key checklist criteria for selecting a gel nail extension kit, covering fit, user preferences, and practical needs.
Beginner Suitability, Tip Fit, and Kit Completeness
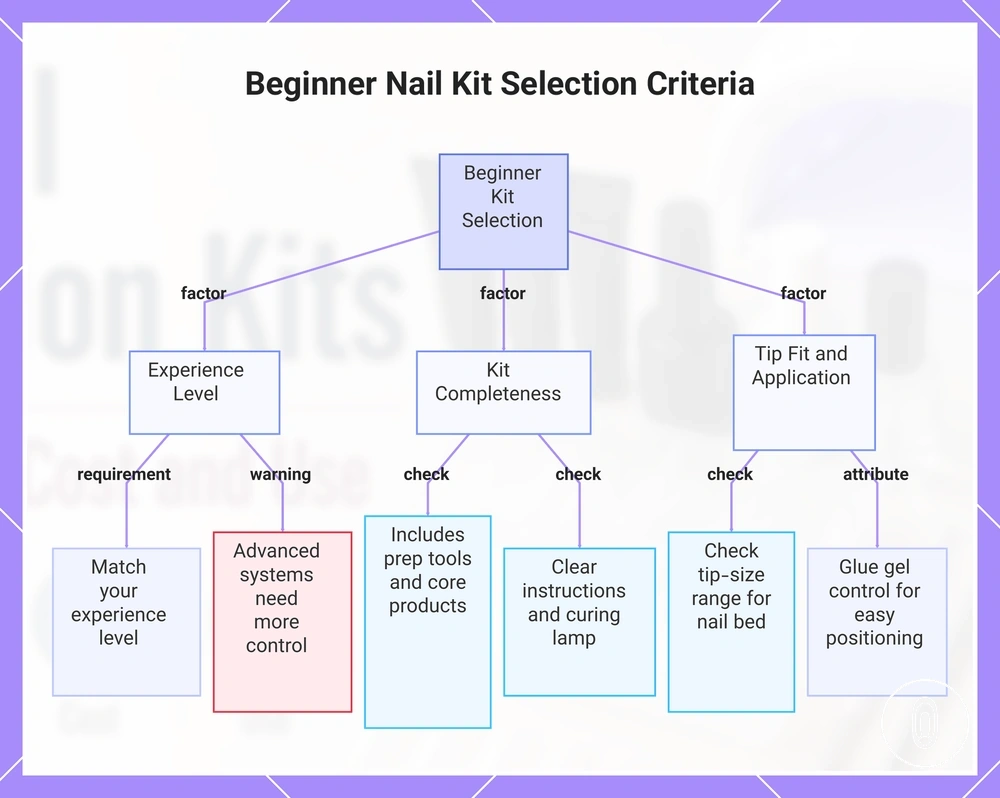
Beginner suitability depends on choosing a kit with fewer missing supplies and lower fit complexity. A kit may be easier for beginners when it includes the main prep tools, provides clear instructions, and reduces the need to source additional items. The key decision point is whether the kit supports your experience level while keeping fit and application manageable.
- Experience level: Choose a kit that matches your experience, as more advanced systems may require greater control during application.
- Tip fit: Check that the tip-size range is likely to suit your nail bed and sidewalls, since a closer fit may help reduce lifting and extra shaping.
- Kit completeness: Confirm that the kit includes the main prep tools and core products to reduce the chance of missing items before application.
- Glue gel control: A glue gel that allows controlled application and cleanup may make positioning the tips easier during use.
- Instructions and curing lamp: Clear instructions and a curing lamp intended for the supplied gel system can help beginners follow the application process with fewer missed steps.
This chart shows the three main factors for selecting a beginner-friendly nail kit: experience level, kit completeness, and tip fit/application support.
Lamp Strength, Cure Time, and Product Compatibility
Lamp strength, cure time, and product compatibility depend on matching the curing lamp with the intended gel system before purchase. Cure quality may vary with wattage, timer settings, gel formula, and opacity, so compatibility should be checked instead of assuming all lamps perform the same. The main decision point is whether the lamp and gel system are intended to work together.
Use this checklist to assess compatibility before choosing a kit:
- Lamp type: Check that the curing lamp is intended for the selected gel formula, as product compatibility depends on the gel system.
- Lamp strength and wattage: Review the wattage together with the product instructions, because lamp strength alone may not determine cure time or curing performance.
- Timer setting: Select a lamp with suitable timer setting options so cure time can follow the product instructions instead of relying on a fixed duration.
- Gel formula and opacity: More opaque or thicker gel formulas may require different curing conditions, so cure time depends on the gel system.
- Under-curing: If the lamp and gel are not well matched, under-curing or a tacky layer may occur even when the surface appears cured.
- Included lamp or existing lamp: If the kit includes a curing lamp, confirm it is intended for the supplied gel system. If you plan to use an existing lamp, check its compatibility before purchase.
This chart shows the main checks and factors to verify curing lamp and gel system compatibility before purchase.
Gel Nail Extension Kit Cost and Value
Kit cost and value depend on what is included, how many tools can be reused, and whether the kit reduces the need for additional purchases. An indicative price alone does not show overall value if important items are missing. A complete kit usually offers better decision confidence when completeness and reuse align with your expected use.
Compare included components before focusing on the price factor alone. A lamp included with the kit, reusable tools, and the main consumables may reduce missing items and additional costs later, while consumables such as gel, tips, and top coat may still require refills depending on how often the kit is used.
The table below summarises the main value criteria and how each one may influence total ownership cost and purchase confidence.
| Cost factor | What to check | Value effect | Decision note |
|---|---|---|---|
| Complete kit | Main components are included | May reduce missing items and extra purchases | Compare included contents before comparing indicative price |
| Lamp included | Compatible curing lamp is supplied | May reduce the need for a separate purchase | Confirm it matches the intended gel system |
| Reusable tools | Files, clippers, or similar tools can be reused | Can improve long-term value | Consider reuse alongside the initial kit cost |
| Consumables | Gel, tips, and top coat volume | May influence future refill needs | Include refill frequency in the overall value assessment |
| Indicative price | Price compared with included components | Supports better decision confidence | A higher indicative price may reflect greater kit completeness |
Judge value by balancing kit cost against completeness, reusable tools, consumables, and expected use frequency instead of relying on the initial price alone. A complete kit may provide stronger long-term value when it reduces additional compatible purchases and matches your intended use.
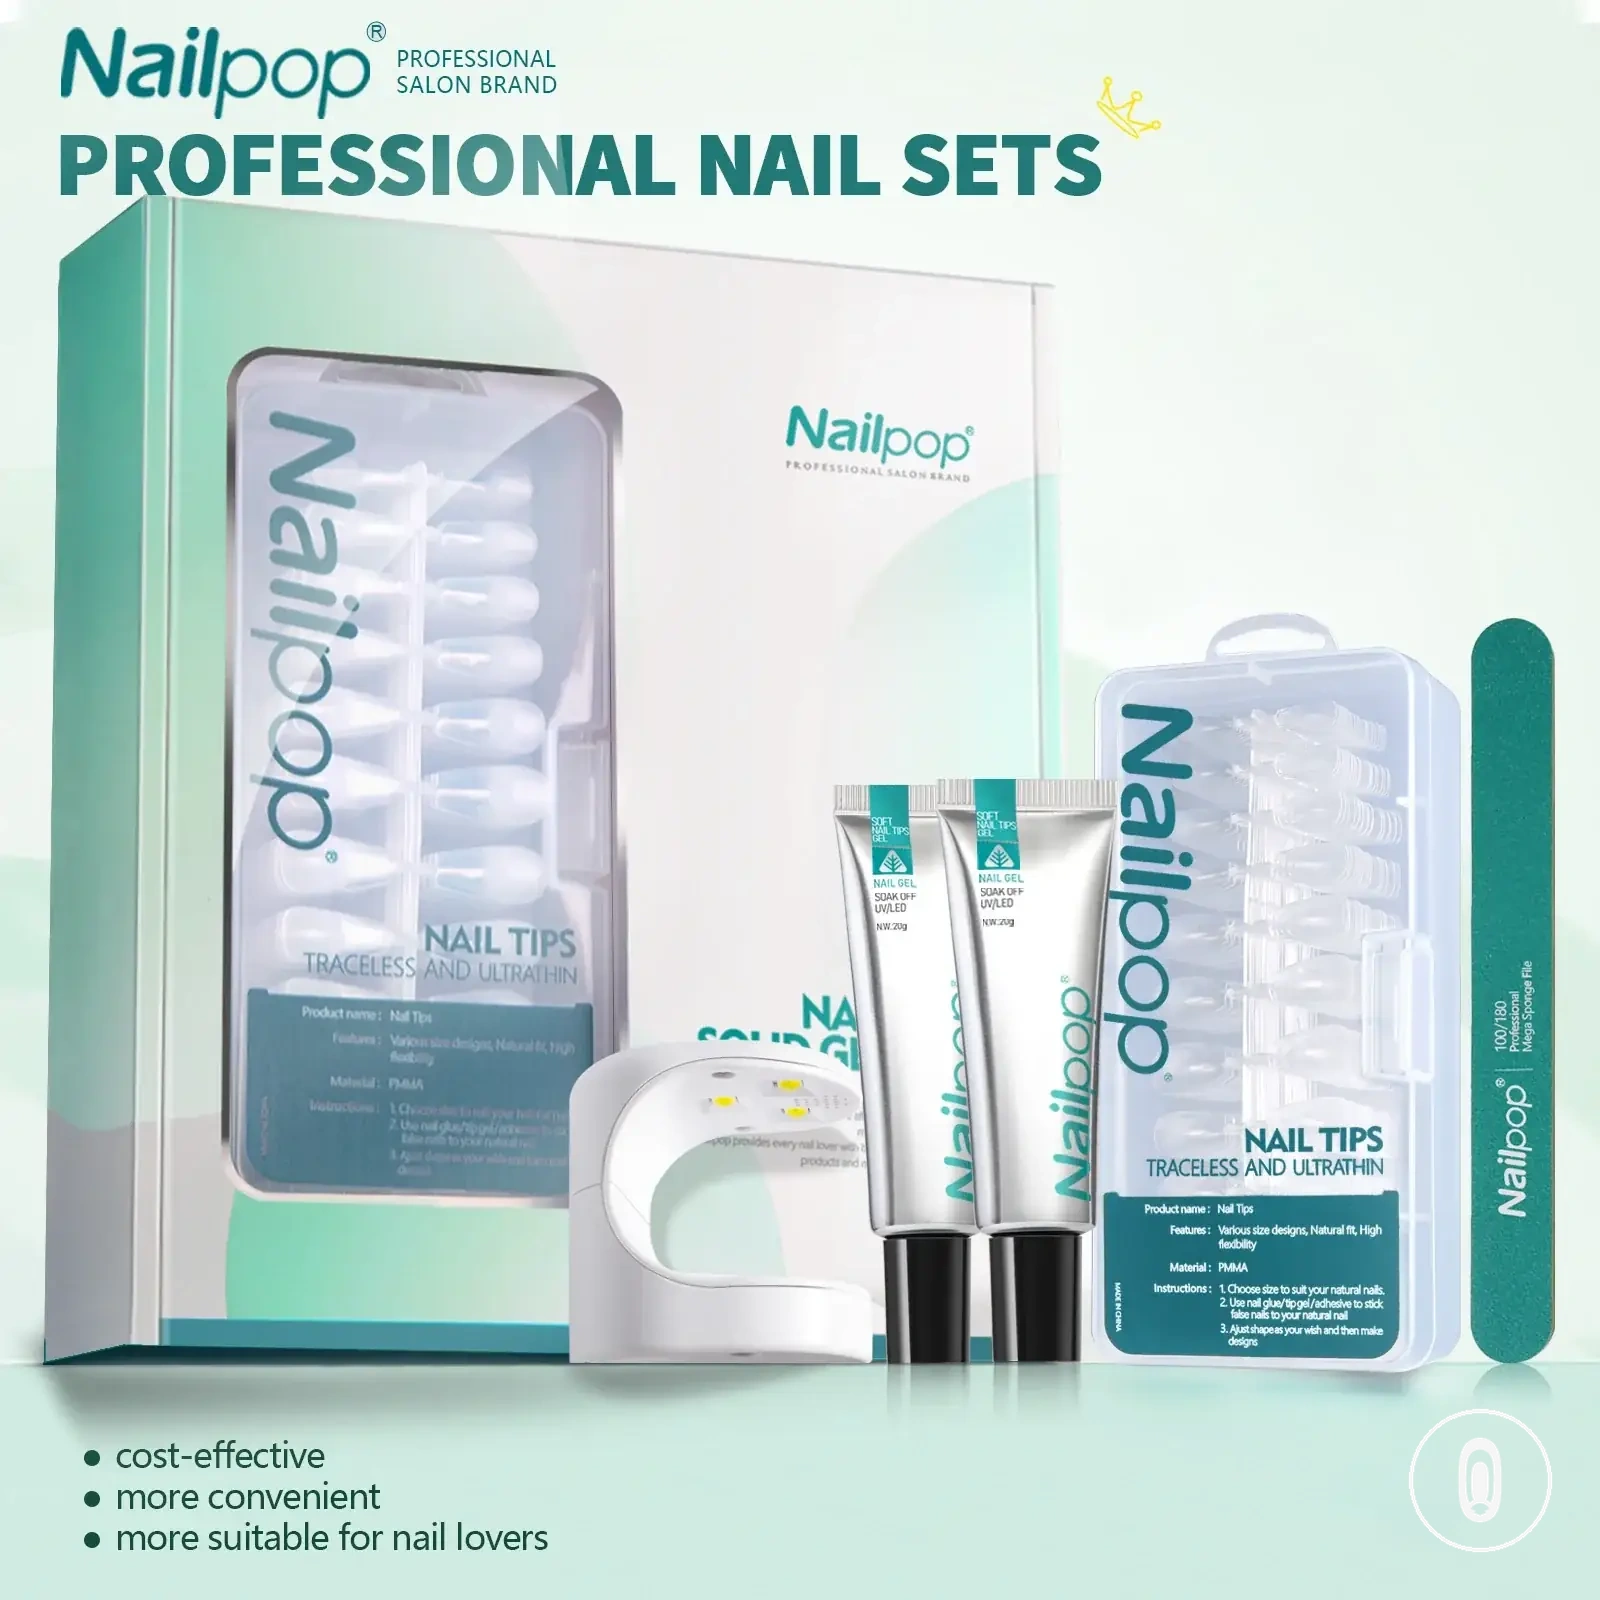
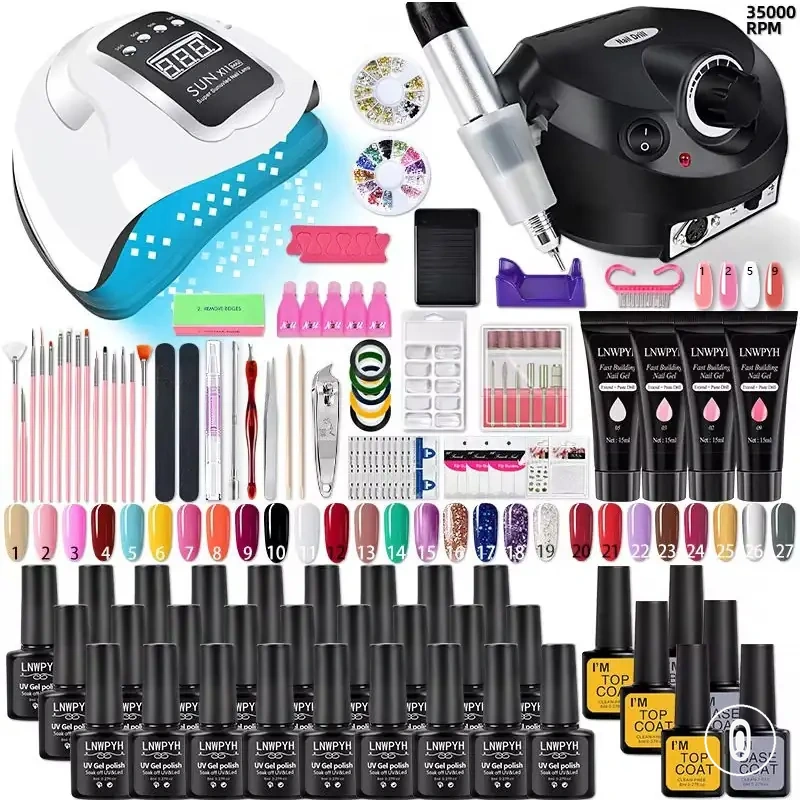
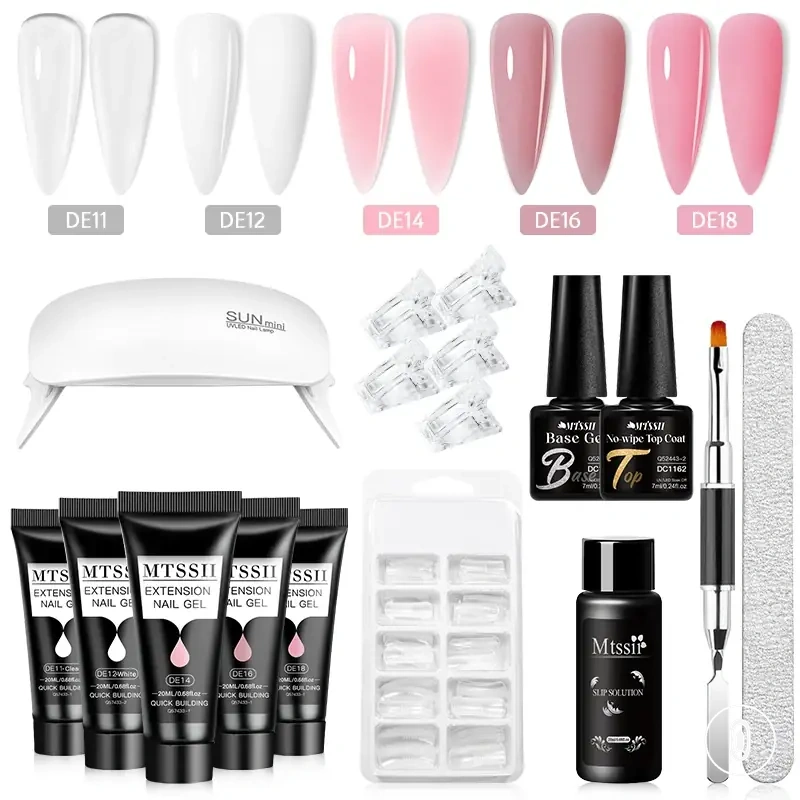
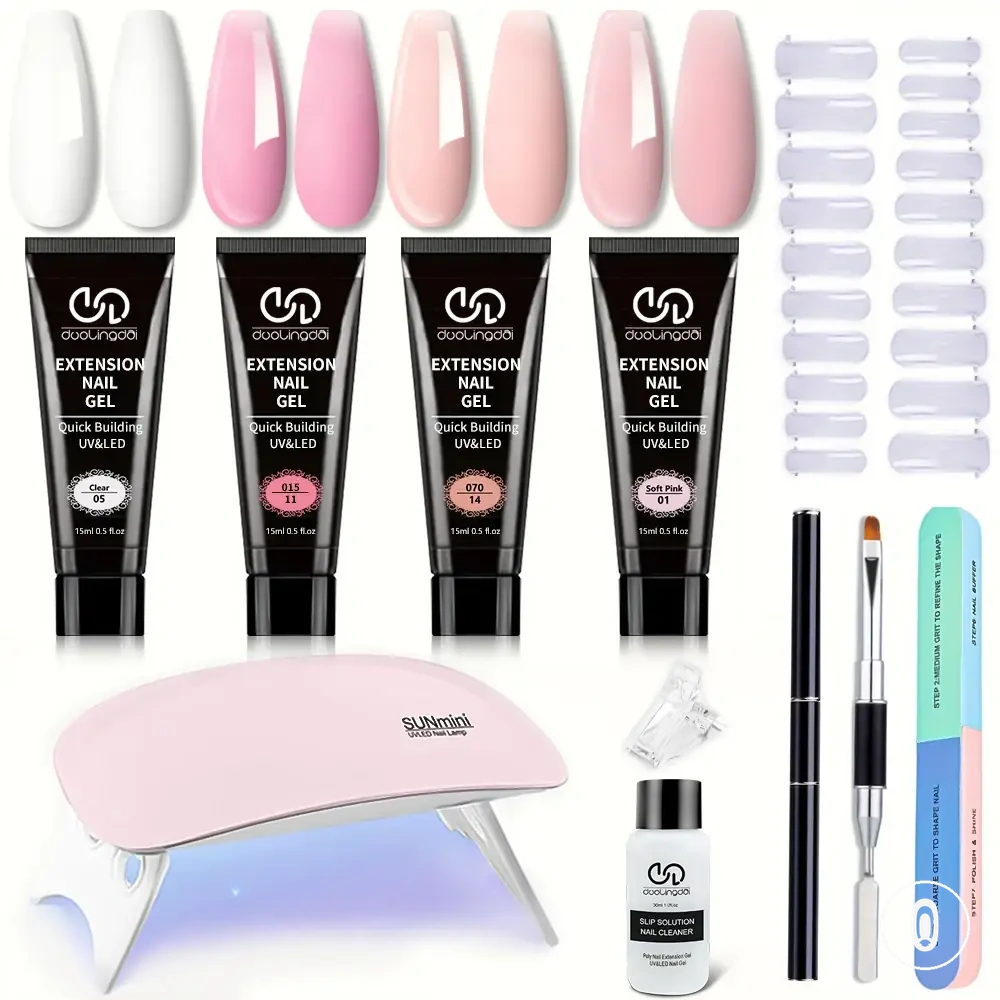
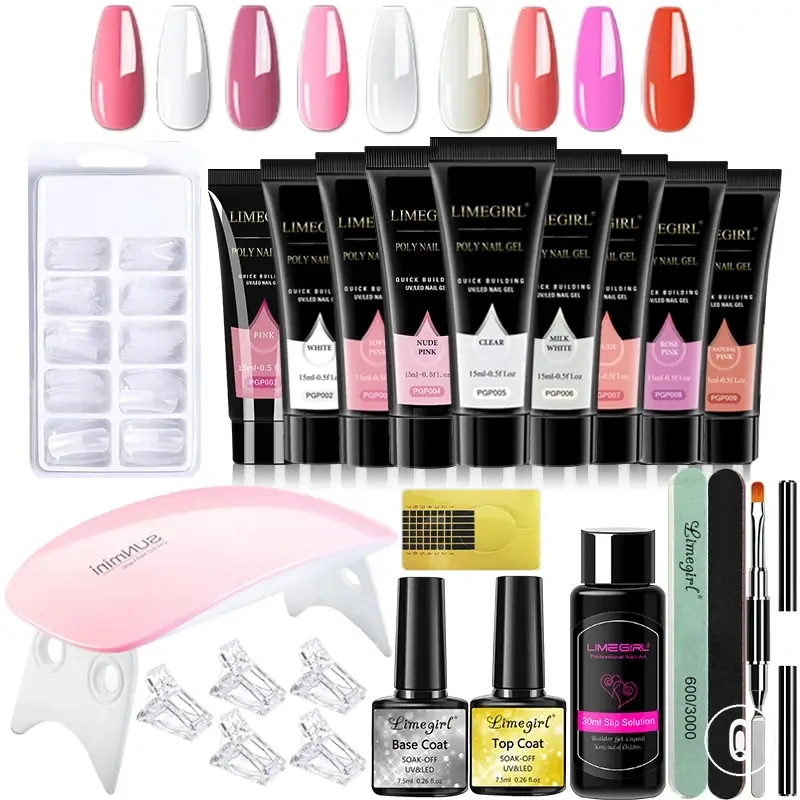
The products below are useful examples for comparing available options. Before buying, check that the compatibility criteria, key features, and product details match your needs.
How At-Home Gel Nail Extension Kits Are Used
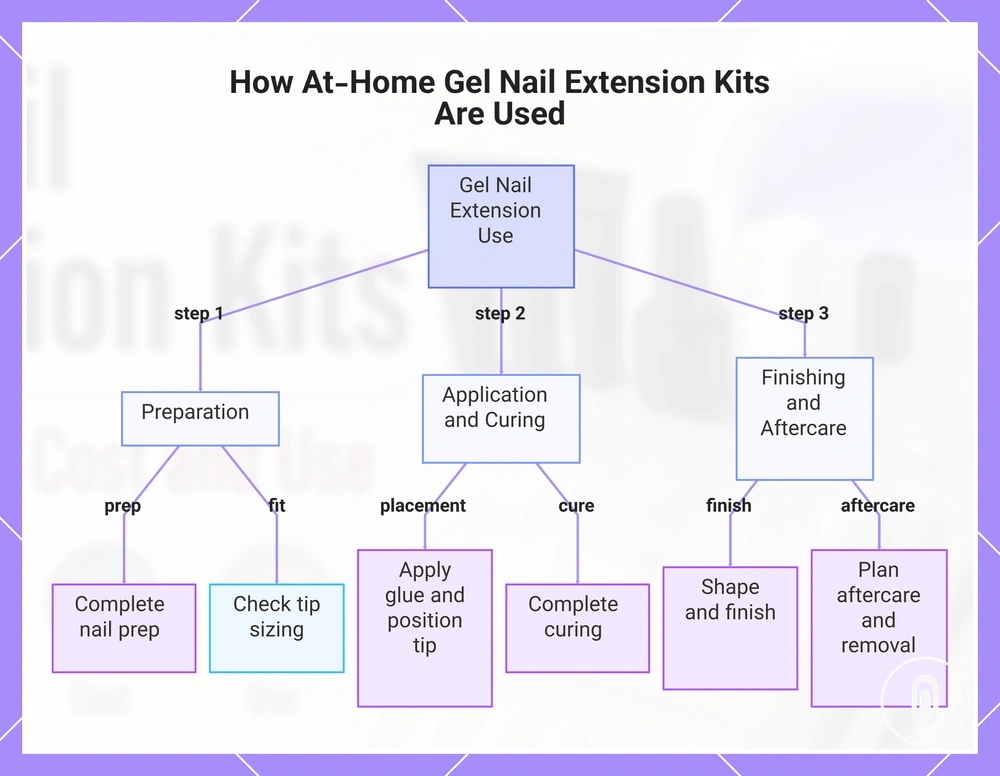
The use flow for an at-home gel nail extension kit moves from nail prep and tip sizing to application, curing, finishing, and removal awareness. Each stage affects how well the extension fits and how consistently the gel system performs. The main condition is to follow the product system and curing requirements rather than using one method for every kit.
The following high-level steps show how preparation, fit, placement, and aftercare connect without replacing a full application guide.
- Complete nail prep: Prepare the natural nail as directed so the surface is ready for the intended gel system.
- Check tip sizing: Match each tip to the nail shape and sidewalls, as poor fit may affect placement and adhesion.
- Control glue gel placement: Apply the gel in a controlled amount so pressure does not cause excess product to overflow around the tip.
- Position the tip: Hold the tip in the intended position while limiting gaps or movement that may affect contact.
- Complete curing: Use a compatible lamp and follow the product instructions because curing conditions vary by gel formula and system.
- Shape and finish: Refine the extension as needed and apply the intended finishing products without overworking the natural nail.
- Plan aftercare and removal: Maintain removal awareness and follow the product-specific removal approach rather than pulling or forcing the extension from the natural nail.
This summary explains the sequence, but detailed technique belongs in a step-by-step guide to how to apply a kit when execution-level instructions are needed.
This chart outlines the use flow for an at-home gel nail extension kit, covering preparation, application, curing, finishing, and aftercare.
Prep, Tip Placement, Curing, and Finish
Nail prep, tip placement, curing, and finish form a connected sequence in which each stage can affect adhesion, alignment, cure quality, and final appearance. The sequence works best when the selected tip, adhesive amount, pressure, and curing conditions suit the intended gel system. The main decision point is to keep each stage consistent with the product instructions.
- Complete nail prep: Prepare the nail surface and reduce residue, as surface condition may affect adhesion and lifting.
- Check tip size and placement: Confirm the tip fit and alignment before applying pressure, because poor positioning may create gaps or require extra adjustment.
- Control adhesive amount: Use an amount suited to the selected tip so excess gel is less likely to overflow during placement.
- Complete curing: Use a compatible lamp and follow the product instructions, since curing exposure depends on the gel system.
- Refine the finish: Complete filing as needed before applying the top coat, as shaping and finishing may affect appearance and surface protection.
Removal and Natural Nail Protection
Safe removal depends on using a removal method that matches the gel system because the removal process can affect natural nail protection. Check soak-off compatibility, filing limits, and the product type before removal, and use aftercare oil if the nails feel dry afterwards. The main decision point is to follow the removal method intended for the gel system instead of peeling or prying off the extension.
Natural nail protection may improve when lifting is addressed with the intended removal method rather than force removal. For more detailed guidance, see safe gel extension removal, as safe removal depends on the gel system and should not be replaced by peeling or prying.
Caution: Avoid these removal practices because they may increase peeling risk or reduce natural nail protection.
- Do not peel or pry off extensions, as force removal may increase peeling risk.
- Do not assume every gel product has the same soak-off compatibility or removal method.
- Do not exceed reasonable filing limits, as unnecessary filing may affect the natural nail.
- Do not skip aftercare oil if the nails feel dry after removal, because conditioning may help support nail care.
Common Problems with At-Home Gel Extensions
Common problems with at-home gel extensions usually result from a combination of conditions rather than one fixed cause. Lifting, poor adhesion, air bubbles, discomfort, and early wear failure may relate to prep, fit, curing, product mismatch, or application conditions. The most effective approach is to identify the symptom first and then check the likely contributing conditions before changing the application process.
The diagnostic table below helps match each symptom with a likely condition, what to check, and the next safe action. Outcomes may vary depending on the gel system, curing conditions, product compatibility, nail prep, and user technique.
| Problem | Likely condition | What to check | Next safe action |
|---|---|---|---|
| Lifting | Prep, cuticle contact, tip fit, or curing may be contributing factors. | Check nail prep, tip fit, cuticle contact, and curing conditions. | Repeat the application after correcting the likely condition. |
| Poor adhesion | Product mismatch, surface preparation, or curing may reduce adhesion. | Review product compatibility, prep, and curing. | Use the intended gel system and follow the product instructions. |
| Air bubbles | Gel amount, placement, or pressure may trap air. | Check adhesive amount, tip placement, and application pressure. | Reposition the tip before curing if adjustment is needed. |
| Discomfort | Fit, placement, or curing conditions may not suit the application. | Review tip fit, placement, and the overall application process. | Stop and reassess the setup before continuing. |
| Early wear failure | Prep, product mismatch, curing, or use conditions may affect durability. | Check nail prep, curing compatibility, and the complete gel system. | Address the likely condition before the next application. |
If lifting continues after these checks, see fixing lifting problems for a more focused diagnostic guide.
Lifting, Poor Adhesion, and Early Wear Failure
When lifting, poor adhesion, or early wear failure occurs, the cause may involve prep, fit, gel amount, curing, or daily wear conditions rather than a single mistake. Check where the symptom appears first because its location can help identify the likely contributing condition. The appropriate correction depends on identifying that condition before changing the application process.
The checks below can help narrow the likely cause:
- Lifting near the cuticle: Cuticle contact or prep residue may reduce adhesion. Check for remaining oil or product touching the skin, then improve surface preparation before the next application.
- Lifting along the sidewall: Tip size or fit may not match the natural nail. Check sidewall alignment and select a tip that fits more closely without forcing placement.
- Lifting at the free edge: Daily stress or reduced cure quality may contribute to early wear failure. Review curing conditions and consider how the nails are used each day.
- Poor adhesion across the nail: Prep residue, product mismatch, or cure quality may affect bonding. Check the prep process, gel system compatibility, and curing conditions.
- Air pockets or excess gel movement: Gel amount or application pressure may trap air. Use a controlled gel amount and check tip placement before curing.