
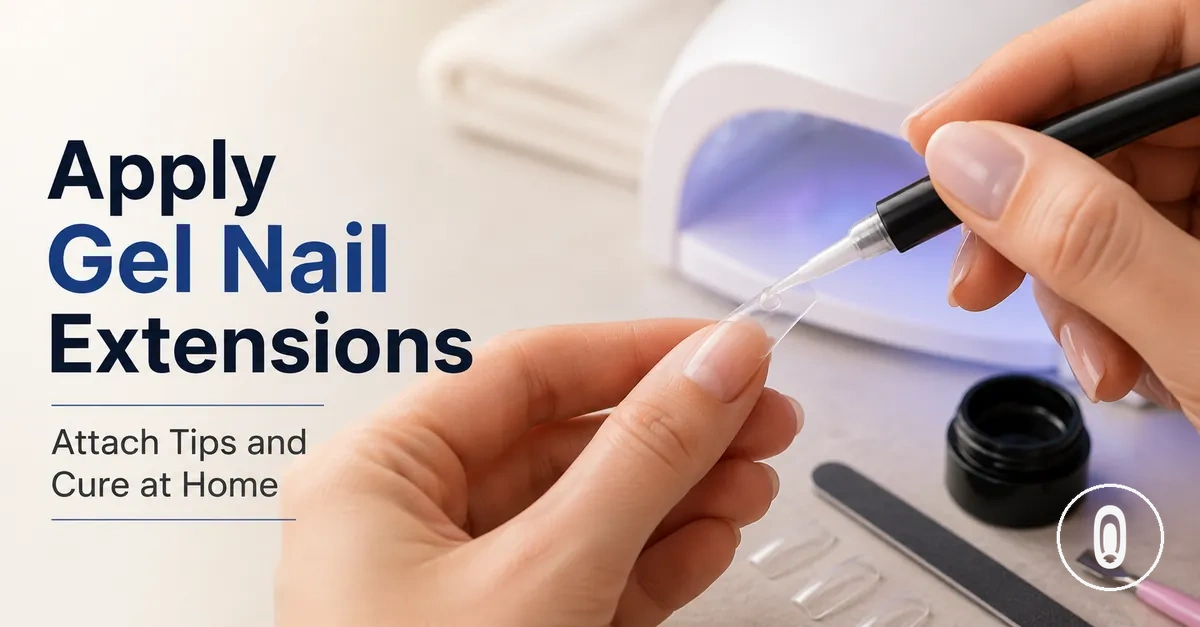
Applying at-home gel nail extensions with a kit
Applying at-home gel nail extensions with a kit starts with prepared nails, accurate tip fit, controlled gel amount, stable placement, correct curing, and sealed finishing. Each condition supports the next, so a weak fit or uneven placement may affect adhesion even when the other steps are completed carefully. Results can vary with the kit formula, lamp, nail prep, and natural nail shape, so manufacturer instructions should remain the final reference.
A gel nail extension kit works as a connected application system rather than a collection of separate tools. Full cover gel tips sit over the natural nail, gel glue creates the contact layer, a UV LED lamp cures the gel, and shaping tools refine the cured extension before sealing. Nail prep and tip selection affect the result, but their full methods belong outside this opening. For broader product context, see the gel nail extension kit hub.
Fit, gel control, curing, and sealing must work together because each stage can affect the stability of the finished extension. Too much or too little gel glue may contribute to overflow, bubbles, or incomplete contact, while uneven pressure can allow the tip to shift before curing. The UV LED lamp and cure time must follow the gel system and manufacturer instructions to reduce undercure risk, while shaping, sealing, and an edge cap can provide wear support without guaranteeing against lifting. The practical process therefore begins with a clean application setup after nail prep before moving into tip placement, curing, and finishing.
Application setup after nail prep
Application setup after nail prep is the stage where everything needed for gel tip application is ready before gel touches the nail. A prepared nail surface, selected tips, gel glue, and a correctly positioned UV LED lamp should already be in place so the application can proceed without unnecessary interruptions. If the nail surface is not ready, return to nail prep before application rather than continuing.
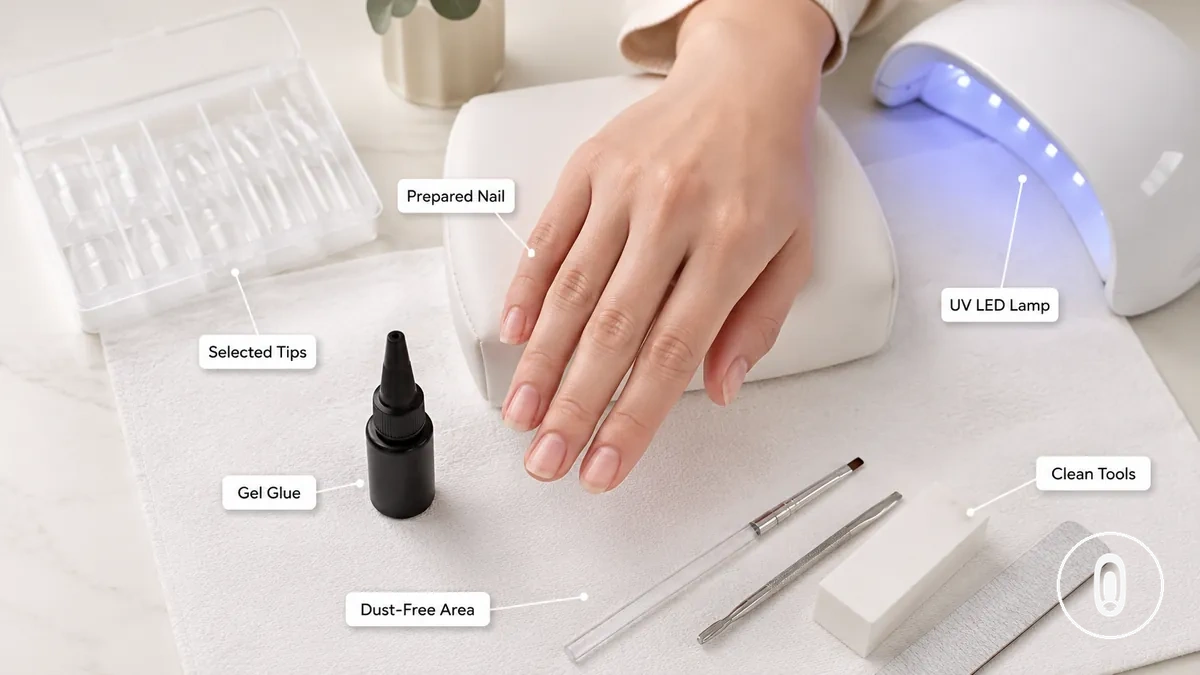
A clean workspace keeps essential items within easy reach before tip placement begins. Arrange the selected tips, gel glue, UV LED lamp, brush or positioning tool, cleanser, file, and buffer so they are ready without interrupting the application flow. Organizing tools used during application can improve placement speed, gel control, and curing access while reducing unnecessary handling. A dust-free workspace may also help reduce contamination during application.
Poor application setup can contribute to handling mistakes before curing begins, even when nail prep has already been completed. Dust, delays, or misplaced tools may affect adhesion or increase lifting risk depending on product formula and application technique. A quick readiness check helps confirm that every item is in place before gel is applied.
- Confirm the prepared nail surface is clean after using cleanser and free of visible dust.
- Lay out the selected tips in the correct sizes before opening the gel glue.
- Keep the gel glue ready for immediate use once application begins.
- Position the UV LED lamp so curing is easy to access without moving the hand unnecessarily.
- Place the brush or positioning tool within easy reach for controlled placement.
- Keep the file, buffer, and workspace clean before adhesive contacts the nail.
- Begin only when all tools and materials are ready to reduce unnecessary timing interruptions.
Matching full cover gel tips to each nail
Matching full cover gel tips to each nail means choosing a tip that covers the natural nail without pinching the sidewalls or extending beyond them. The tip should follow the natural cuticle with consistent sidewall coverage and an appropriate curve fit across the contact area. Checking fit before glue is applied helps support accurate placement and may reduce application problems later.
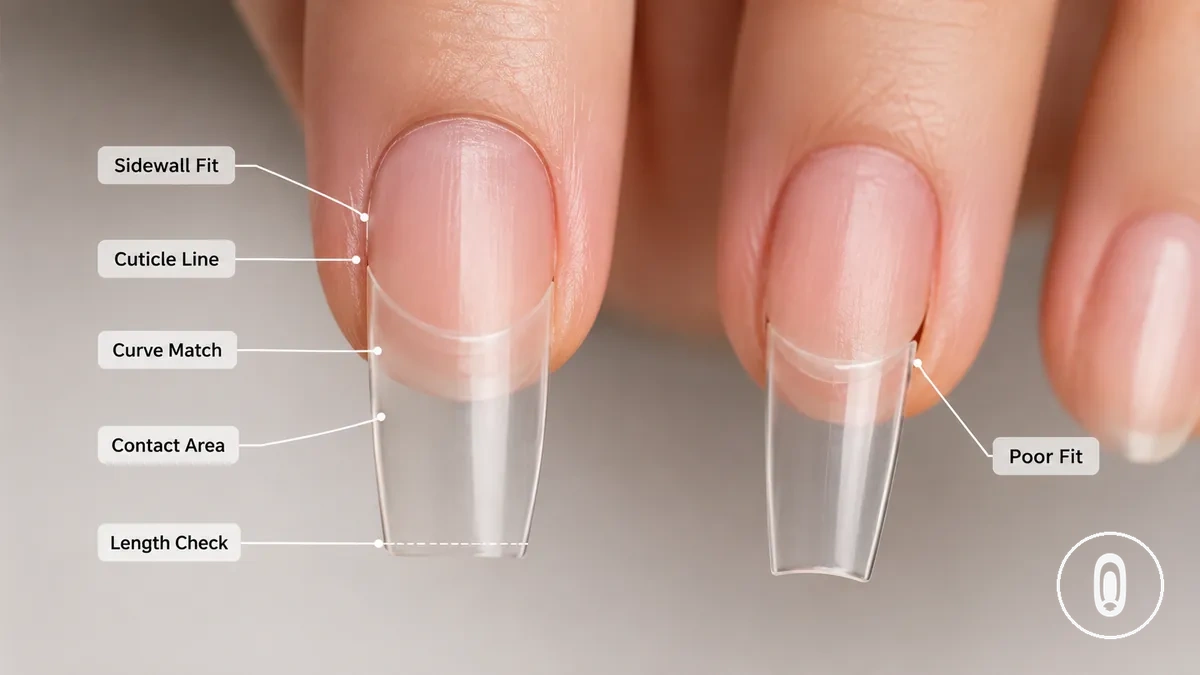
A full cover gel tip that is too small may place pressure on the natural nail or leave part of the sidewall uncovered. A tip that is too wide can extend beyond the nail edge and make clean placement more difficult. A poorly matched curve fit may leave uneven contact across the natural nail, while a closer curve match provides more even contact. These visible fit signals can influence comfort, adhesion, and lifting risk depending on nail prep, gel application, and curing.
Test each full cover gel tip on the natural nail before applying adhesive so the width, cuticle alignment, contact area, length, and stress point can be checked together. Matching full cover gel tips to each nail depends on these visible fit signals before glue is applied. For additional sizing guidance, see choosing tip size before application.
Use these fit checks before applying gel glue:
- Sidewall coverage reaches both edges without pinching or overhang.
- Cuticle alignment follows the natural cuticle with minimal visible gaps.
- Curve fit sits evenly across the contact area without rocking.
- Length remains manageable for controlled placement and trimming if needed.
- The full cover gel tip feels stable and comfortable during the fit check before adhesive is applied.
Preparing gel tips for adhesion
Preparing gel tips for adhesion starts with making the inner surface and contact area ready for adhesive according to the kit instructions. The contact area should be clean, free from visible contamination, and prepared in the way specified for the selected gel tips before adhesive is applied. If the kit includes pre-etched tips or specifies a primer or bonding step, follow the manufacturer instructions rather than using the same preparation method for every tip.
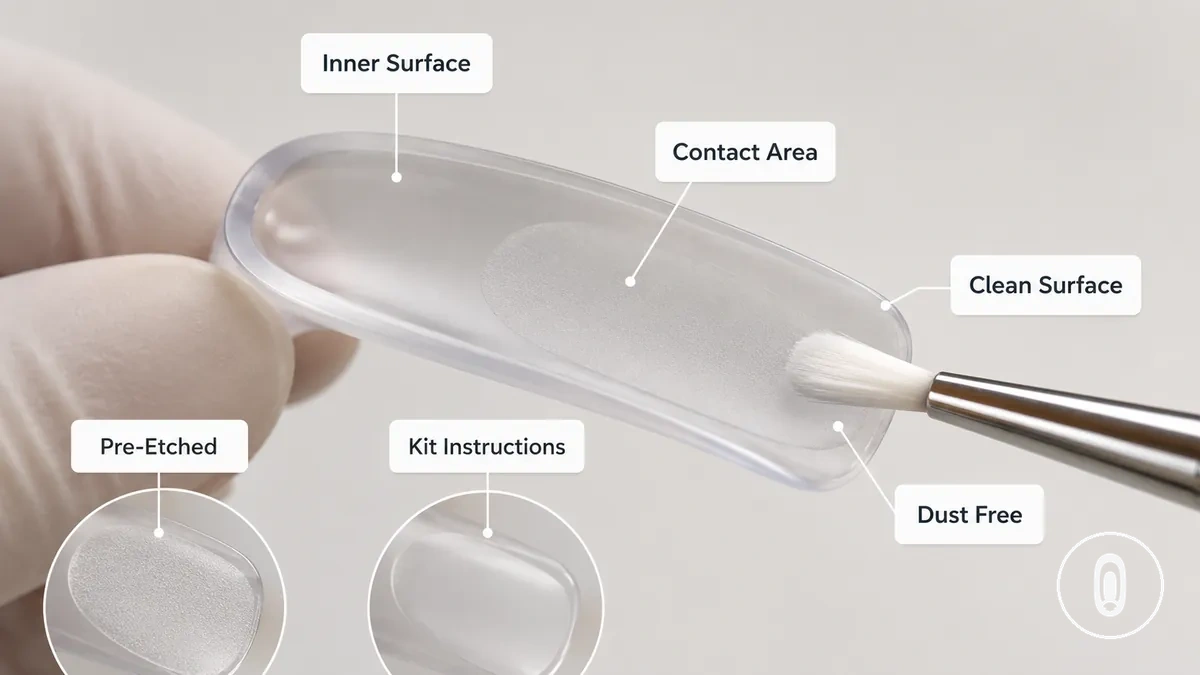
Shine, dust, and contamination on the inner surface can affect adhesive contact. Remove visible dust and keep the contact zone clean before applying gel so the adhesive reaches the intended contact area. Preparation methods may differ by tip material, so avoid assuming that every gel tip requires surface treatment. Cleanliness helps create suitable conditions for adhesive grip and may reduce bubble or lifting risk.
Pre-etched tips are often intended to be used according to the supplied instructions, while other gel tips may require light surface preparation or a primer only when directed by the manufacturer. Preparing gel tips for adhesion means checking the selected tip first and using any bonding step only when the kit requires it. This approach keeps the contact area ready without applying the same method to every product.
Use this checklist before applying adhesive:
- Inspect the inner surface and contact area for visible dust or contamination.
- Keep the contact zone clean before adhesive is applied.
- Remove visible dust without damaging the inner surface.
- Use a primer or bonding step only when the kit instructions specify it.
- Check whether the gel tips are pre-etched before performing additional surface preparation.
Applying gel glue and placing the tip
Applying gel glue and placing the tip depends on controlling the gel glue amount, starting angle, pressure, and sidewall alignment together. The full cover tip should be seated on the prepared nail with a suitable bead size and stable positioning before curing. Check the alignment before the gel begins to set to help reduce bubbles, overflow, and shifting.
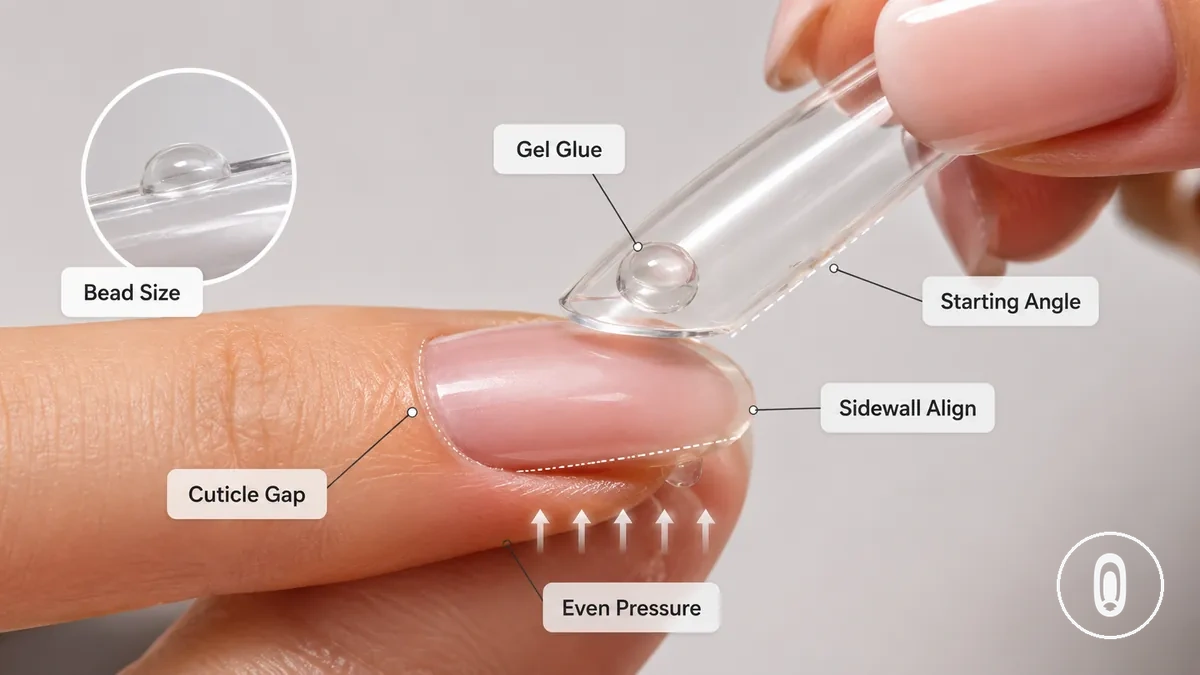
Too much gel glue may increase overflow, while too little may leave incomplete contact beneath the full cover tip. An unstable starting angle or uneven pressure can allow bubbles or tip movement during placement. For example, a flatter nail may need a different gel amount or pressure than a more curved nail, so follow the kit instructions rather than using one fixed method for every application.
Applying gel glue and placing the tip works best when gel amount, angle, and pressure are controlled together. Follow these steps to seat the full cover tip before curing without repeatedly repositioning it.
- Place a suitable bead size of gel glue inside the contact area of the full cover tip according to the kit instructions.
- Hold the full cover tip at a starting angle near the cuticle and begin seating it onto the prepared nail.
- Maintain an appropriate cuticle distance and keep the sidewall alignment even as the tip lowers into position.
- Apply steady, even pressure so the gel glue spreads across the contact area and helps reduce bubbles.
- Check for visible overflow or trapped bubbles before curing, and remove excess gel only if the kit instructions allow it.
- Hold the full cover tip in position until the recommended flash cure or initial cure step begins.
Once the full cover tip is seated, keep it stable until curing starts. Follow the cure timing provided with the kit because adhesive formulas and curing lamps may require different procedures.
Controlling gel amount under the tip
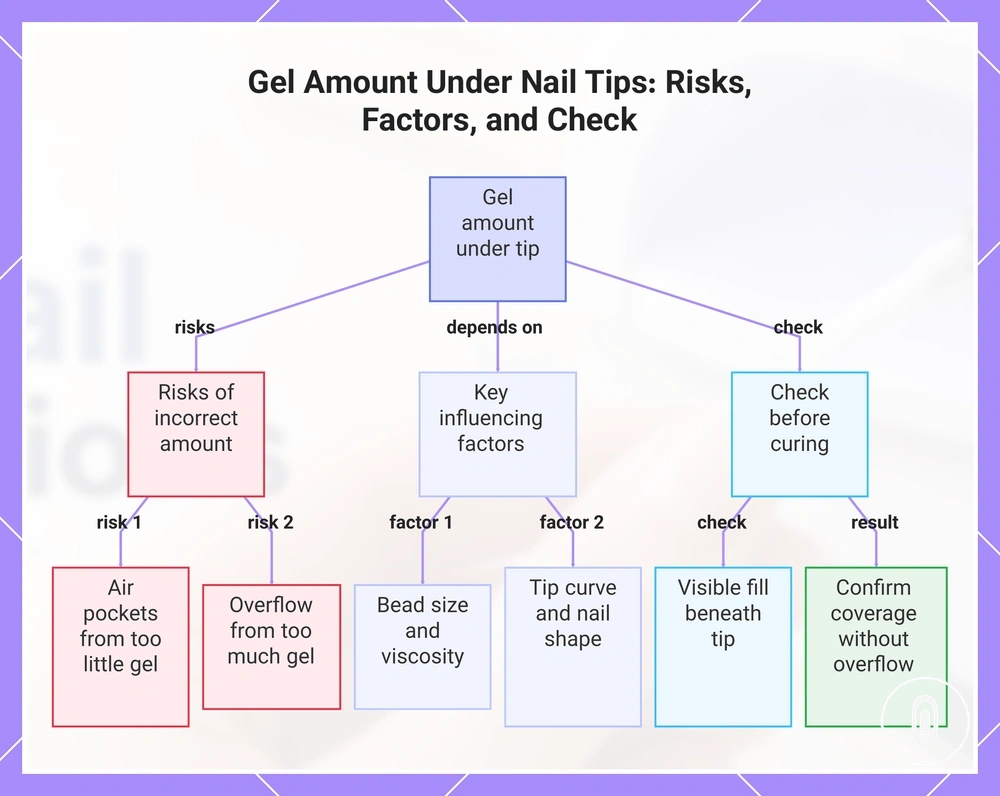
Gel amount under the tip should fill the contact area without flooding it. The required gel amount depends on bead size, gel glue viscosity, nail length, the tip curve, and the product formula, so there is no single bead size that suits every application. The goal is to create even contact coverage while limiting unnecessary overflow.
- Too little gel amount may leave incomplete fill and create air pockets within the contact area.
- Too much gel glue can increase overflow and may require cleanup before curing if the kit instructions allow it.
- Gel glue viscosity affects how the bead size spreads beneath the tip and covers the contact area.
- The tip curve and nail shape can change how much gel is needed for even fill, so the adhesive amount may vary between applications.
- Check the visible fill beneath the tip before continuing to help confirm that the contact area is covered without excessive overflow.
This chart shows the risks of incorrect gel amount, the key factors that affect the required amount, and the check to verify proper fill before curing.
Pressing the tip without bubbles or shifting
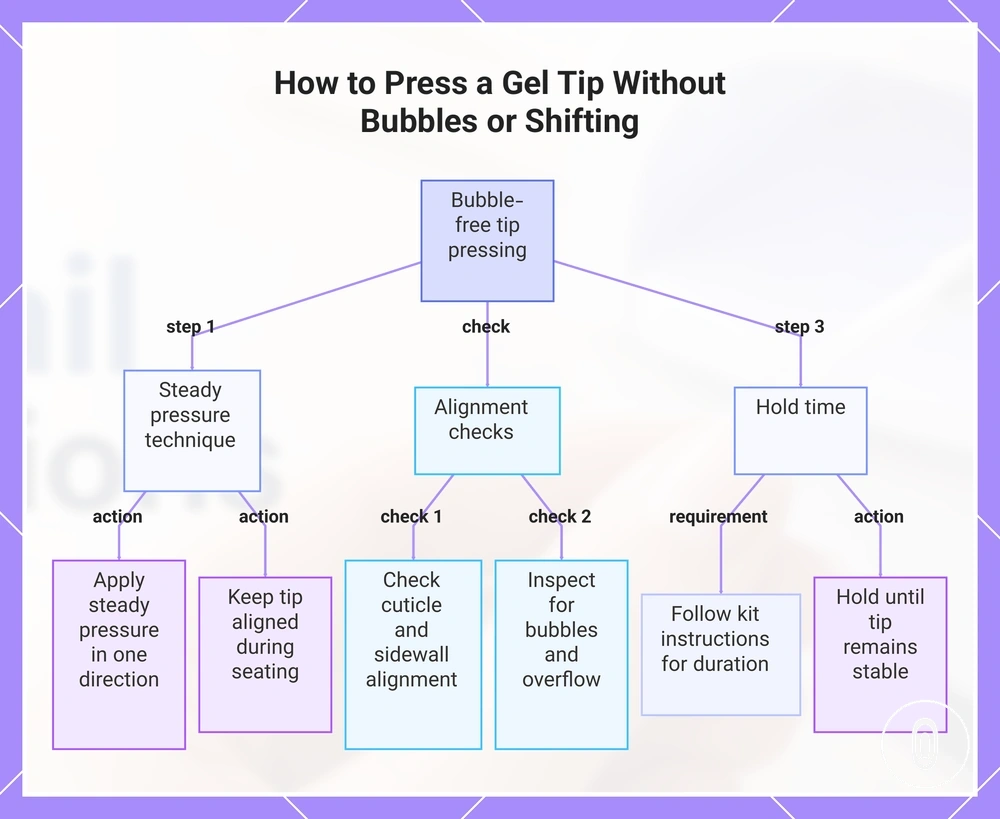
Steady pressure helps the gel spread across the contact area while reducing the chance of bubbles and shifting before curing begins. Keep the gel tip aligned as it is seated because uneven pressure can affect cuticle placement, sidewall alignment, straight placement, and gel overflow.
- Apply steady pressure in one consistent direction to encourage even gel spread instead of forcing the tip into place.
- Check the cuticle placement and sidewall alignment while holding the tip so it remains straight before curing.
- Look for visible bubbles, air pockets, or gel overflow, and make a small adjustment only if the tip appears tilted before curing begins.
- Maintain a steady hold time until the tip remains stable, following the kit instructions because product viscosity, tip curve, and lamp access can affect the required hold time.
This chart shows the key steps and checks for pressing a gel tip to avoid bubbles, shifting, and alignment issues before curing.
Flash curing and full curing the extension
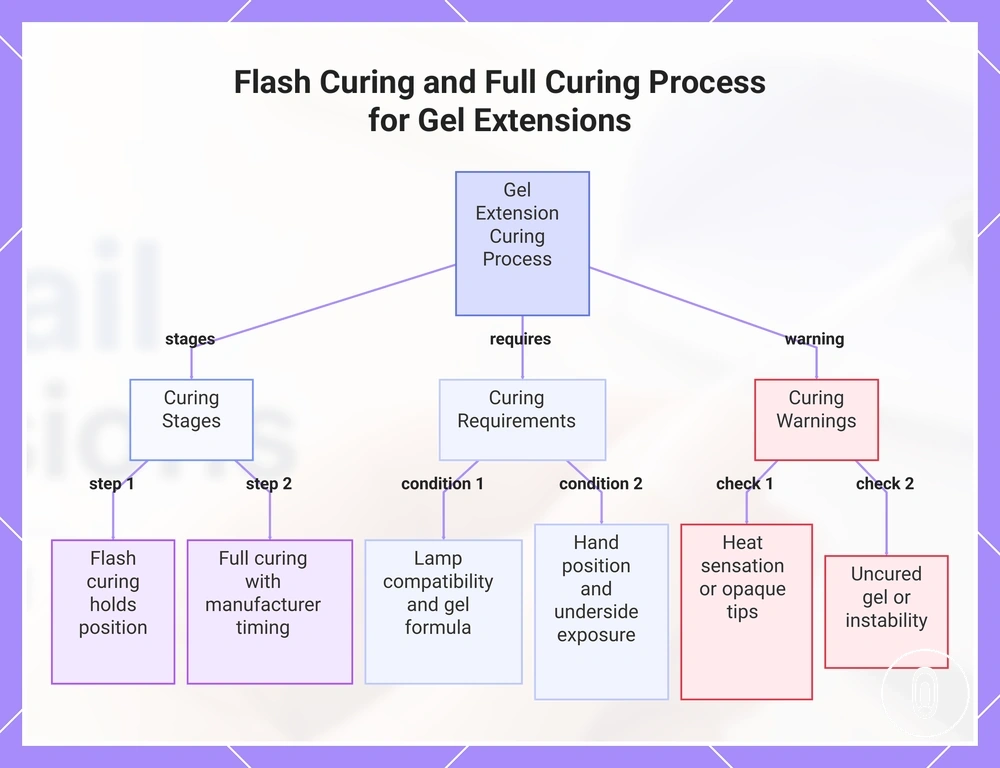
Flash curing holds the placed extension in position, while full curing completes the cure according to the kit instructions. The curing process depends on the UV LED lamp, gel glue, lamp compatibility, gel formula, hand position, exposure position, and manufacturer timing rather than a universal cure cycle.
Lamp compatibility influences how the gel glue cures, so use the UV LED lamp recommended for the selected system when the kit specifies one. Keep the hand position steady during flash curing because movement can increase the risk of shifting or undercure. If the extension design or gel system requires underside exposure, follow the product instructions to help achieve a complete full curing cycle and support durability.
If heat sensation occurs during curing or more opaque tips require additional attention, follow the kit instructions before changing the curing process. Avoid contact with uncured gel, and use extra caution if skin sensitivity is a concern.
- Position the extension correctly before starting the flash curing stage.
- Keep the hand steady during flash curing to help maintain placement stability.
- Complete the full curing cycle using the manufacturer timing for the selected UV LED lamp and gel system.
- Check whether underside exposure is recommended for the extension and follow the kit instructions when applicable.
- Stop if uncured gel remains visible or the extension appears unstable, and review lamp compatibility and curing instructions before continuing.
This chart shows the two-stage curing process for gel extensions, including key requirements and warnings for a successful cure.
Trimming, shaping, and sealing the applied extensions
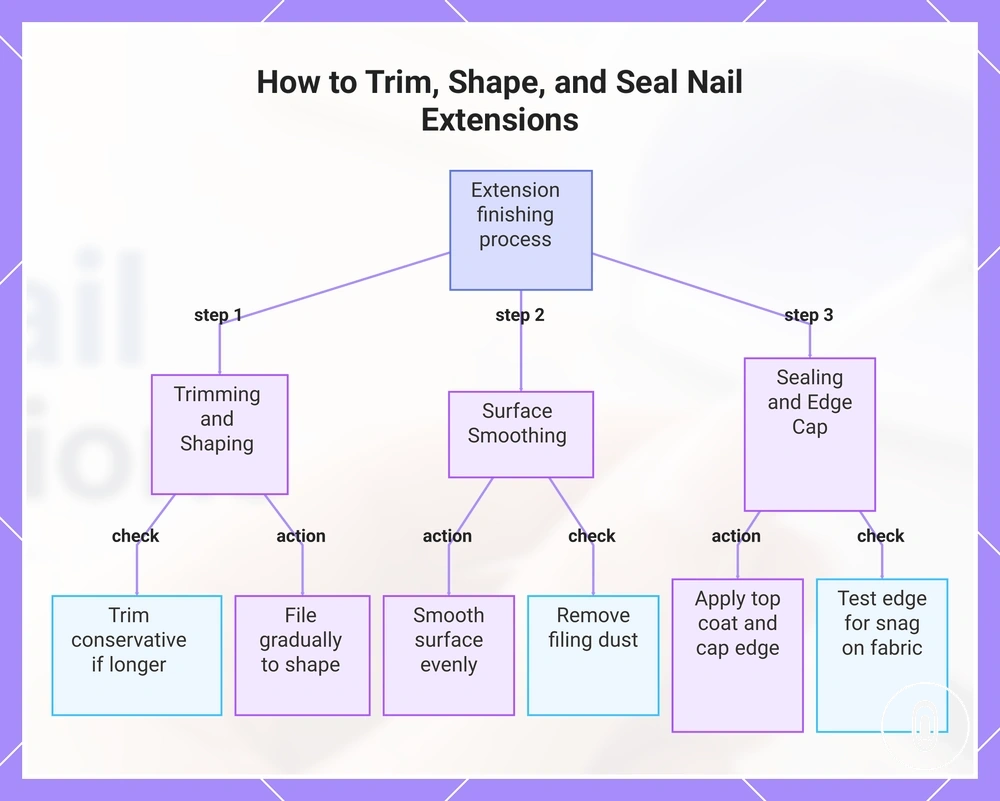
Trimming, shaping, and sealing the applied extensions starts after the cured extension is stable. Finishing refines the length, free edge, surface smoothness, and seal to improve comfort, appearance, and edge durability. The final result can vary with extension thickness, fit, and normal wear.
If the extension feels longer than expected, begin with conservative trimming before refining the shape. A nail tip clipper can shorten the cured extension, while a file helps refine the free edge and sidewall shape with greater control. For example, a beginner may trim a small amount first and then file gradually until the desired length and shape are reached. Surface smoothing after filing helps prepare the extension for sealing.
If the finished edge catches on fabric or feels rough, apply a top coat and cap the free edge after removing filing dust. An edge cap can improve snag resistance and support shine, while sealing may help reduce edge lifting risk depending on preparation, fit, curing, and wear.
- Trim the cured extension to the preferred length with a nail tip clipper if needed.
- Use a file to refine the free edge and sidewall shape with controlled, even strokes.
- Smooth the surface so the extension feels even before sealing.
- Remove visible filing dust before applying the top coat.
- Apply the top coat and cap the free edge to complete the seal.
This chart outlines the three main steps for finishing cured nail extensions: trimming and shaping, surface smoothing, and sealing with an edge cap.
Application checks that support longer wear
Application checks that support longer wear verify whether the applied extension has the conditions that usually support better wear. Longer wear depends on prep quality, fit, adhesion, curing, the sidewall seal, the edge cap, and early care rather than a single factor. These observable checks help identify conditions that may increase early lifting risk.
If the applied extension appears stable, inspect the sidewall seal, cuticle gap, cured hardness, underside cleanliness, and edge cap before making changes. A consistent cuticle gap, clean underside, firm cured hardness, and intact edge cap are useful signs that the application is ready to leave alone, while visible irregularities may need gentle correction. For more guidance after these final checks, see making extensions last. Application checks can support longer wear, but they cannot overcome poor preparation, poor fit, or incompatible products.
If only a minor rough edge or light snagging is present, gently refine the edge without changing the overall shape. Leave the set alone when the sidewall seal, cuticle gap, cured hardness, underside cleanliness, edge cap, and comfort appear satisfactory. Use this final checklist to verify the conditions most likely to affect early lifting or snagging.
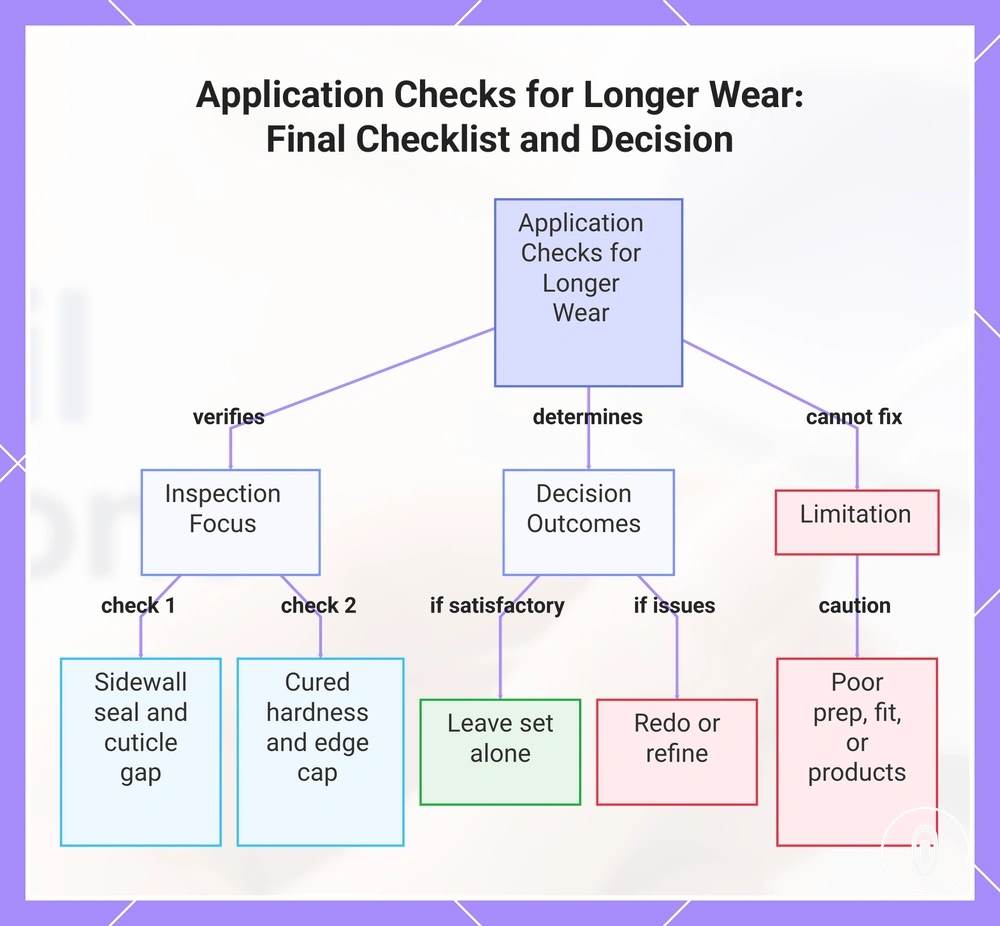
- Check that the sidewall seal appears even without visible lifting.
- Confirm the cuticle gap is consistent and free from excess product.
- Verify that the cured extension feels firm according to the kit instructions.
- Inspect the underside cleanliness for visible uncured residue or debris.
- Confirm the edge cap remains intact around the free edge.
- Check that the extension feels comfortable during normal movement and redo the application if a poor bond or visible lifting is present.
Redo is usually the better choice when the applied extension has a poor bond, visible lifting, or persistent movement instead of a minor surface imperfection. Small edge irregularities may only need gentle refinement when adhesion remains stable. For more information about application causes of lifting, review the common diagnostic signs before deciding to redo the tip. Complete these application checks before deciding that the finished extension is ready for normal wear.
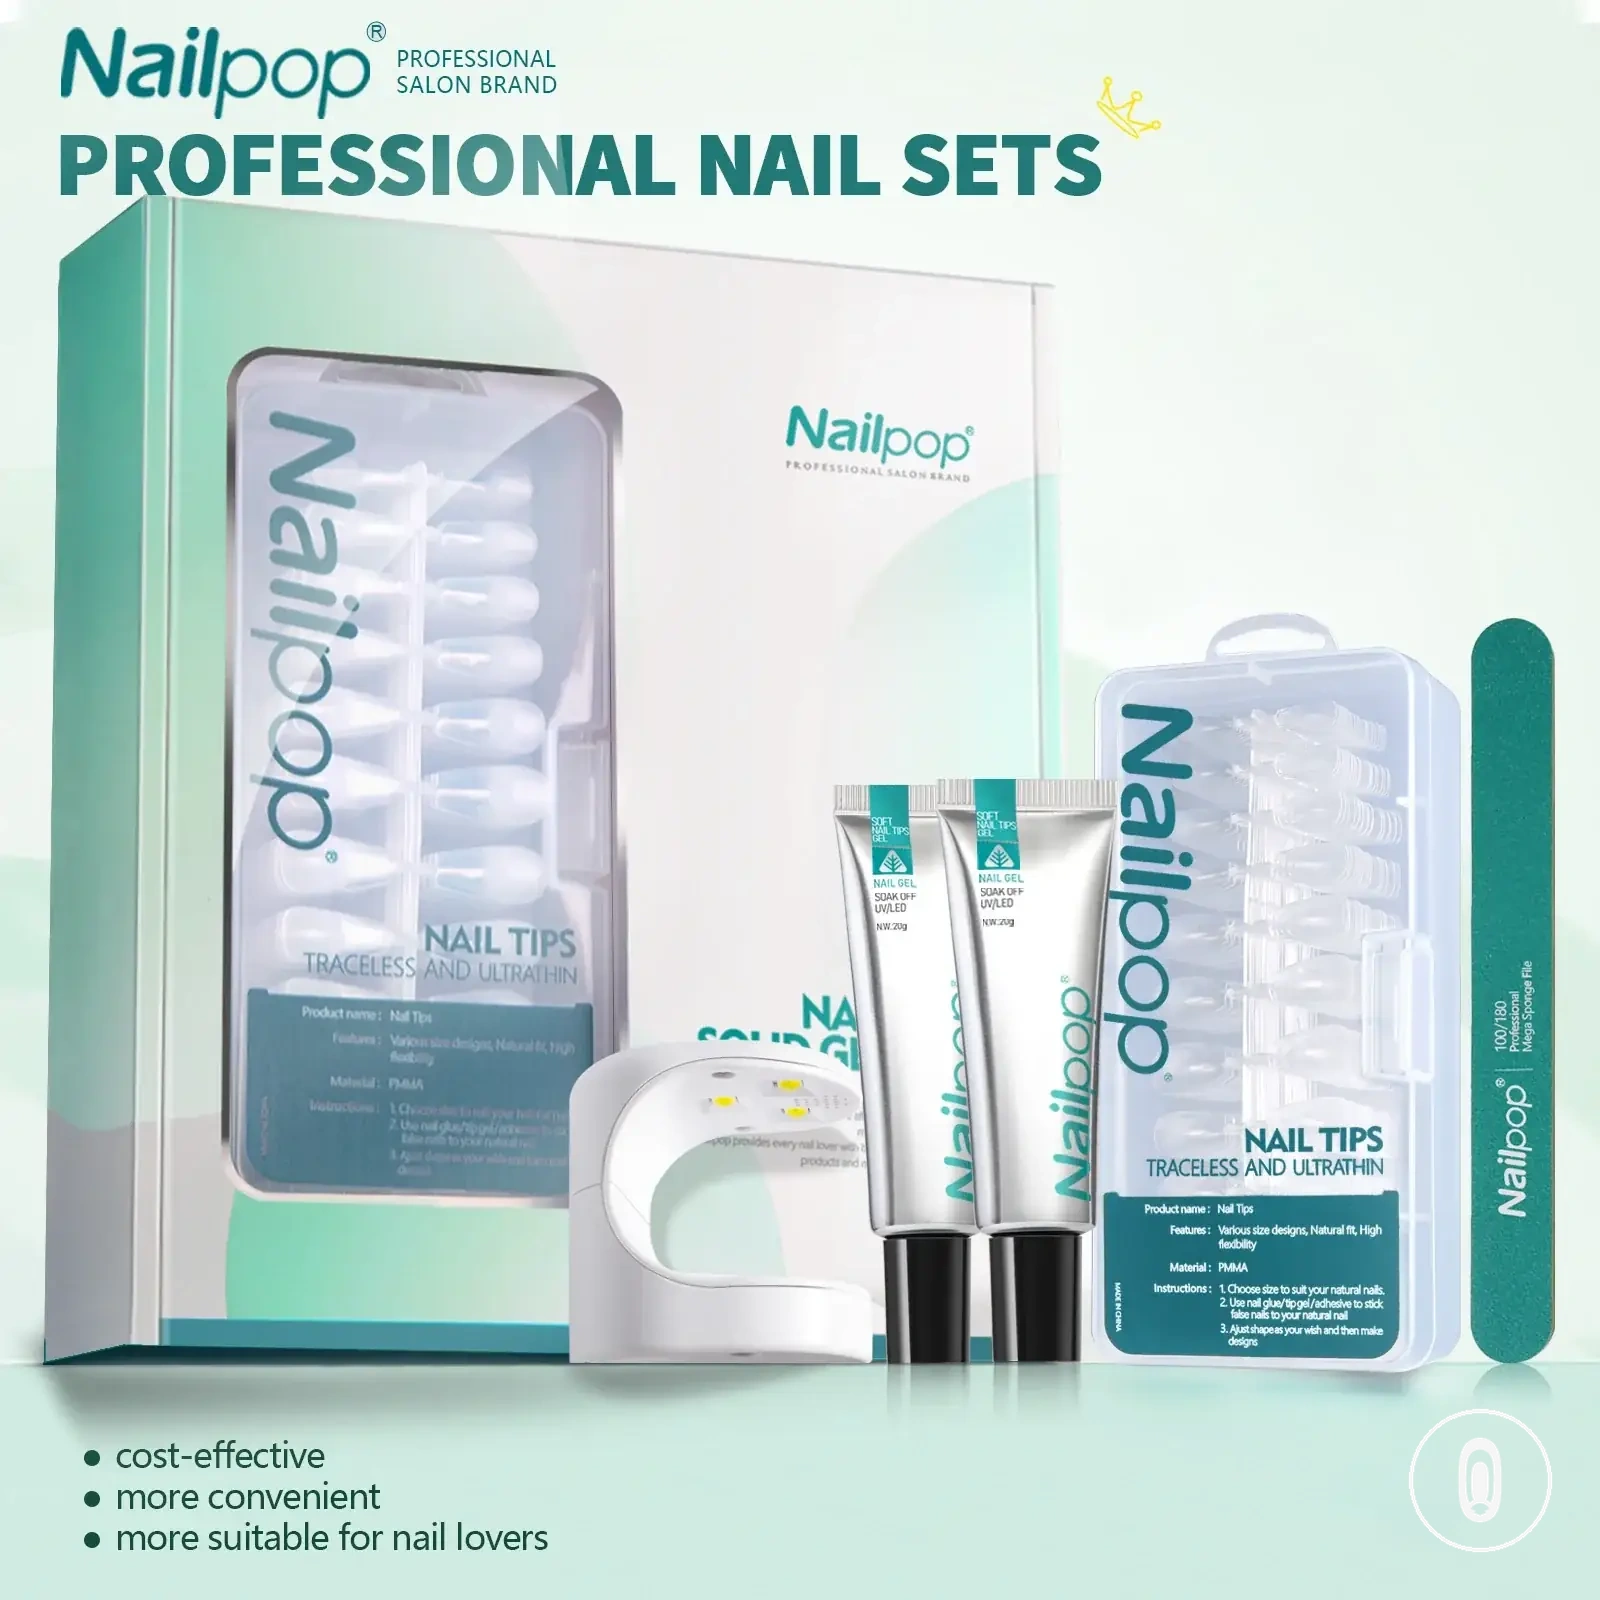
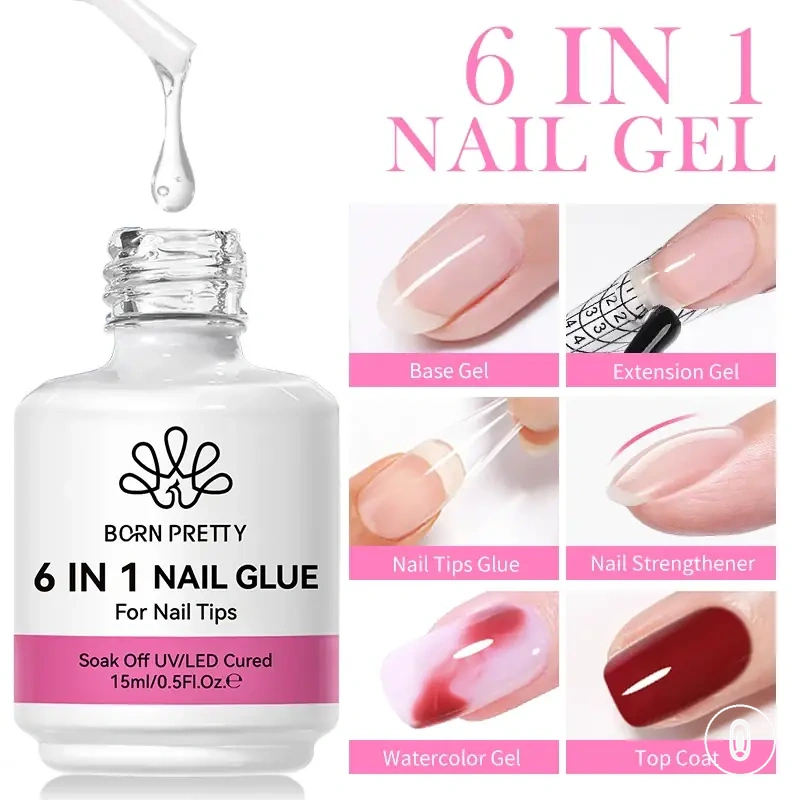
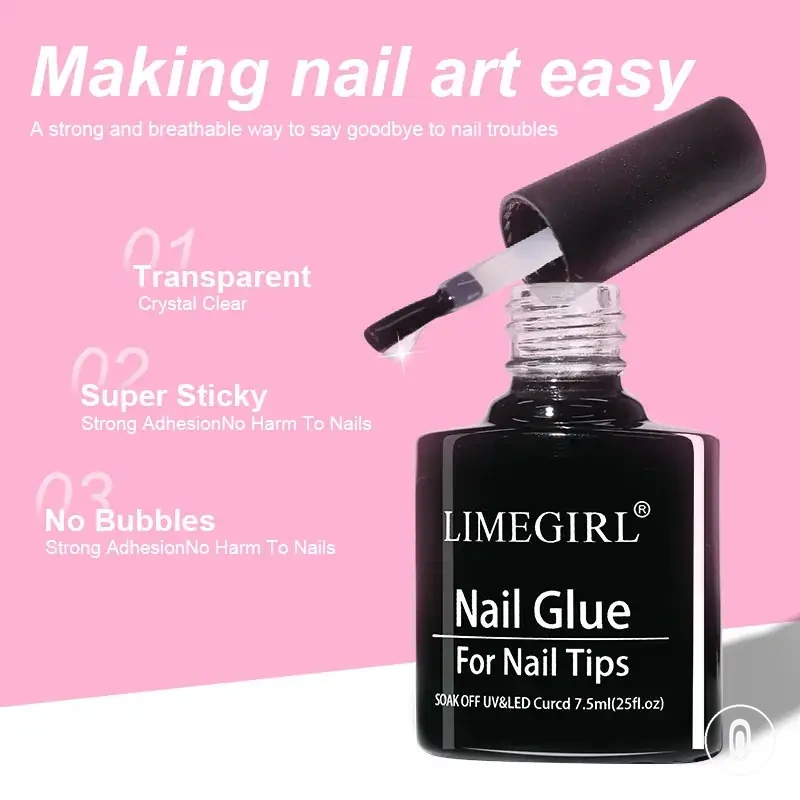
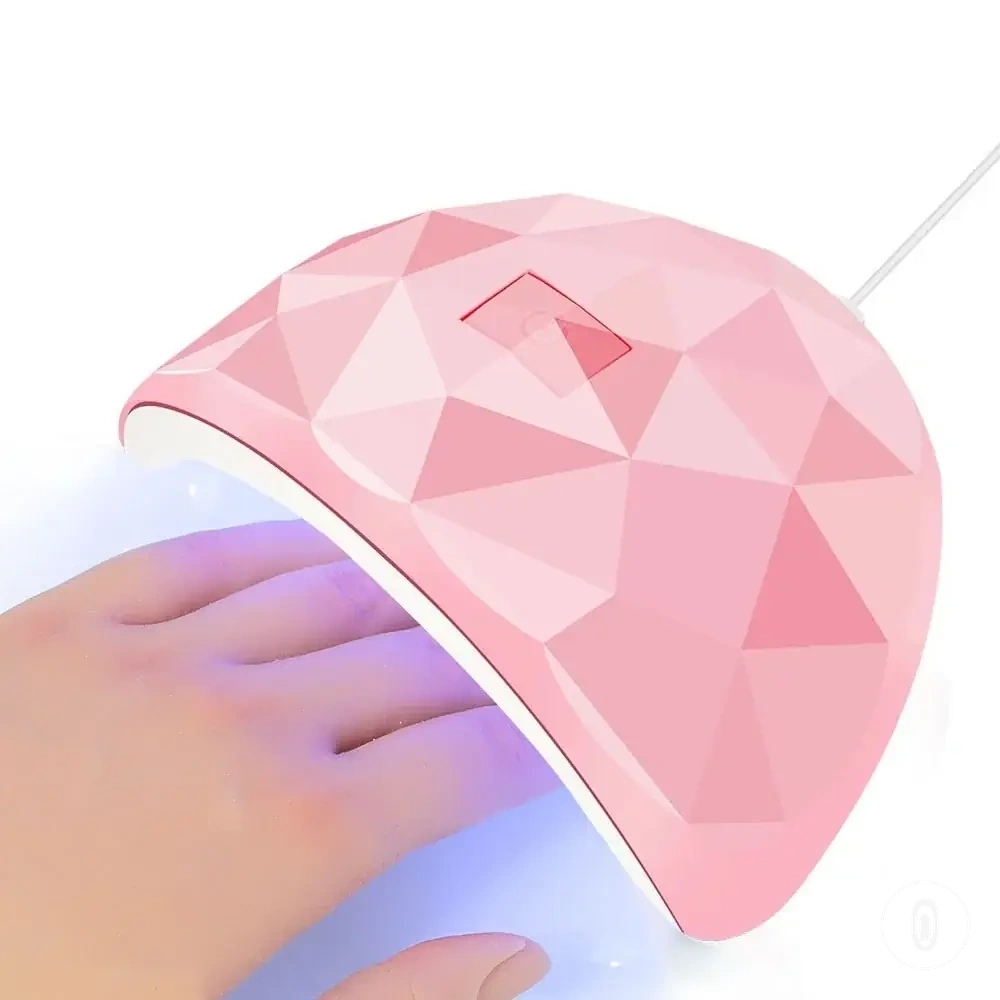
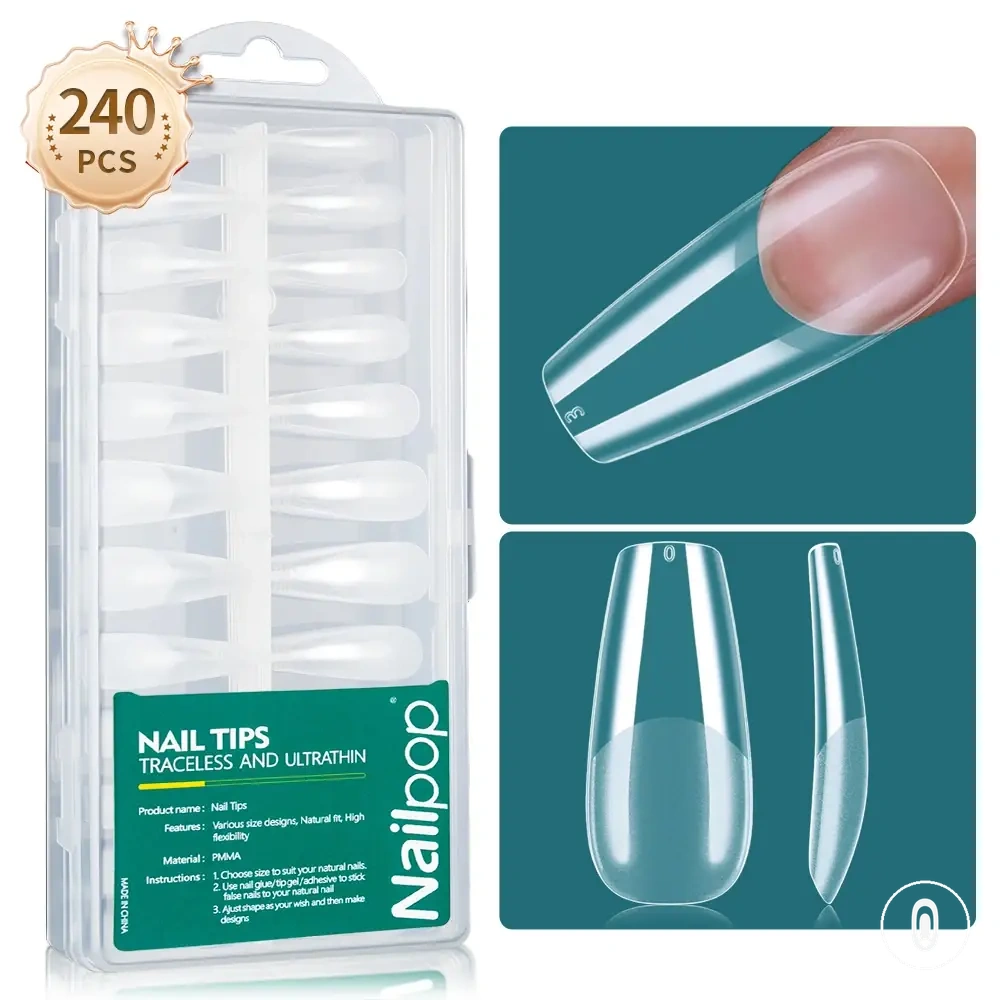
The products below are useful examples for comparing available options. Before buying, check that the compatibility criteria, key features, and product details match your needs.
This chart shows the key application checks that help verify conditions for longer wear, the decision to leave the set alone or redo, and a warning about limitations.
Application mistakes that weaken gel extensions
Application mistakes that weaken gel extensions usually involve poor fit, too much gel, bubbles, undercuring, tip shifting, flooding, or rough finishing. Each error can reduce adhesion, comfort, curing quality, or wear support depending on the product and cure state. Broader guidance on application mistakes sits outside this local application-error scope.
Application mistakes that weaken gel extensions are easier to prevent when each error is tied to its likely sign and a safer correction. The table separates minor issues that may allow careful refinement from problems that may require the tip to be redone.
| Mistake | Affected part or attribute | Visible sign or risk | Safer correction |
|---|---|---|---|
| Poor fit | Sidewall coverage and contact area | Pressure, overhang, gaps, weak adhesion, or lifting | Choose a better-fitting tip before curing; redo the tip if the cured fit is unstable. |
| Excess gel | Gel amount and cuticle area | Overflow, flooding, skin contact, or uneven curing risk | Use a controlled amount and clean excess only when the kit instructions allow it before curing. |
| Air bubbles | Contact area beneath the tip | Visible air pockets or uneven adhesion | Adjust pressure and placement before curing; redo the tip if bubbles remain trapped. |
| Undercuring | Gel glue cure and hardness | Softness, instability, or reduced durability | Check lamp compatibility, hand position, and manufacturer timing before continuing. |
| Tip shifting | Placement and sidewall alignment | Crooked position, uneven cuticle gap, or discomfort | Correct the alignment before curing; redo the tip rather than forcing a post-cure adjustment. |
| Flooding | Cuticle and sidewall area | Gel touching the skin or excess product around the edges | Stop before curing and remove excess according to the kit instructions. |
| Rough finishing | Free edge, edge seal, and surface | Snagging, uneven shape, or weaker wear support | Gently refine the edge and restore the seal when adhesion remains stable. |
A small rough edge may only need gentle filing and resealing, while poor fit, trapped bubbles, major shifting, visible undercuring, or a weak bond may be redo signals. Post-cure force should not be used to correct a tip that is crooked or poorly bonded. Review application causes of lifting when the visible problem may extend beyond one local application error. The safer decision depends on whether the issue affects only the finish or the bond beneath the tip.