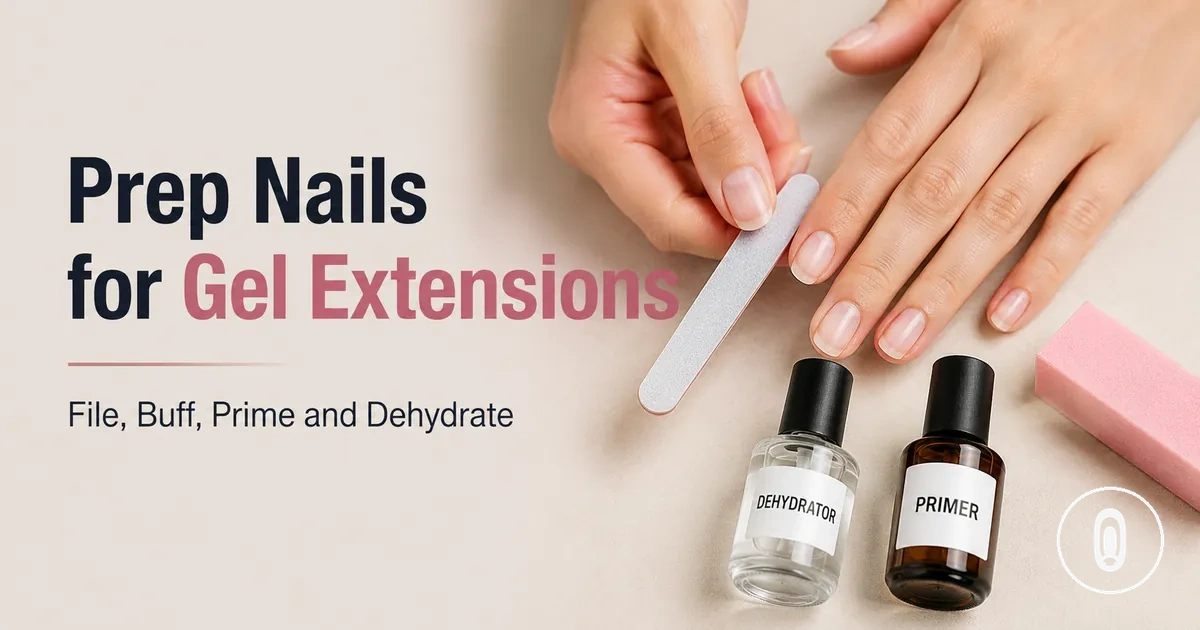
Nail Prep for At-Home Gel Extensions
Nail prep is the controlled preparation of the natural nail before at-home gel extensions are applied. It creates a clean nail plate, a clear cuticle area, and a lightly textured surface that supports clean contact and surface readiness. Good preparation helps create suitable conditions for adhesion before gel tips are applied.
Oil, moisture, dust, residue, and non-living cuticle tissue can interfere with surface contact if they remain on the natural nail. Light buffing, careful cuticle-area preparation, and thorough cleaning help prepare the nail plate without unnecessary surface removal. A nail cleanser, dehydrator, and primer may be used according to the product instructions to improve surface readiness. Stop the preparation process if the natural nail or surrounding skin becomes painful, irritated, or unusually sensitive.
Nail prep usually follows a controlled sequence that begins with cleaning and light surface preparation before moving to prep liquids such as a dehydrator and primer when appropriate. This preparation stage establishes the surface condition only and does not include tip fit, curing, or the full gel application process. The next section builds on this foundation by explaining the overall preparation workflow in more detail.
What Nail Prep Needs to Do Before Gel Extensions
Nail prep must leave the nail plate clean, dry, and lightly textured while keeping the cuticle area controlled and free from residue. These conditions reduce interference from oil, moisture, and surface debris, helping create better adhesion readiness before gel extensions are applied.
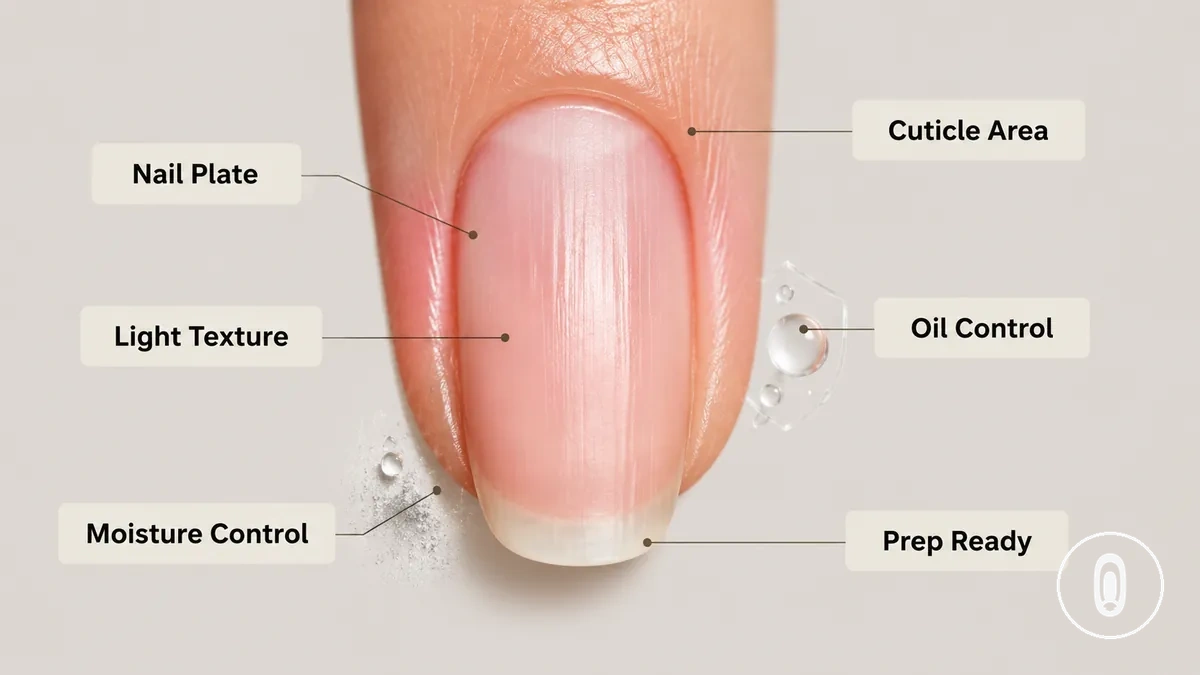
Oil and moisture can reduce clean contact between the natural nail surface and the product system. Residue or non-living tissue around the cuticle area may also create uneven contact and can contribute to lifting risk. Nail prep changes the surface condition, but it does not replace correct tip fit, curing, or application technique within at-home gel nail extension kits.
Nail Prep Tools and Products for Gel Extensions
Nail prep tools and prep products serve different roles when preparing the natural nail for gel extensions. Mechanical tools work directly on the nail plate or cuticle area, while prep liquids clean or condition the surface before application. Keeping these roles separate helps reduce confusion between physical preparation and liquid surface preparation.
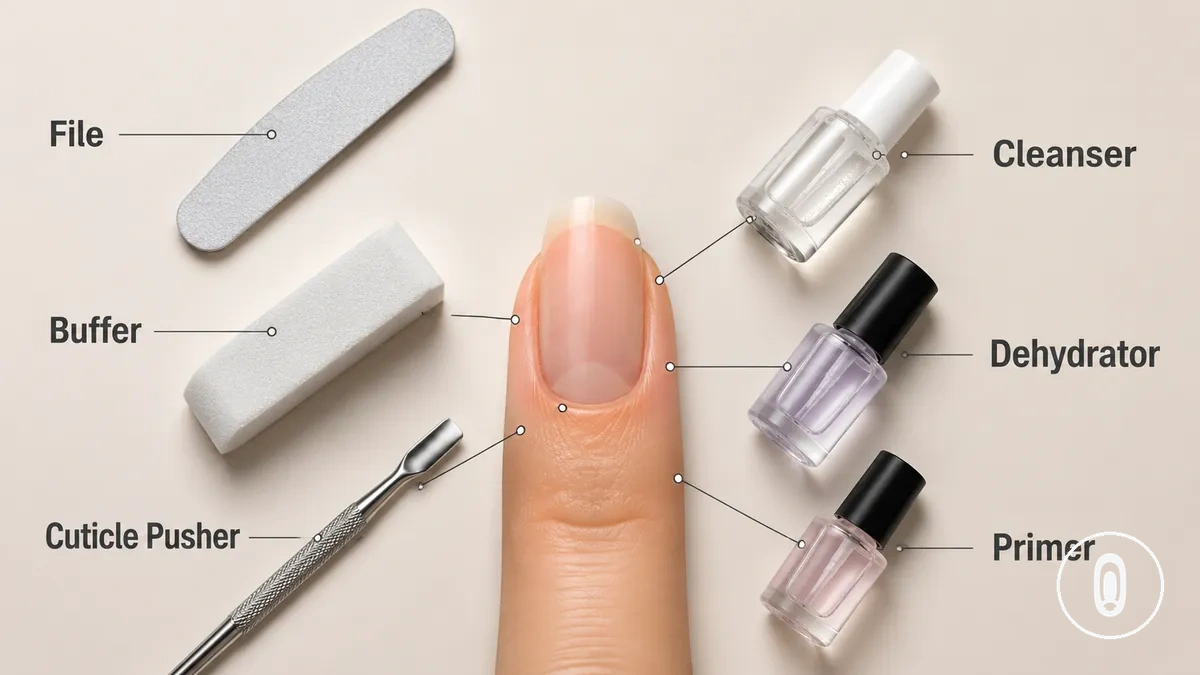
Using the correct item at the appropriate stage helps prepare the nail plate while reducing unnecessary surface changes or product misuse. Mechanical tools and prep liquids support different contact points and should not be treated as interchangeable. Understanding this distinction also makes it easier to identify the purpose of prep products in a kit. The table below summarizes each item's role and safe use condition.
| Item | Prep function | Use condition | Effect or risk reduced |
|---|---|---|---|
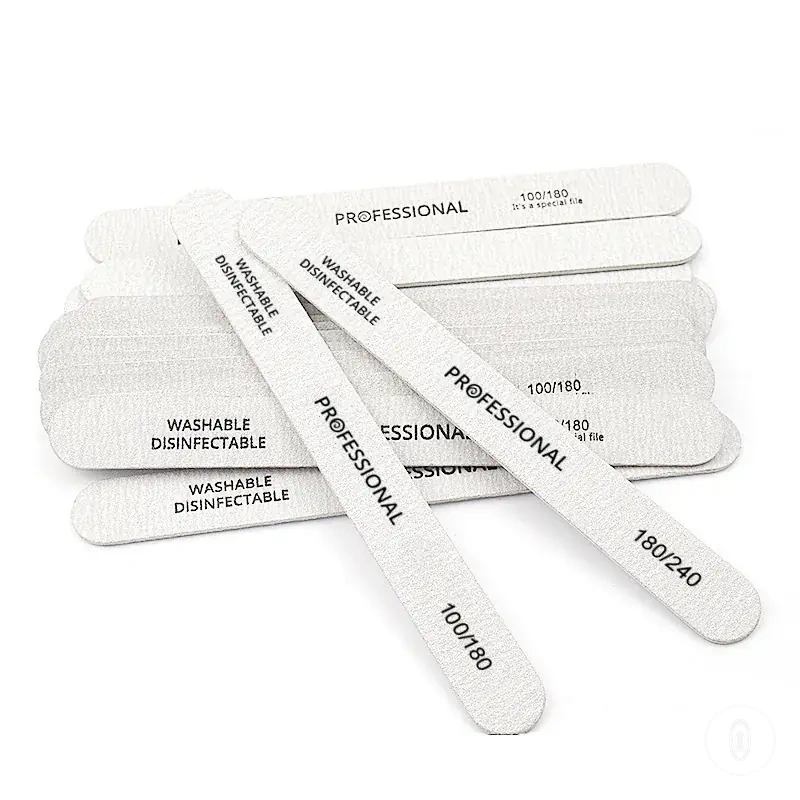
| File | Shapes the free edge | Use before product application when edge shaping is needed | Helps create a smooth edge |
| Buffer | Lightly refines surface texture | Use gently on the natural nail plate | Reduces surface shine that may affect contact |
| Cuticle pusher | Moves non-living tissue from the cuticle area | Use with controlled pressure | May reduce adhesion risk caused by surface obstruction |
| Cleanser | Removes residue from the nail plate | Apply after dust removal | Improves surface cleanliness |
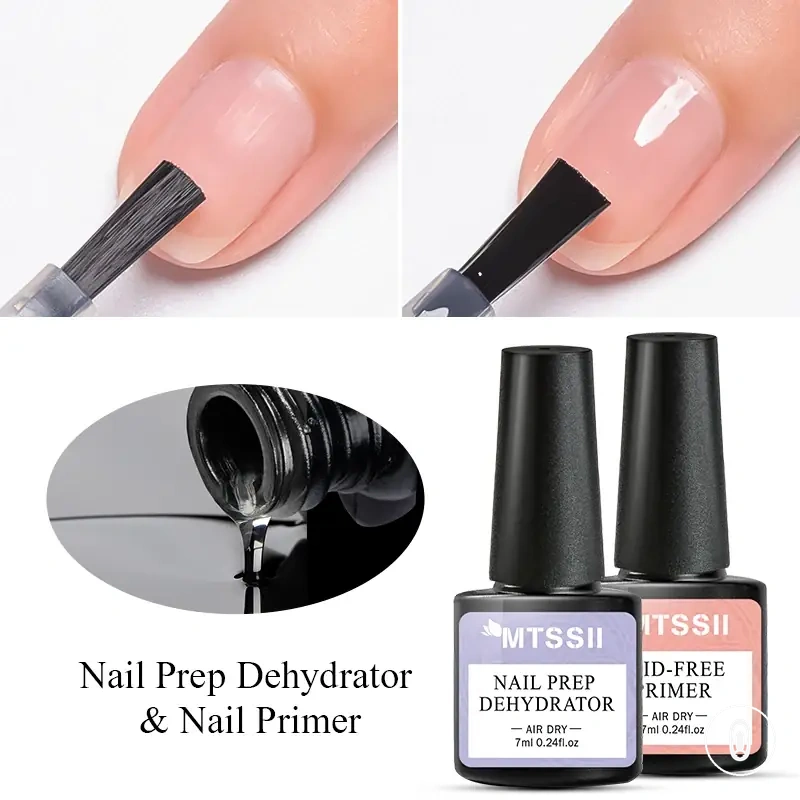
| Dehydrator | Helps reduce surface oil and moisture | Use when recommended by the product instructions | May improve surface readiness before primer |
| Primer | Prepares the nail surface before gel application | Apply only when the product instructions require it | May help reduce adhesion risk under suitable conditions |
Files, Buffers, and Cuticle Tools
Files, buffers, and cuticle tools are mechanical prep tools that contact different areas of the natural nail during preparation. A file shapes the free edge, a buffer refines the nail plate surface texture, and a cuticle tool works around the cuticle area to manage non-living tissue. Each tool is intended for a specific contact area and should be used with safe pressure.
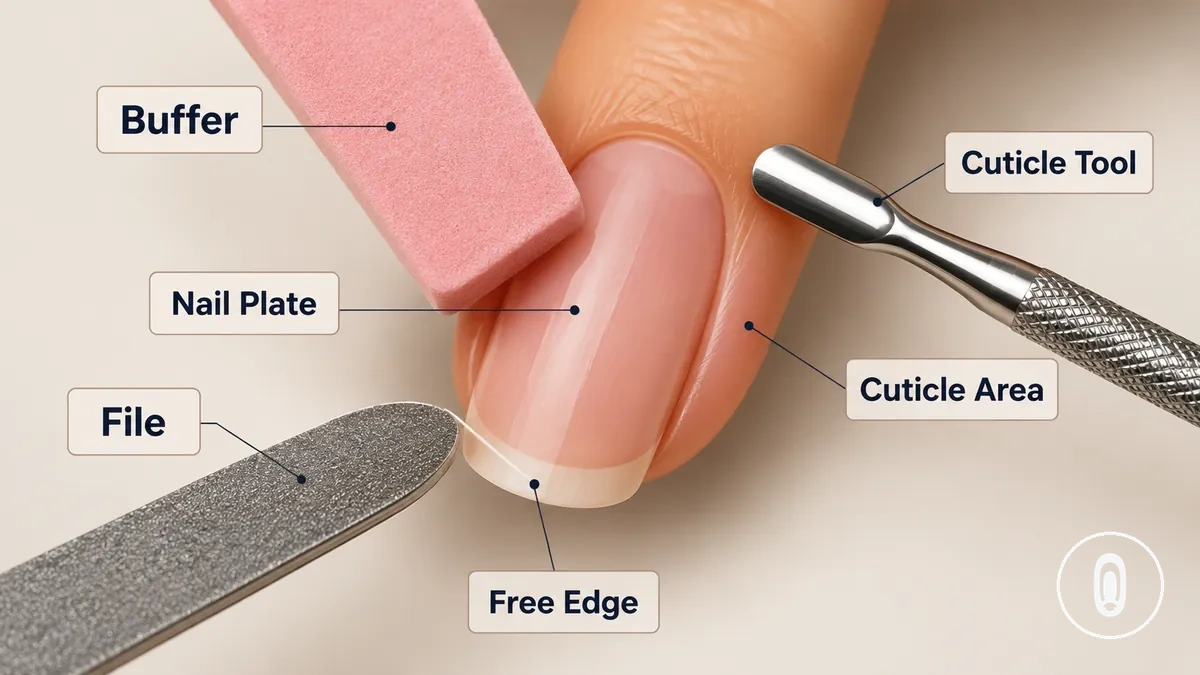
- File: Contacts the free edge to shape and smooth the nail edge before product application.
- Buffer: Contacts the nail plate with light pressure to refine surface texture. Over-buffing may remove more surface than intended and can increase irritation risk.
- Cuticle tool: Contacts the cuticle area to gently move non-living tissue away from the nail plate. Applying too much pressure may irritate the surrounding skin.
Cleanser, Dehydrator, and Primer Roles
Cleanser, dehydrator, and primer have separate roles in liquid nail prep. Cleanser removes residue from the nail plate, dehydrator helps reduce surface oil and moisture, and primer provides adhesion support when the product system calls for it. Their use is order-sensitive because each liquid prepares a different surface condition.
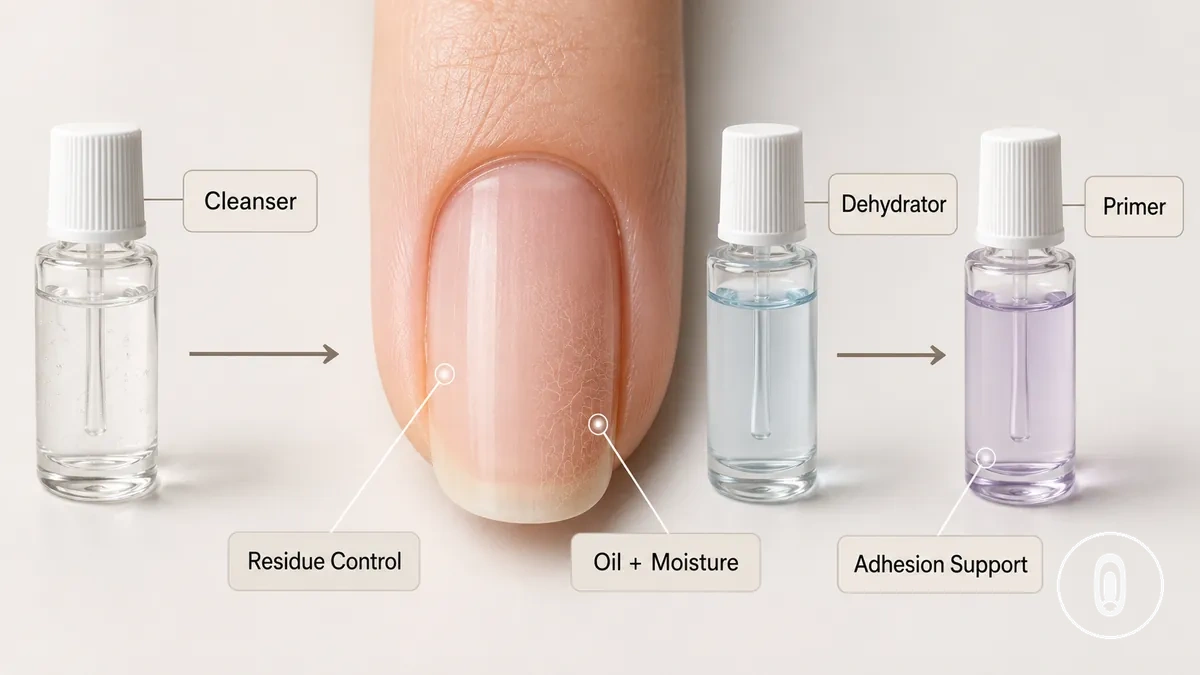
Confusing these prep liquids can leave residue, moisture, or an unsuitable surface condition before gel application. Natural nail condition and product instructions may change whether a dehydrator or primer is needed and whether the surface should reach a dry or tacky condition.
| Product | Main role | When it is used | Condition to check |
|---|---|---|---|
| Cleanser | Removes dust and residue from the nail plate | After mechanical surface preparation and before later prep liquids | The nail plate appears clean and free from visible residue |
| Dehydrator | Helps reduce surface oil and moisture | Before primer when recommended by the product system | The surface reaches the dry condition described in the product instructions |
| Primer | Provides adhesion support for the next gel product | After dehydration when required by the product system | The surface matches the dry or tacky condition specified in the product instructions |
How to Prep Natural Nails Before Gel Tips
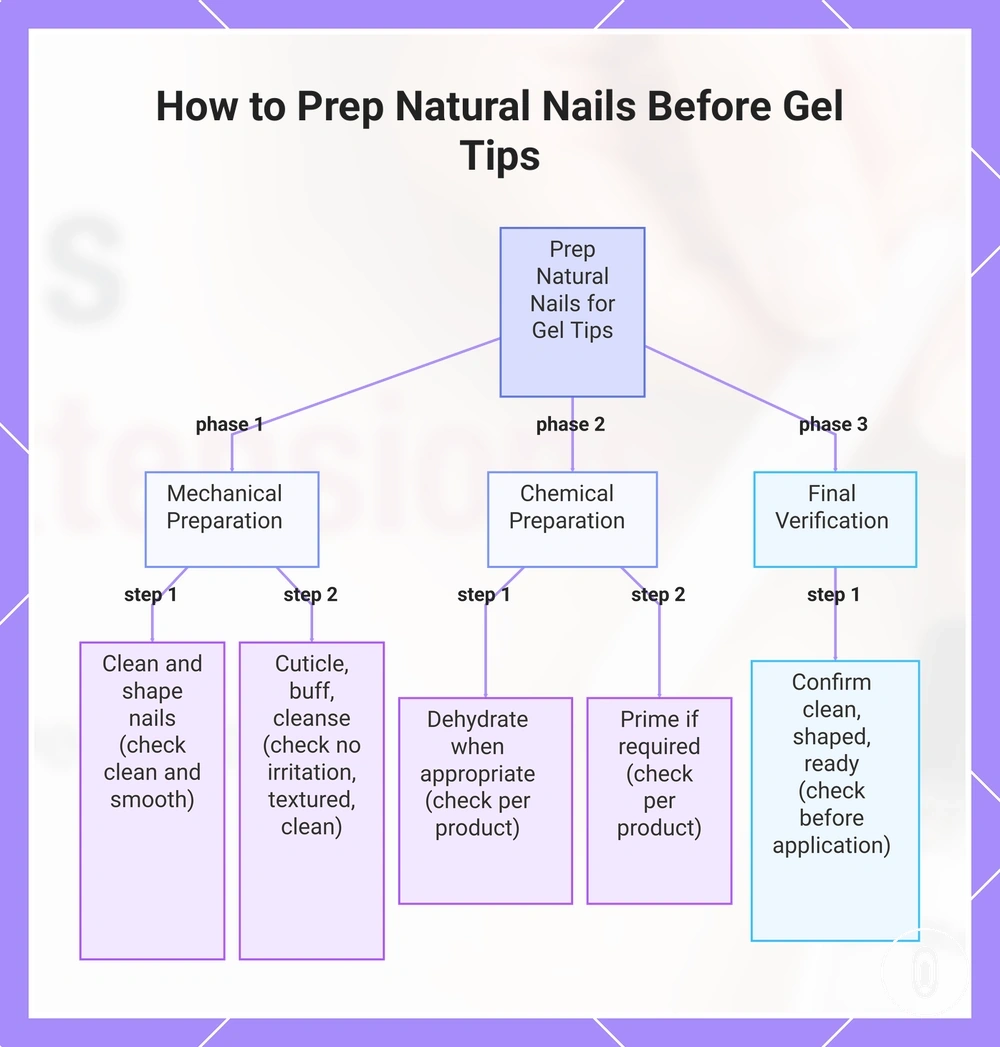
Preparing natural nails before gel tips starts with a consistent prep sequence that creates a clean, dry, and ready nail plate for adhesion readiness. Follow each step in order because the condition of the natural nails, product system, or nail sensitivity may change the safest approach.
-
Remove residue and dry the nail plate.
Remove visible residue, oil, and dust from the natural nails. Check that the nail plate appears clean and dry before continuing.
-
Shape the free edge.
Shape the natural nails to the desired outline. Confirm the edge is smooth and even before moving to the next step.
-
Perform cuticle work.
Gently move non-living tissue away from the nail plate. Stop if the surrounding skin becomes irritated or unusually sensitive.
-
Buff the nail surface lightly.
Buff only enough to refine the surface texture for adhesion readiness. Check that the nail plate is lightly textured without excessive surface removal.
-
Cleanse the nail plate.
Use a cleanser to remove remaining dust and residue after buffing. Confirm the nail plate appears clean before liquid prep begins.
-
Dehydrate when appropriate.
Apply a dehydrator if the product system recommends it to help reduce surface oil and moisture. Check that the nail reaches the condition described in the product instructions.
-
Prime if required.
Apply primer only when the product system calls for it. Confirm the nail surface matches the preparation condition described in the product instructions.
After the prep sequence is complete, confirm the natural nails are clean, shaped, and ready before moving to the application steps after prep.
This chart shows the key phases of prepping natural nails for gel tips: mechanical preparation, chemical preparation, and final verification.
Remove Old Product and Dry the Nail Plate
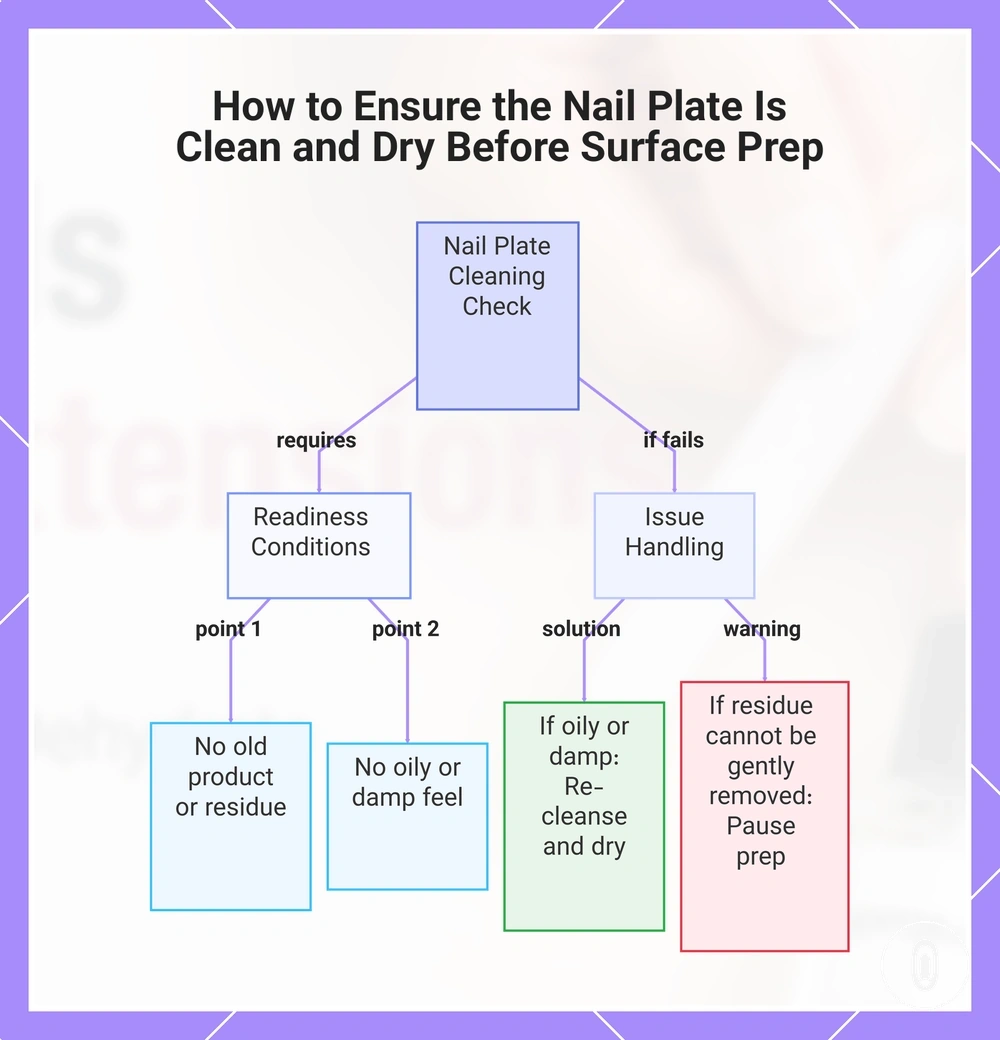
The nail plate should be free of old product, oil, moisture, dust, and residue before surface prep begins. Visible residue, moisture, and dust can interfere with surface prep, so confirm the nail plate is clean and dry before continuing.
- No visible old product or remaining product film
- No dust or loose residue on the clean surface
- No oily feel on the nail plate
- Nail plate is clean and dry
If the nail plate still feels oily or damp after cleaning, cleanse the nail surface again and allow it to dry before continuing. If old product or residue cannot be removed gently, pause surface prep rather than using aggressive removal methods.
This chart shows the readiness conditions for a clean, dry nail plate and the corrective actions if issues are found.
Shape the Free Edge
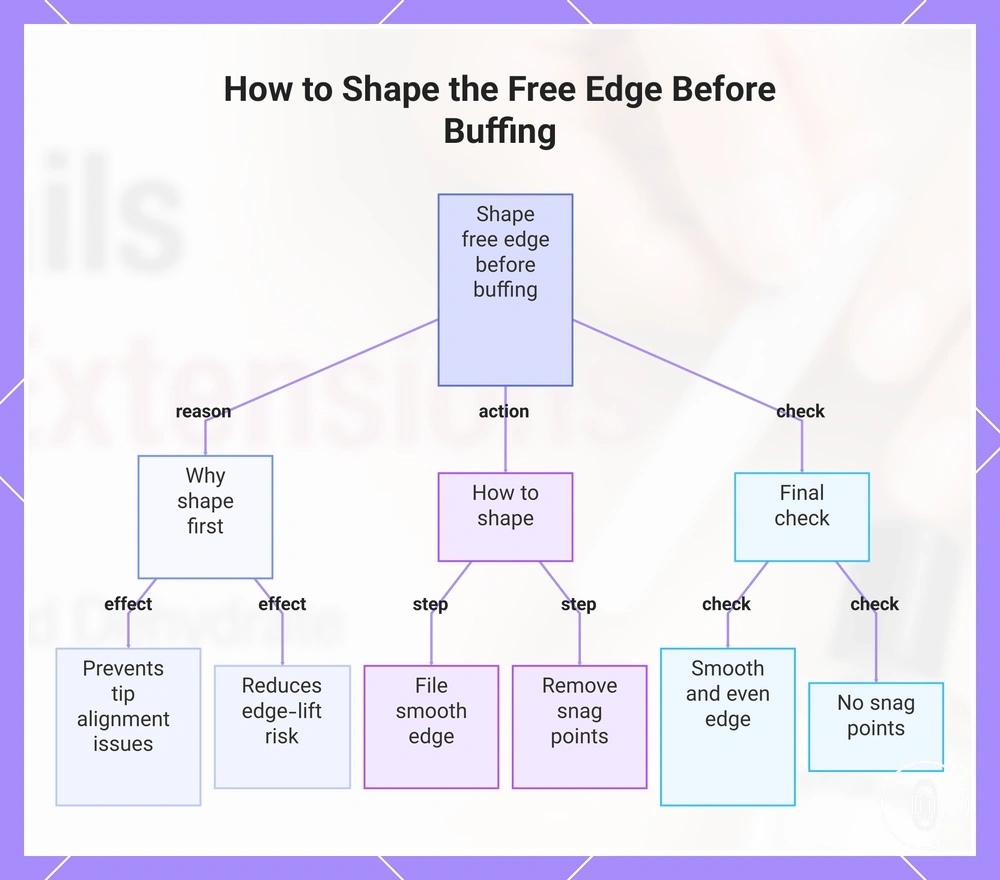
The free edge should be shaped before buffing because a rough or uneven edge can interfere with clean tip alignment. Use a file to create a smooth edge, remove snag points, and keep the edge shape consistent, as uneven areas may increase edge-lift risk depending on tip fit and application. For example, if one side of the free edge catches on fabric, continue filing gently until the edge feels smooth. Check that the free edge is smooth, even, and free of snag points before moving to the next prep step.
This chart shows the reason, action, and final check for shaping the free edge before buffing to ensure proper tip alignment and reduce edge-lift risk.
Push Back Cuticles and Remove Non-Living Tissue
Cuticle prep clears visible non-living tissue from the cuticle area where it overlaps the nail plate or sidewall before gel application. Non-living tissue on the nail plate can interfere with prep, so use a cuticle pusher with gentle pressure to move visible tissue away while keeping the surrounding skin uninjured. Keep the cuticle area clean and cleared before moving to the next prep step, as this may help reduce lifting risk.
If the cuticle area becomes painful, irritated, damaged, or inflamed, stop the process rather than applying more pressure or continuing cosmetic prep. Resume only when the area is suitable for preparation, and follow guidance on protecting natural nails as a boundary for safe cosmetic prep.
Lightly Buff Without Thinning the Natural Nail
Lightly buff the natural nail to remove surface shine rather than reduce nail thickness. The goal is to create a light surface texture on the nail plate that may improve contact with prep liquids and gel adhesive, not to thin the natural nail. Over-buffing can increase the risk of thinning, so use gentle pressure and stop once the shine is reduced. Check that the nail plate has a lightly textured finish without signs of excessive buffing.
Use these checks while buffing:
- Apply gentle pressure throughout the buffing step.
- Stop after the surface shine is reduced and a light surface texture is visible.
- Avoid repeated passes over areas that appear naturally thin.
Cleanse, Dehydrate, and Prime in the Right Order
Cleanse, dehydrate, and prime is the usual liquid prep order after mechanical nail preparation is complete. Each product prepares the nail plate for the next step, but the required dry condition or tacky condition may vary by product system and nail condition. Follow the product instructions if they specify a different primer type, prep order, or surface condition.
- Cleanser: Use the cleanser first to remove remaining dust and residue after mechanical preparation. Check that the nail plate is clean before applying the dehydrator.
- Dehydrator: Apply the dehydrator after the cleanser to help reduce surface oil and moisture. Continue when the nail reaches the dry condition described in the product instructions.
- Primer: Apply the primer after the dehydrator if the product system requires it. Confirm whether the primer should remain in a dry condition or a tacky condition according to the product instructions before moving to the next gel-extension step.
Prep Conditions That Affect Gel Extension Adhesion
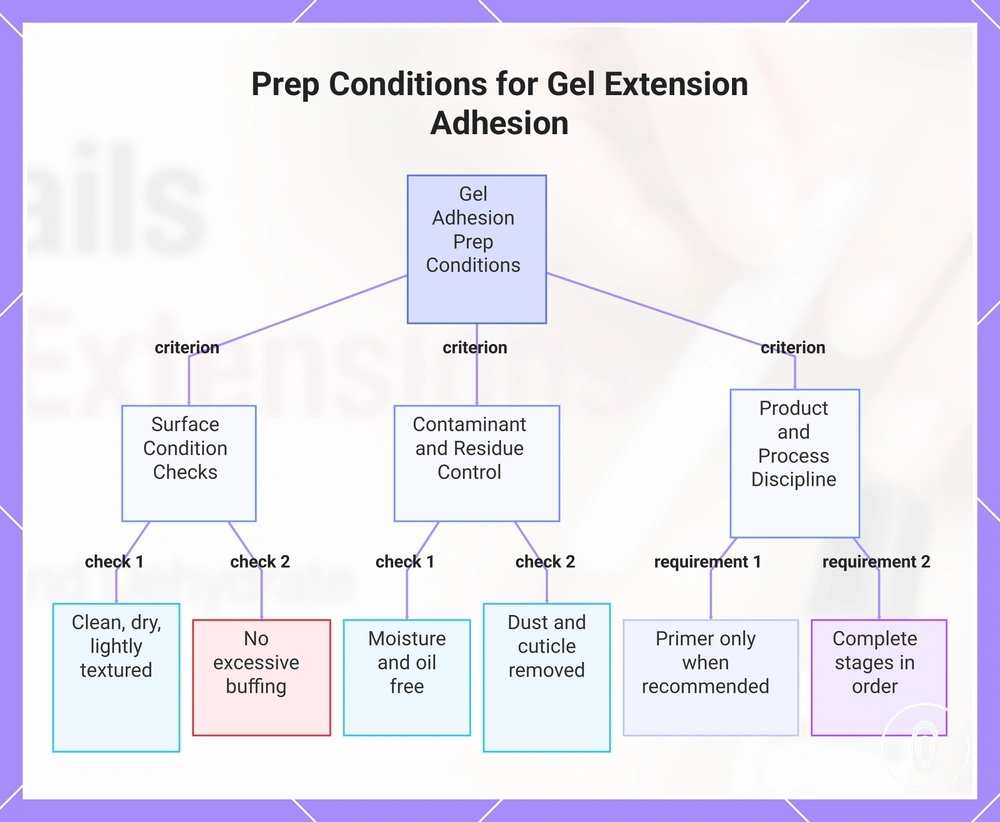
Adhesion depends on nail plate condition and prep conditions rather than on one product alone. Surface preparation, liquid prep, and the order of each step all influence adhesion readiness. Use the following criteria to assess whether the nail is ready before gel application.
- Nail plate condition: Check that the surface is clean, dry, and lightly textured without signs of excessive buffing.
- Moisture and oil: Excess moisture or oil may reduce adhesion readiness. Continue only when the nail reaches the condition described in the product instructions.
- Dust: Remove buffing dust before liquid prep. A clean nail plate is a better starting point for the next product.
- Cuticle residue: Clear visible cuticle residue from the nail plate and sidewall areas, as remaining tissue may increase lifting risk.
- Buffing level: Remove surface shine without thinning the natural nail. Over-buffing can increase the risk of unnecessary surface damage.
- Primer use: Use primer only when the product system recommends it and follow the product instructions for surface condition.
- Timing: Complete each prep stage in the intended order so the nail remains ready for the next product.
Moisture, oil, dust, and cuticle residue can reduce prep quality if they remain on the nail plate. Clean the surface before liquid prep and confirm that the nail is clean and dry before continuing.
Buffing level, primer use, and timing work together to support adhesion readiness. A lightly textured surface and the correct primer condition may improve preparation when they match the product instructions. Inconsistent prep conditions can contribute to lifting from poor prep.
If the natural nail appears thin or sensitive, a gentler preparation approach may be more appropriate than additional buffing. Choose prep products and tools according to nail plate condition, the product system, and the preparation stage rather than using every product by default.
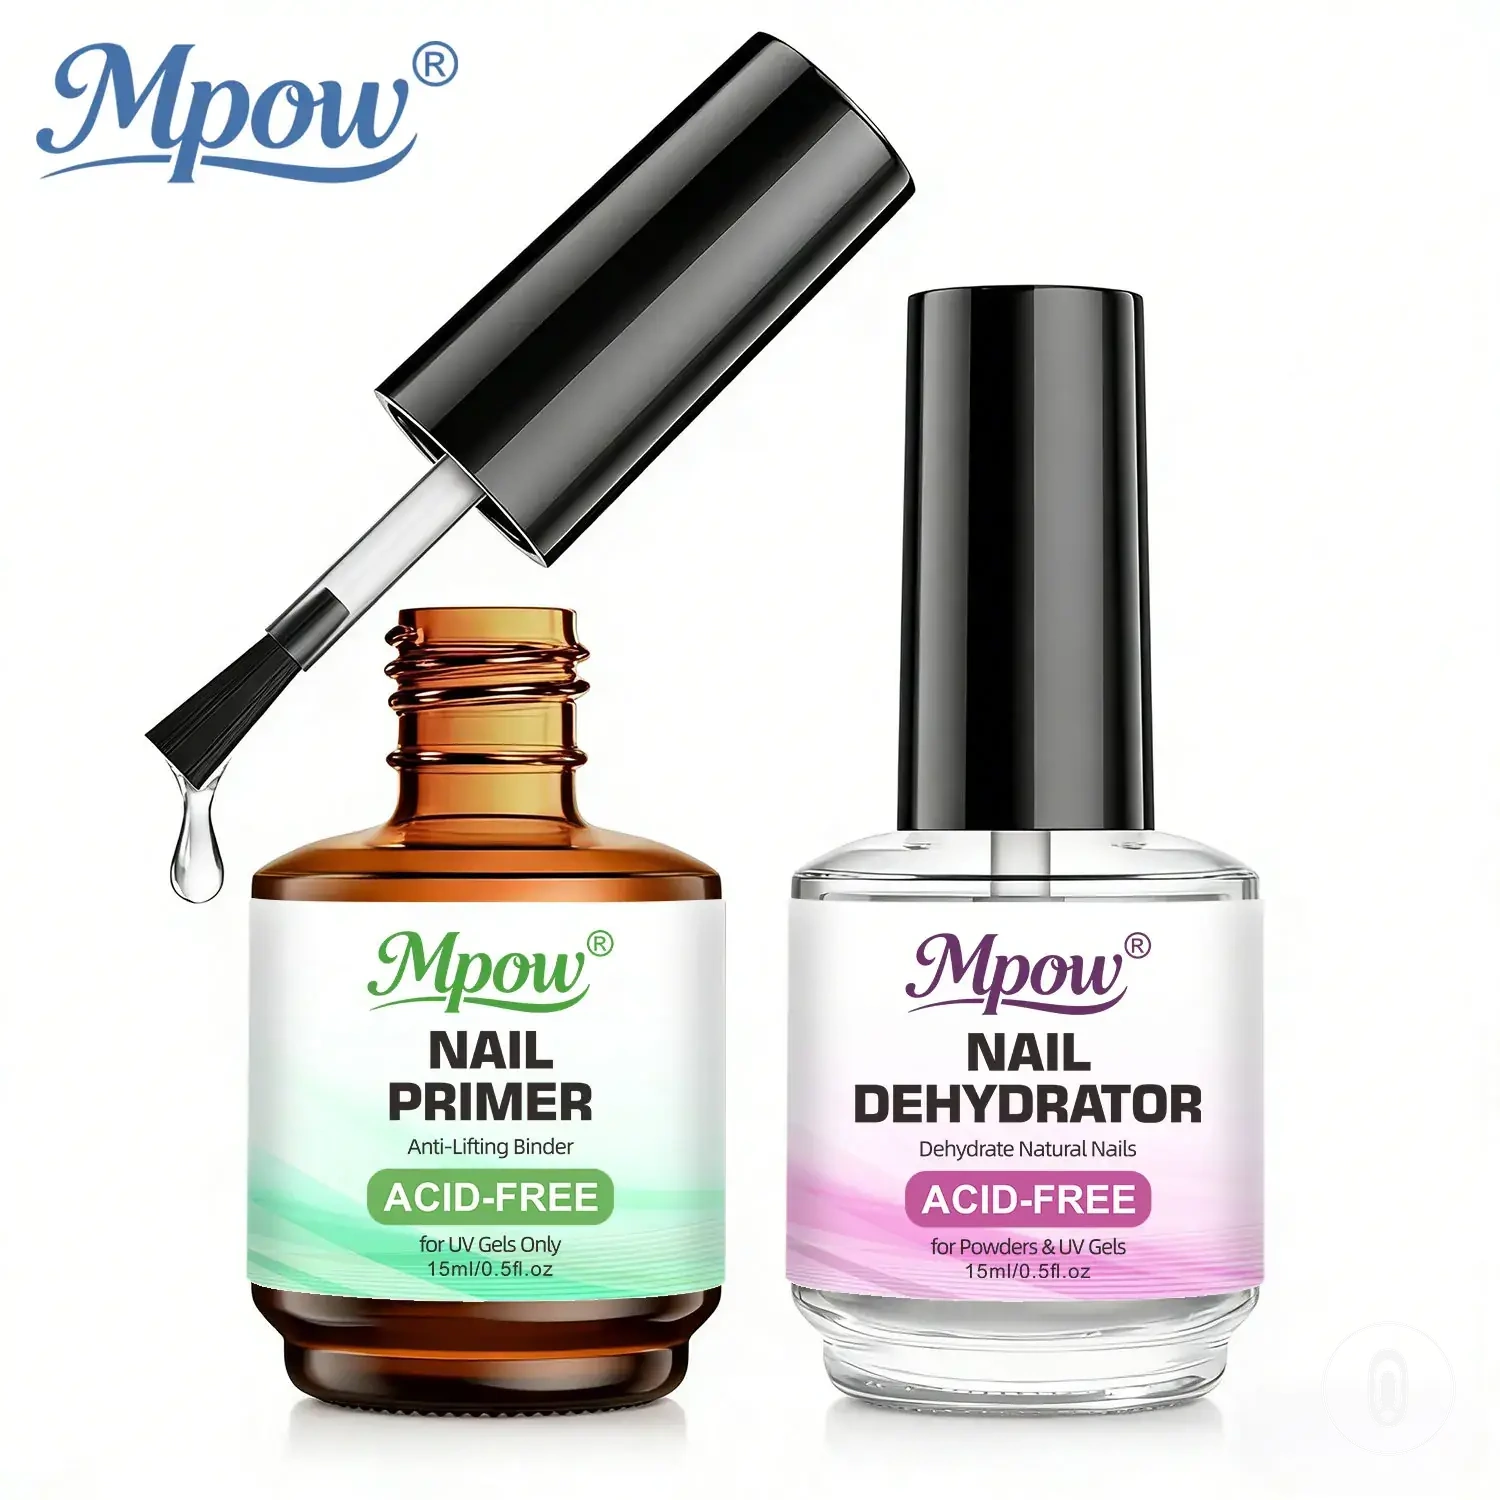
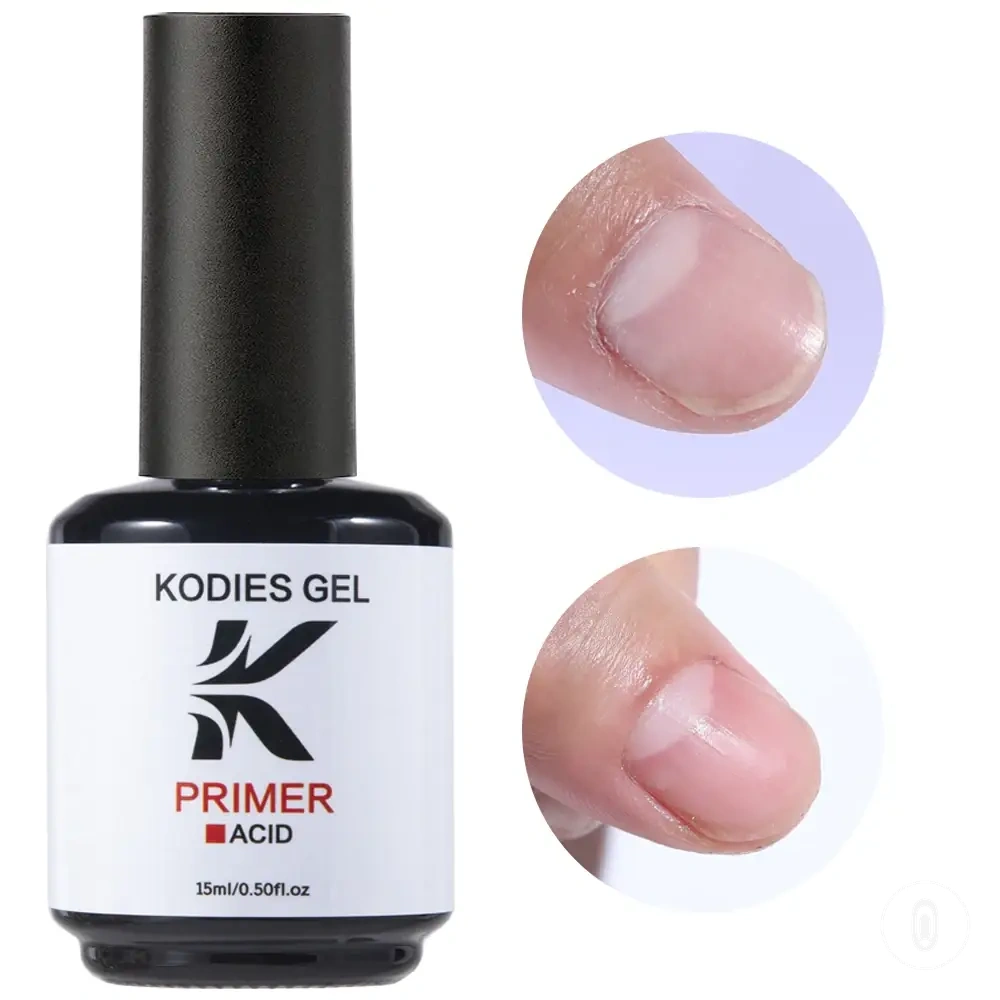
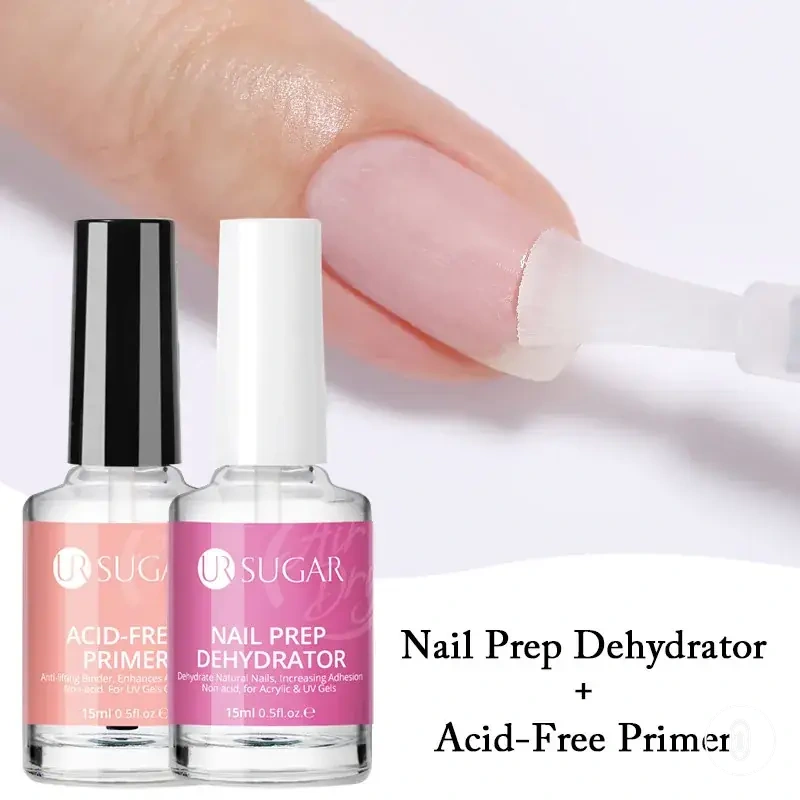
Here are product examples that may make comparison easier. Before buying, always review the compatibility criteria, essential features, and product details.
This chart shows the key prep conditions to check for ensuring gel extension adhesion, covering surface condition, contaminant control, and product discipline.
Prep Mistakes That Lead to Lifting or Peeling
Prep mistakes can contribute to lifting or peeling when residue, cuticle tissue, moisture, or over-buffed nails interfere with adhesion between the natural nail and gel extensions. These signs do not prove that prep is the only cause, so compare each visible problem with the likely surface condition before correcting it.
| Prep mistake | Likely condition | What it may look like | Prevention within prep |
|---|---|---|---|
| Residue left on the nail plate | Dust, oil, or product film remains before liquid prep | Early lifting or peeling where contact may be incomplete | Cleanse the nail plate and confirm that visible residue is removed before continuing |
| Moisture remains on the surface | The nail plate has not reached the required dry condition | Lifting in areas where moisture may have interrupted adhesion | Allow the nail to reach the condition described in the product instructions before the next prep product |
| Cuticle tissue remains | Non-living cuticle tissue overlaps the nail plate or sidewall | Lifting near the cuticle area or sidewall | Clear visible non-living tissue with gentle pressure while keeping the surrounding skin uninjured |
| Over-buffing | The nail plate has been thinned or irritated by excessive surface work | Peeling, sensitivity, or an uneven preparation surface | Use light pressure and stop after the surface shine is reduced |
| Under-buffing | Surface shine or smoothness remains where light texture is needed | Reduced contact and possible early lifting | Lightly refine the surface without removing unnecessary nail thickness |
| Wrong liquid order | Cleanser, dehydrator, or primer is used out of sequence or under the wrong surface condition | Uneven application readiness or lifting linked to incomplete prep | Follow the product instructions for order, dry condition, and primer behaviour |
Residue, cuticle tissue, moisture, and over-buffed nails are prep-specific conditions that may increase lifting risk. Correcting the surface condition before application can reduce preventable interference, while broader diagnosis of lifting from poor prep may require checking where and how the problem appears.
Lifting can also result from poor tip fit, curing issues, or other application errors rather than prep alone. When the nail plate appears properly prepared, the next check should move outside the prep boundary instead of repeating surface work.
When to Pause Prep to Protect Natural Nails
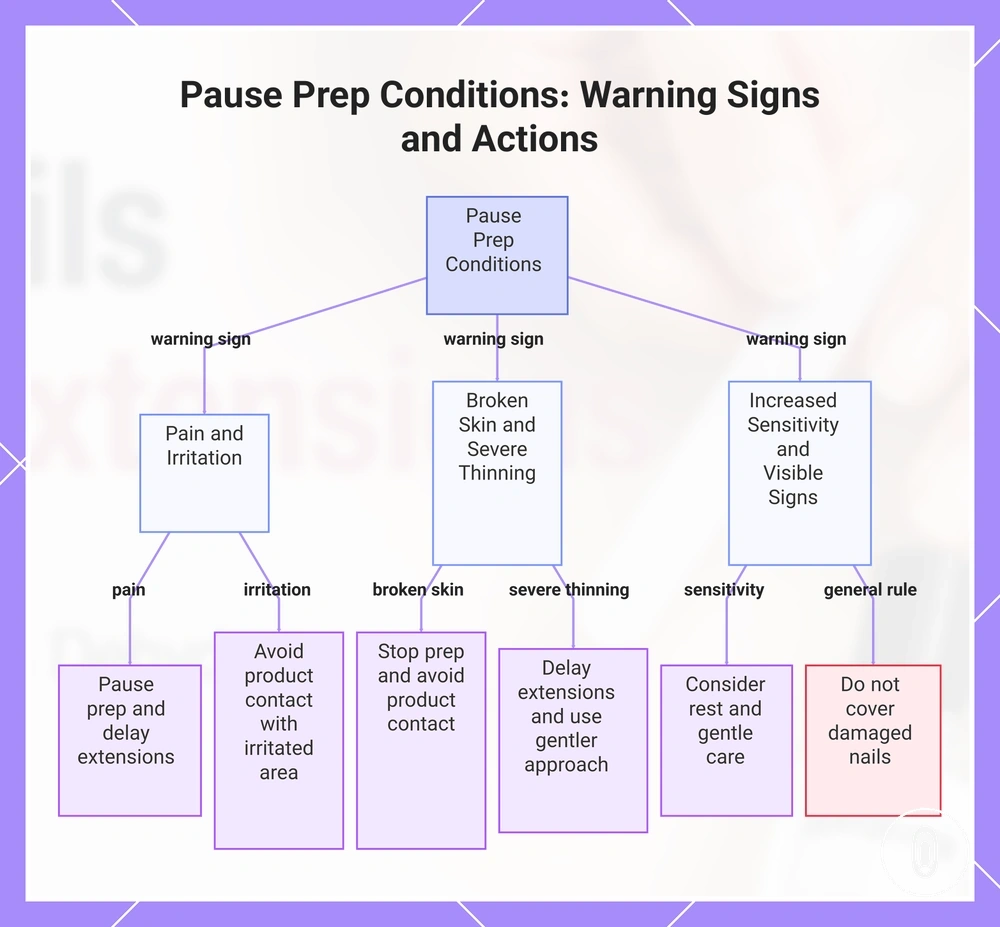
Pause prep when the natural nail or surrounding skin shows warning signs such as pain, broken skin, severe thinning, or irritation. Continuing cosmetic prep under these conditions can increase discomfort or place additional stress on the nail area, so delaying gel extensions is the safer decision.
If pain, broken skin, severe thinning, or irritation develops during prep, stop the process rather than continuing with more filing or product application. Avoid product contact with affected areas and consider rest or gentle care until the nail condition is more suitable for cosmetic preparation. For more guidance on cosmetic prep boundaries, see protecting natural nails.
- Pain: Pause prep and delay gel extensions until the discomfort has settled.
- Broken skin: Stop prep and avoid product contact with the affected area.
- Severe thinning: Delay gel extensions and choose a gentler approach instead of additional buffing.
- Irritation: Pause prep if the nail or surrounding skin becomes irritated during preparation.
- Increased sensitivity: Consider rest and gentle care before deciding whether to continue cosmetic prep.
- Visible warning signs: Do not cover painful, broken, or severely thinned nails with gel extensions.
This chart shows the warning signs that indicate when to pause cosmetic nail prep and the corresponding actions to protect natural nails.