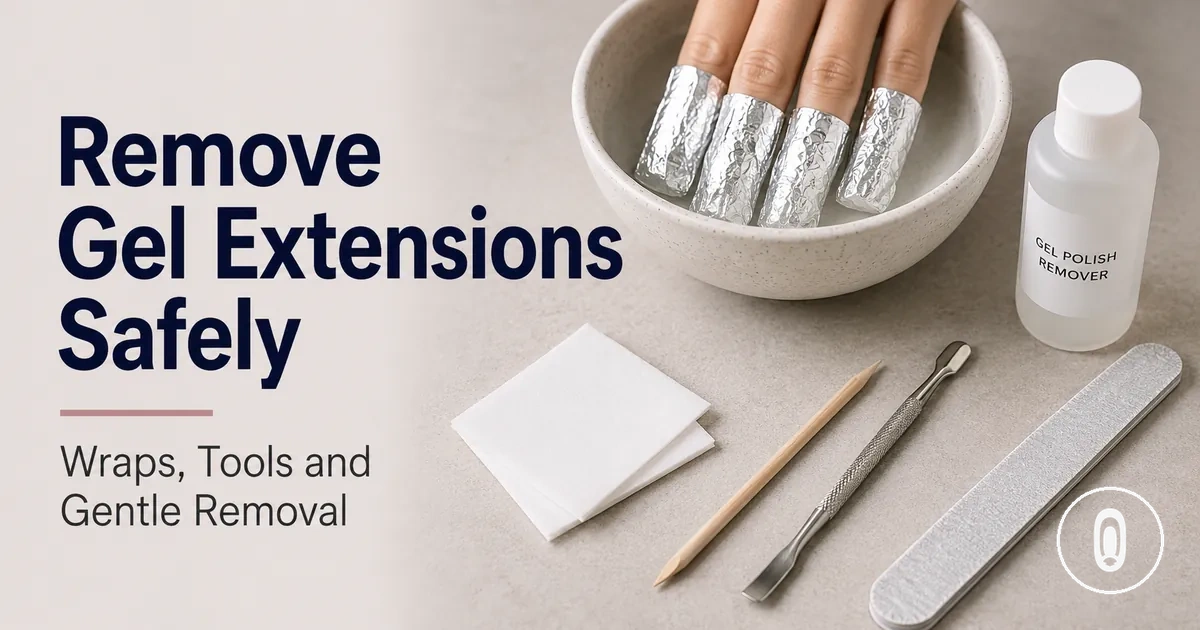
Safe At-Home Gel Nail Extension Removal
Safe removal of at-home gel nail extensions starts by softening the gel bond before trying to separate the product from the natural nail. The safe frame is to soften, wait, check the softened gel, and avoid force.
Soak-off removal uses remover wraps, cotton pads, or soak-off clips to maintain acetone contact after the top seal has been lightly opened. Product type, gel thickness, bond strength, and soak response can change how the removal process behaves, so the broader gel nail extension kit hub should not be read as proof that every gel extension system removes in the same way. Routine soak-off may be suitable for soft gel tips that soften as expected, while pain, visible nail damage, or material that remains firmly attached calls for more caution.
Forced peeling can lift layers from the nail plate instead of releasing only the extension material. A safer process checks whether the gel has softened, repeats the soak when resistance remains, and limits pressure to reduce the risk of thinning, sensitivity, and further nail damage. Before beginning the detailed steps, assess the extension condition and prepare the correct remover wraps, filing tools, protection items, and aftercare supplies.
Before Removing Gel Nail Extensions at Home
Remove at home only when the extension and nail condition suggest that gentle soak-off is appropriate. Removal readiness depends on lifting, product thickness, soak response, and the condition of the natural nail.
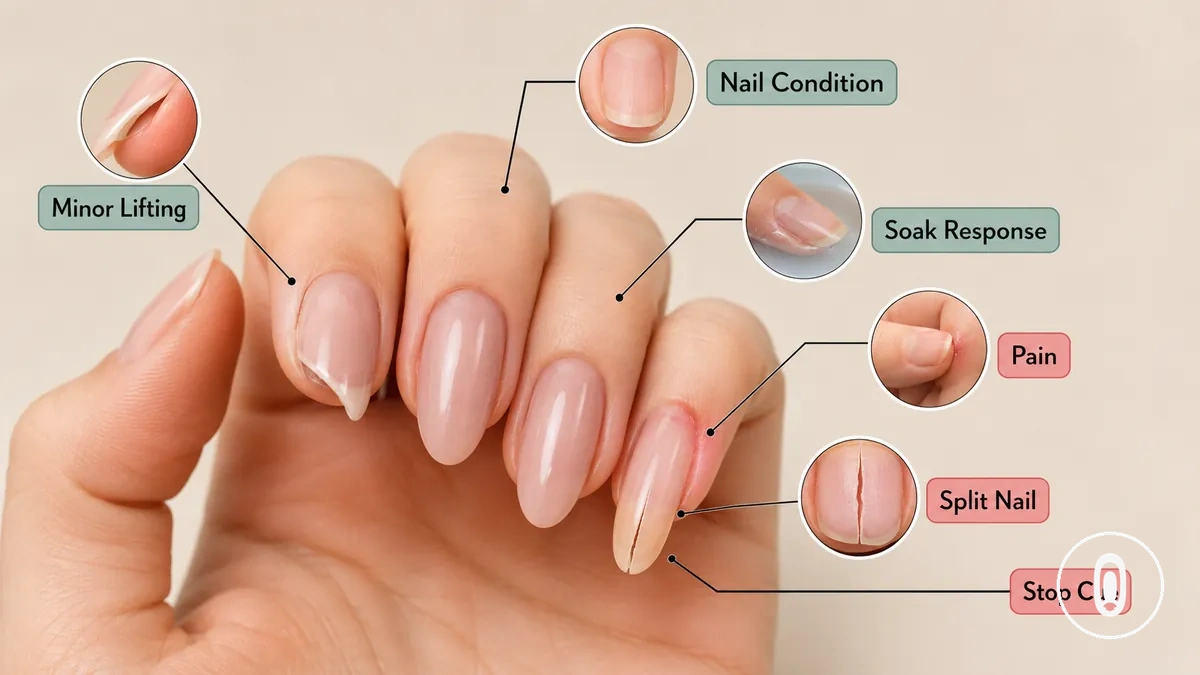
If an extension shows minor looseness, lifting, or edge wear, it may respond to careful filing and soaking. Thick application, cracking, or limited soak response can change the removal decision and may require more patience or professional help. Product type, maintenance history, and extension wear also affect removal timing. Painful, infected, split, or severely lifted nails should not be treated like routine soak-off removal.
Starting too early or continuing despite warning signs can increase the risk of nail damage. Use the checklist to separate safe-to-continue cues from stop-or-delay cues, and stop if pain, a split nail, or signs of infection develop.
- Safe-to-continue cue: Removal timing matches the current extension condition rather than convenience alone.
- Safe-to-continue cue: Only minor lifting or looseness is present without significant discomfort.
- Safe-to-continue cue: The filing and soak response shows that the product is softening rather than resisting removal.
- Stop-or-delay cue: Persistent pain, marked soreness, or discomfort is present.
- Stop-or-delay cue: The nail surface shows a split nail, visible damage, or a possible infection sign.
- Stop-or-delay cue: Product thickness or limited soak response keeps the extension firmly attached.
Tools for Gel Extension Soak-Off Removal
Removal tools support safe gel extension removal by helping control soaking, filing, lifting, protection, and aftercare. Each tool has a specific function, and correct use is more important than having a larger collection of tools.
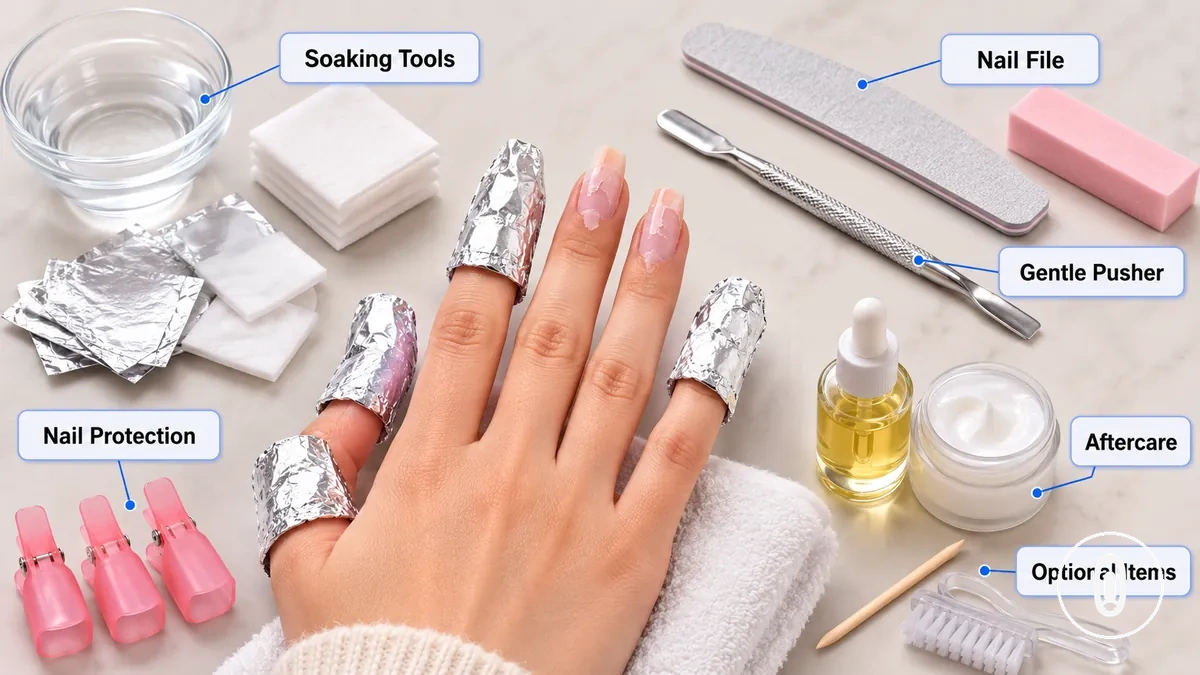
Using the wrong tool at the wrong stage can increase abrasion risk or make removal more difficult. A nail file is typically used to reduce the top seal, while remover wraps, cotton pads, and soak-off clips help maintain acetone contact during soaking. A cuticle pusher or orangewood stick should be used only after the gel has softened and with gentle pressure against the natural nail. Essential removal tools support the removal process, while comfort or cleanup items are optional.
Core removal tools are often included with at-home gel extension kits, although kit contents can vary. For a closer look at typical kit contents, see removal tools in a kit. The checklist below groups tools by their function rather than by product type.
- Soaking: Remover wraps, cotton pads, foil wraps, and soak-off clips help maintain acetone contact while the gel softens.
- Filing: A nail file helps reduce the top seal, while a buffer can smooth remaining material with controlled use.
- Lifting: A cuticle pusher or orangewood stick is used with gentle pressure only after the gel has softened.
- Protection: Careful tool use helps reduce unnecessary pressure on the natural nail during removal.
- Aftercare: Aftercare items help support the nail and surrounding skin once soak-off removal is complete.
- Optional comfort items: Cleanup accessories may improve convenience but do not replace correct soaking or careful technique.
Remover Wraps, Soak-Off Clips, and Cotton Pads
Remover wraps, soak-off clips, and cotton pads form the soaking delivery system for gel extension removal. Their purpose is to maintain steady remover contact with the gel surface so softening can occur under suitable conditions. Together, these items hold remover against the gel surface.
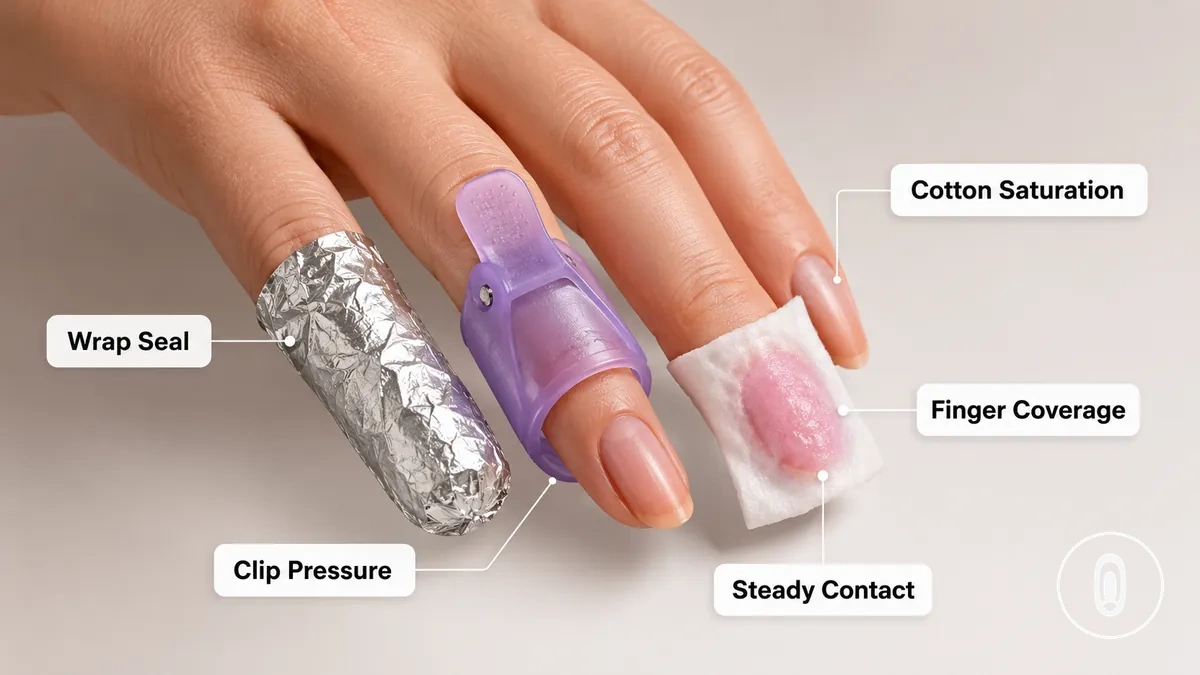
If remover contact becomes uneven, softening may vary across the nail. A secure wrap seal, appropriate clip pressure, complete finger coverage, and natural heat retention can help maintain consistent contact quality without excessive pressure. Check the fit if the cotton pads begin drying out or the soak response appears uneven.
- Saturation: Cotton pads should remain sufficiently saturated to maintain consistent remover contact with the gel surface.
- Seal: Remover wraps or foil wraps should form a close seal to help reduce evaporation during soaking.
- Clip pressure: Soak-off clips should hold the wrap in place without applying excessive pressure to the finger.
- Finger coverage: Complete finger coverage and natural heat retention can help maintain steady contact throughout the waiting period.
- Drying out: If cotton pads dry before the gel softens, remover contact may decrease and the soak response can become less consistent.
Files, Buffers, and Cuticle Pushers
Nail files, buffers, and cuticle pushers provide mechanical support during gel extension removal by opening the top seal and helping remove only softened residue. A nail file can reduce the top seal to improve remover penetration, while a buffer smooths softened residue and a cuticle pusher checks whether the gel has released. These tools should open the top seal and test softened gel, not remove attached product by force.
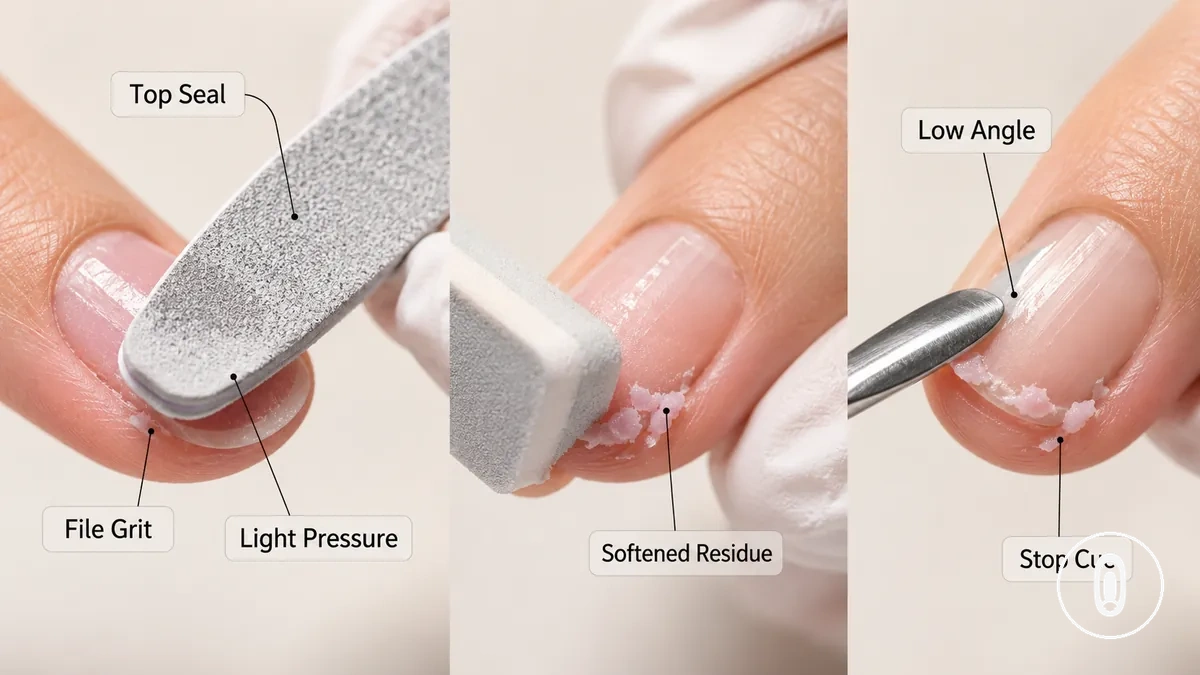
Caution: Dulling the top seal is different from thinning the natural nail. Keep the tool angle low, use light pressure, and stop if resistance remains to help reduce abrasion risk and unnecessary contact with the nail plate.
Use the checklist below to match each tool with its function and the main condition that affects safe use.
- Nail file: Select suitable file grit and use light pressure to reduce the top seal and support remover penetration without excessive thinning.
- Buffer: Use the buffer surface to smooth softened residue with controlled contact, as repeated buffing may increase abrasion risk on the nail plate.
- Cuticle pusher: Hold the cuticle pusher at a low tool angle and lift only softened residue. Stop if resistance remains.
- Pressure and contact area: Keep pressure light and limit the contact area to softened residue rather than pressing across the natural nail.
How to Soak Off Gel Nail Extensions
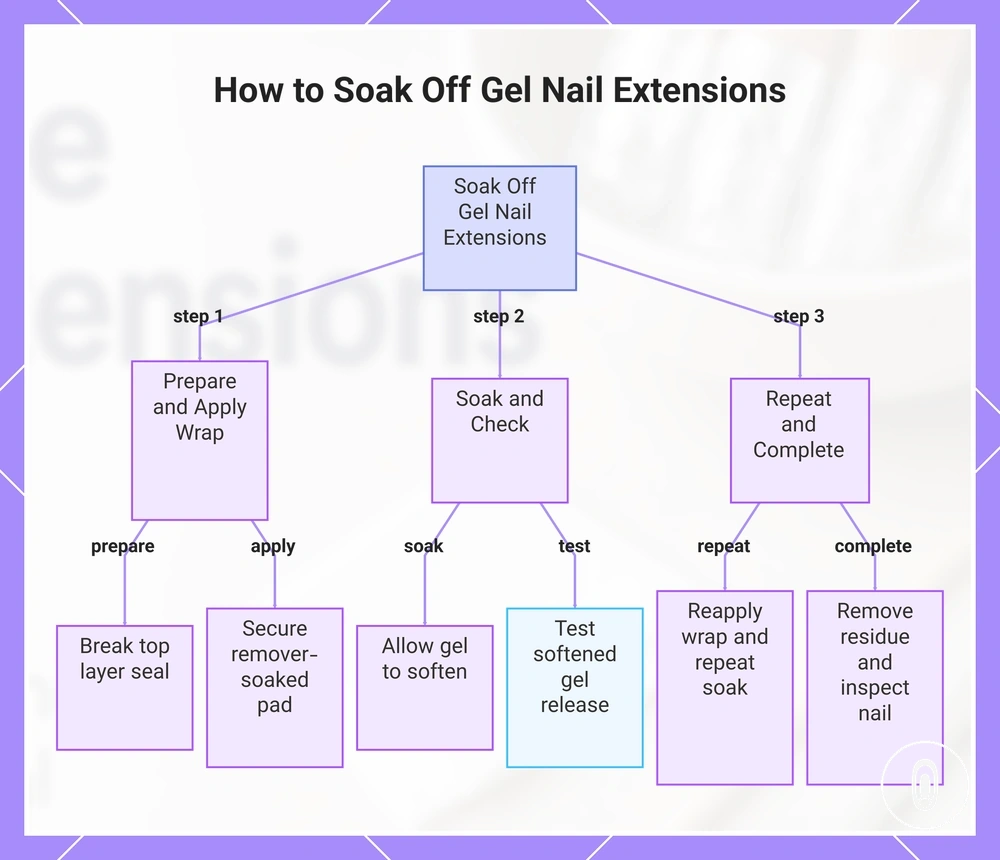
Soak off gel nail extensions by softening the product until it releases with gentle removal rather than force. The process depends on gel thickness, product type, remover wrap seal, and preparation of the top layer, so safe soak-off follows a soften, check, and repeat soak sequence instead of a fixed timing promise.
- Prepare the top layer. Lightly file the top layer to break the seal and support remover penetration. Stop once the surface is opened, then apply the remover wrap.
- Apply the remover wrap. Place a remover-soaked cotton pad over the gel nail extensions and secure it with a remover wrap or soak-off clip to maintain consistent remover contact. Adjust the wrap if it becomes loose before continuing.
- Allow the gel to soften. Soak-off time may vary with gel thickness, product type, wrap seal, and previous filing. Check for softened gel instead of relying on a fixed waiting period.
- Test for gentle removal. Use a cuticle pusher with light pressure to check whether the softened gel releases. Caution: If resistance remains, stop and move to the next step instead of forcing the product from the natural nail.
- Repeat soak if needed. Reapply the remover wrap and repeat soak where firm areas remain attached. Continue only after additional softening is visible.
- Complete the removal. Gently remove softened residue and inspect the natural nail. If attached product remains, repeat the soak rather than increasing pressure.
This chart shows the step-by-step process for safely removing gel nail extensions by softening and gentle release, including preparation, soak and check, and completion.
Shorten the Extension Length
Shortening the extension length reduces leverage at the free edge and can make soaking easier before the main removal process begins. Clip carefully from the free edge using controlled pressure and a suitable cutting angle, as cracking or stress may vary with the remaining extension thickness and the condition of the natural nail. Reduce leverage first, then continue with filing and soaking rather than cutting too close or trying to snap the extension off.
File the Sealed Top Layer
The sealed top layer should be lightly filed to remove the shiny surface so remover penetration can begin more effectively. File only until the top coat becomes a dull surface, as the amount of filing may vary with the top coat, color layer, and builder or gel adhesive thickness. Caution: Dulling the sealed top layer prepares the surface for soaking, not for removing the product by filing, so stop before the natural nail is exposed.
- Pressure: Use light file pressure to open the surface seal without filing deeply into the gel.
- Visual cue: A dull surface is the main stopping cue, while remaining gel can continue to soften during soak-off.
- Stopping point: Stop once the sealed top layer has been opened for remover penetration rather than continuing toward the natural nail.
Wrap and Soak the Extensions
Wrap and soak the extensions by keeping steady remover contact across the nail surface so the gel can soften before removal. Cotton saturation, full finger coverage, and a secure foil or clip seal are more important than a fixed soak duration, which may vary with gel thickness, filing, and the quality of the wrap seal.
- Wrap the nail: Place saturated cotton with remover over the nail surface and secure it with a foil wrap or clip so continuous contact is maintained.
- Allow the soak: Leave the wrap in place for a soak duration that depends on the gel thickness and soak response. Avoid allowing the cotton to dry or using aggressive heat to speed the process.
- Check one nail: Remove one wrap first to check one nail before removing the remaining wraps. If the gel still resists gentle lifting, rewrap and continue soaking.
- Repeat if needed: Continue soaking until the product softens sufficiently, as separation depends on steady contact and checking before applying force.
Gently Push Away Softened Gel
Only softened gel should move easily with gentle pressure from a cuticle pusher held at a low angle. If resistance appears, stop and soak again rather than trying to move attached product, because resistance may indicate that the gel has not softened enough to separate from the natural nail surface.
- Movement cue: Softened gel should glide away with light pressure, while remaining residue may require additional soaking before removal.
- Pressure cue: Keep the cuticle pusher at a low angle and use gentle pressure so the tool follows the softened gel instead of pressing against the natural nail.
- Resistance response: If resistance remains, rewrap and soak longer before trying again. A buffer may be used only for any remaining residue after the gel has released.
Natural Nail Protection During Removal
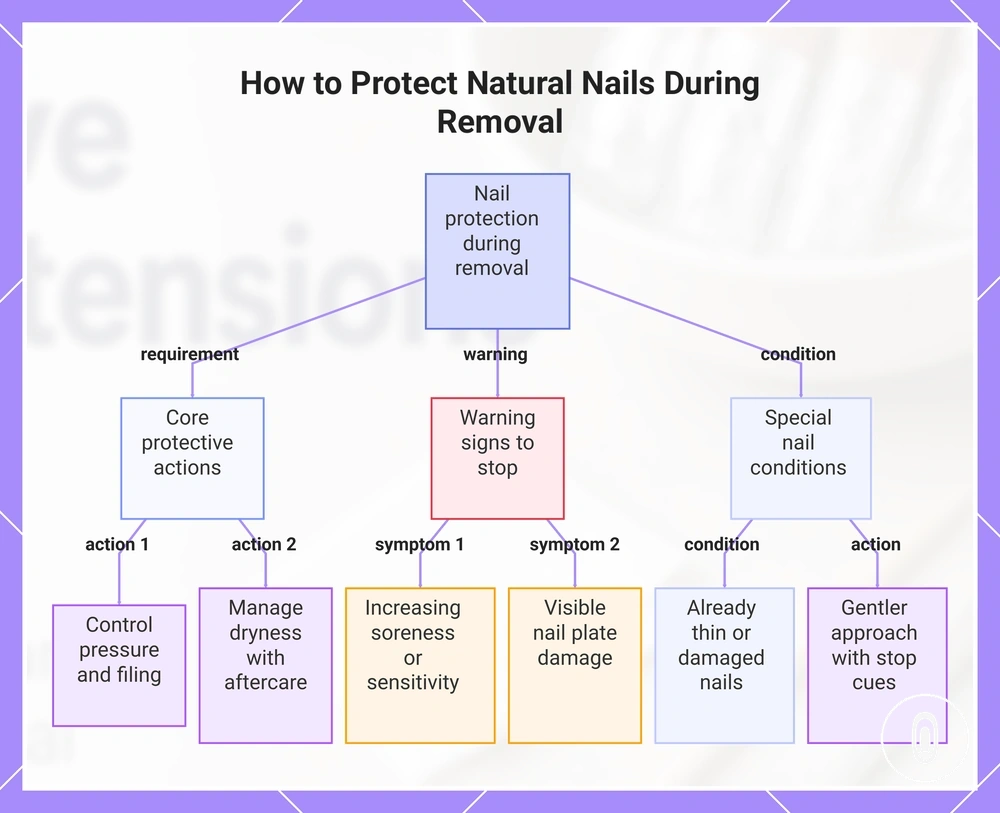
Natural nail protection during removal depends on reducing unnecessary pressure, limiting over-filing, and managing dryness while the gel is being removed. Nail plate thinning, sensitivity, and soreness may become more likely when abrasion or pressure increases, so damage reduction focuses on controlling pressure, reducing dryness, and protecting the nail surface rather than preventing every possible issue.
If the natural nail is already thin, sore, over-filed, or previously damaged, use a gentler approach and treat resistance or increasing discomfort as a stop cue. Mild dryness after acetone exposure can often be managed with appropriate aftercare, while increasing sensitivity, persistent soreness, or visible nail plate damage are warning signs to pause removal. Gentle handling is especially important when the nail surface already appears weakened.
When dryness remains within normal limits, aftercare and moisture support may help the natural nail recover after removal. If warning signs such as increasing soreness, sensitivity, or nail plate thinning develop, stop the removal process instead of adding more pressure or filing. For more detailed guidance, see protect natural nails during removal.
- Avoid increasing pressure when resistance remains.
- Avoid over-filing the nail plate to remove attached product.
- Avoid continuing if soreness, increasing sensitivity, or another stop cue develops.
- Avoid repeated acetone exposure without appropriate aftercare for dryness.
- Avoid treating weakened or previously damaged nails as routine removals.
This chart outlines the key protective actions, warning signs, and special considerations for protecting natural nails during gel removal.
When Gel Extensions Do Not Soften Enough
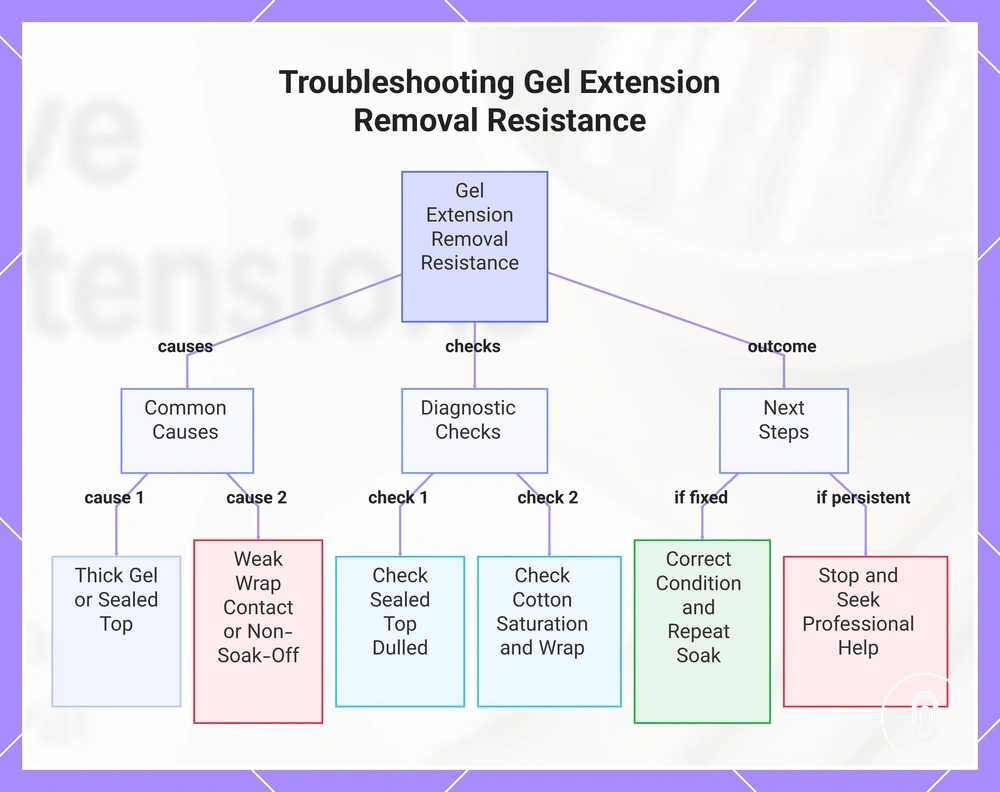
When gel extensions do not soften enough after soaking, resistance is a diagnostic signal rather than a reason to apply more pressure. The next step is to identify the likely cause before continuing, because resistance often indicates that the removal conditions need adjustment.
Resistance may be linked to thick gel, an incompletely filed sealed top layer, weak wrap contact, or non-soak-off material. Check whether the sealed top layer was dulled, the cotton remained saturated, and the wrap stayed in close contact throughout the soak. If one of these conditions was not met, correct it and repeat the soak before attempting removal again.
If the gel still does not soften after another soak, compare the symptom with the likely cause before choosing the next action. Thick gel or a sealed top layer may respond to improved surface preparation, while weak wrap contact may require better cotton saturation or a tighter seal to reduce evaporation. If the product appears to be non-soak-off material, treat that as a stop condition rather than continuing repeated soak attempts.
If resistance remains after these checks, stop the at-home removal process instead of increasing pressure or attempting aggressive removal. A resistant product that does not soften may require professional help, particularly when the natural nail becomes sore or shows signs of damage.
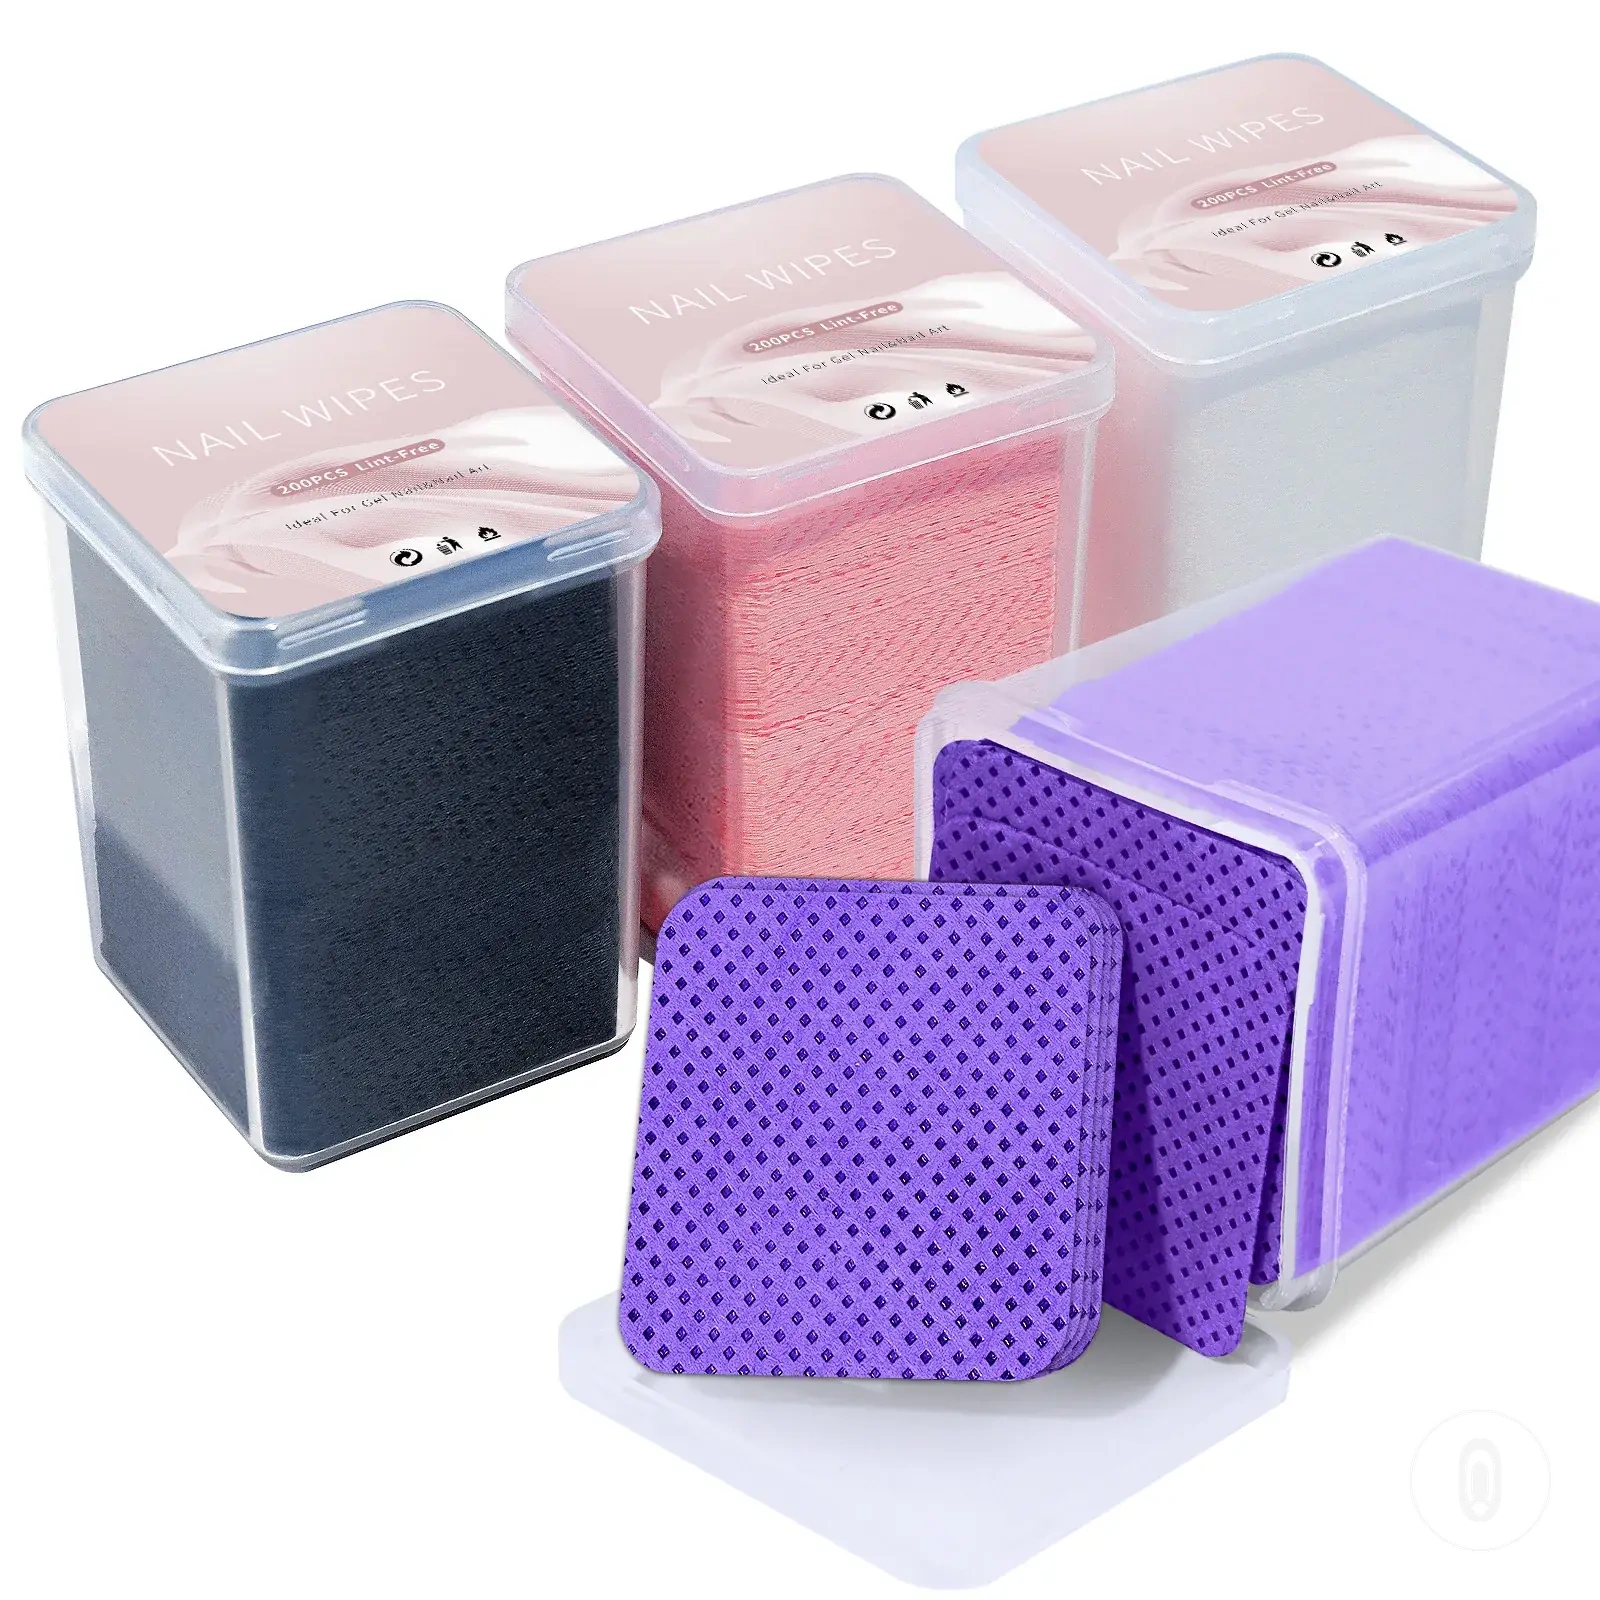
Here are product examples that may make comparison easier. Before buying, always review the compatibility criteria, essential features, and product details.
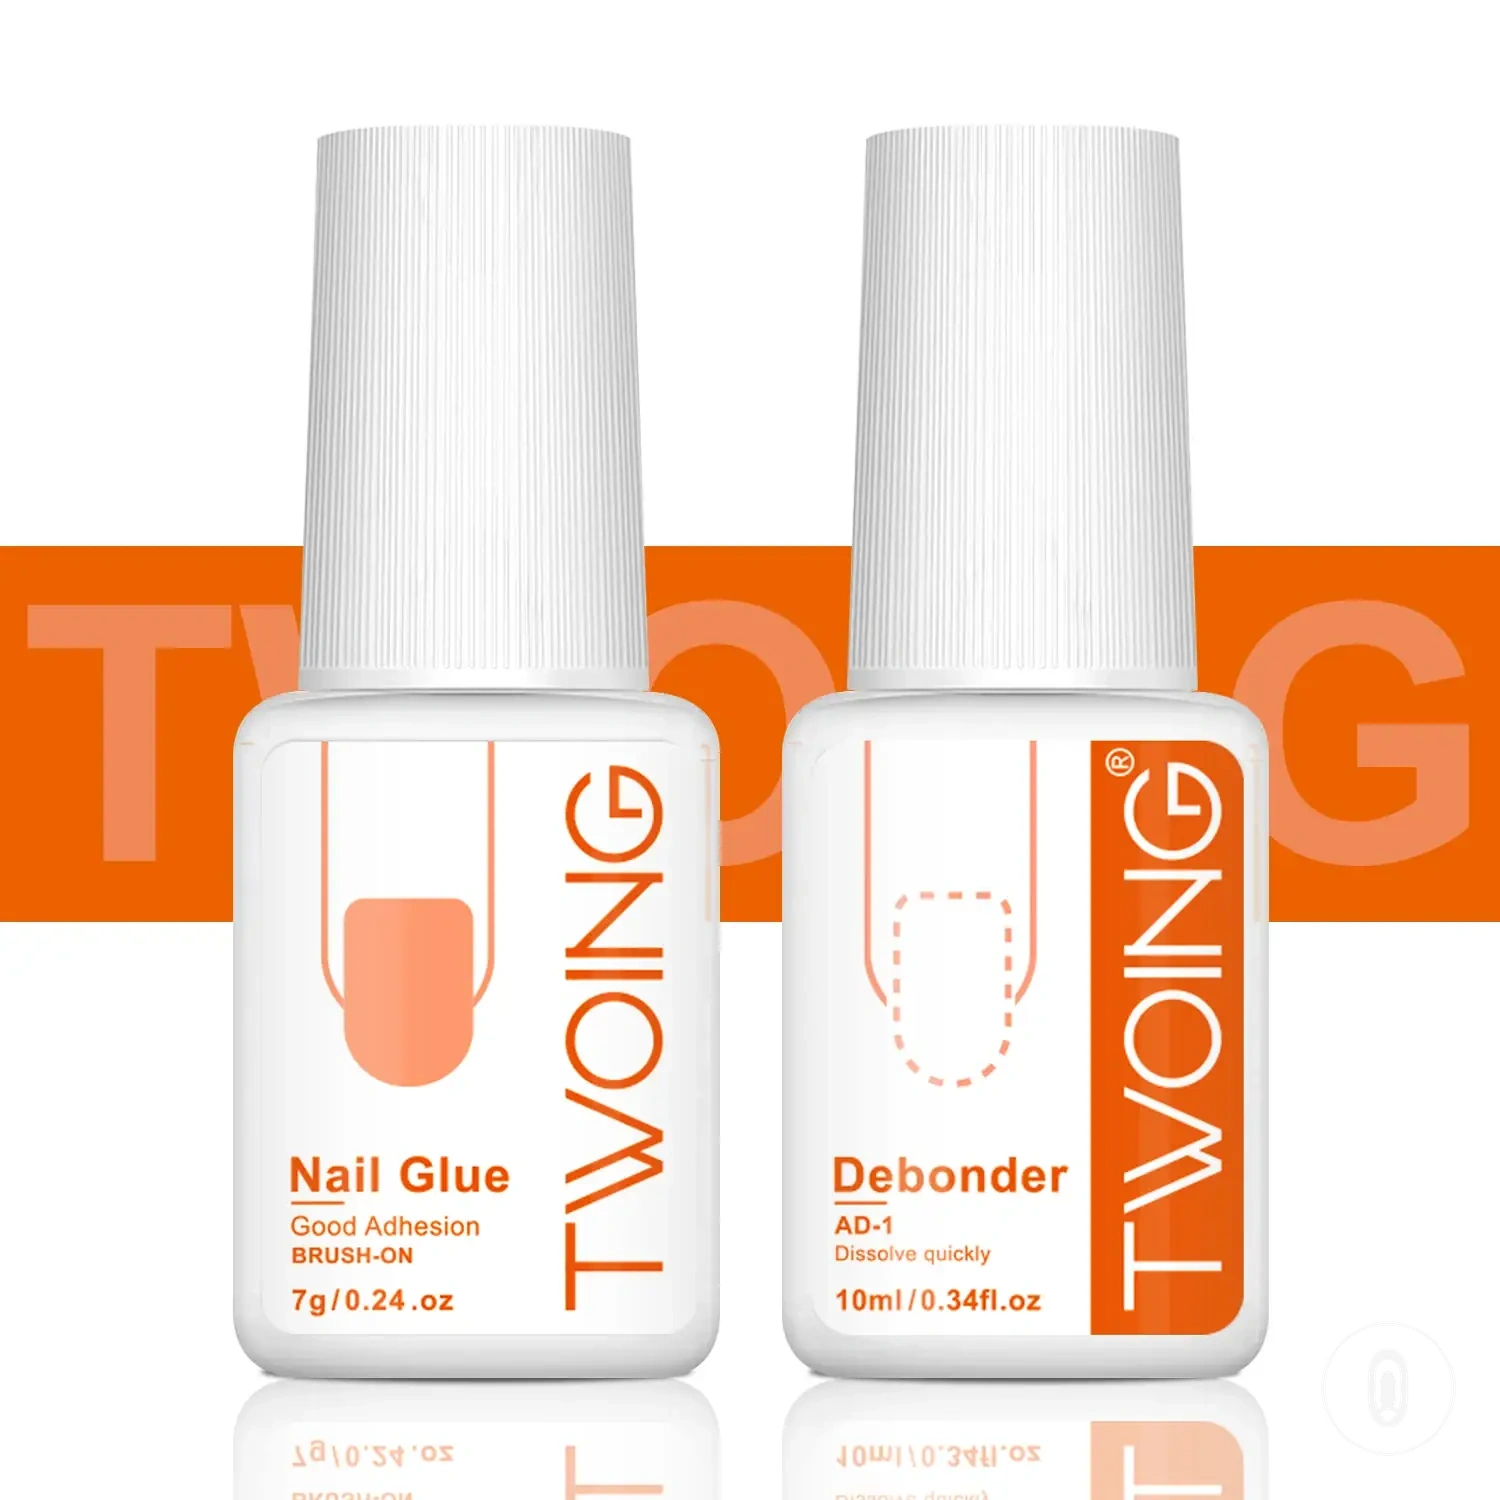
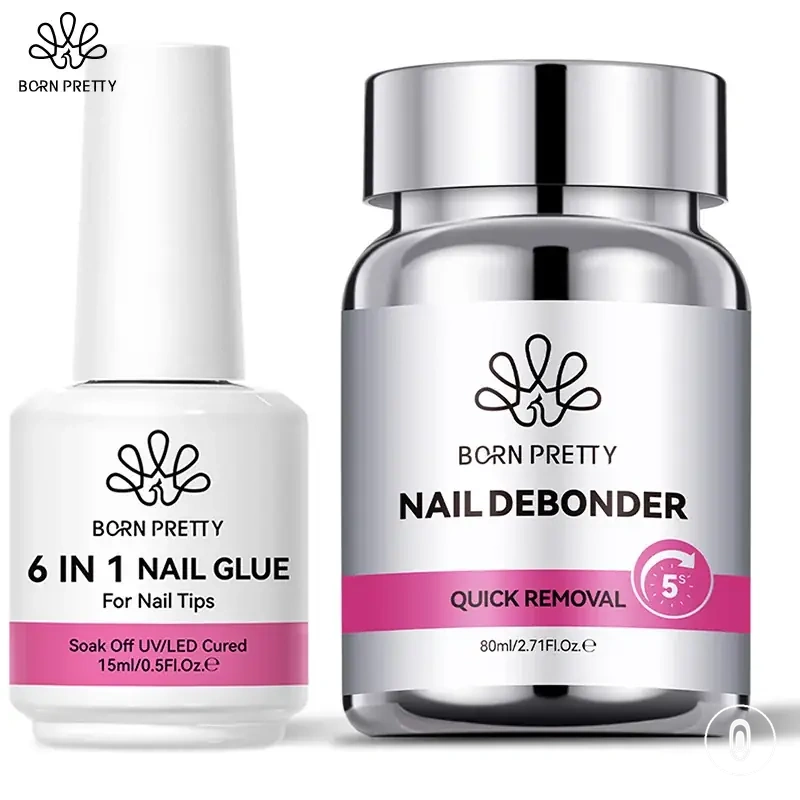
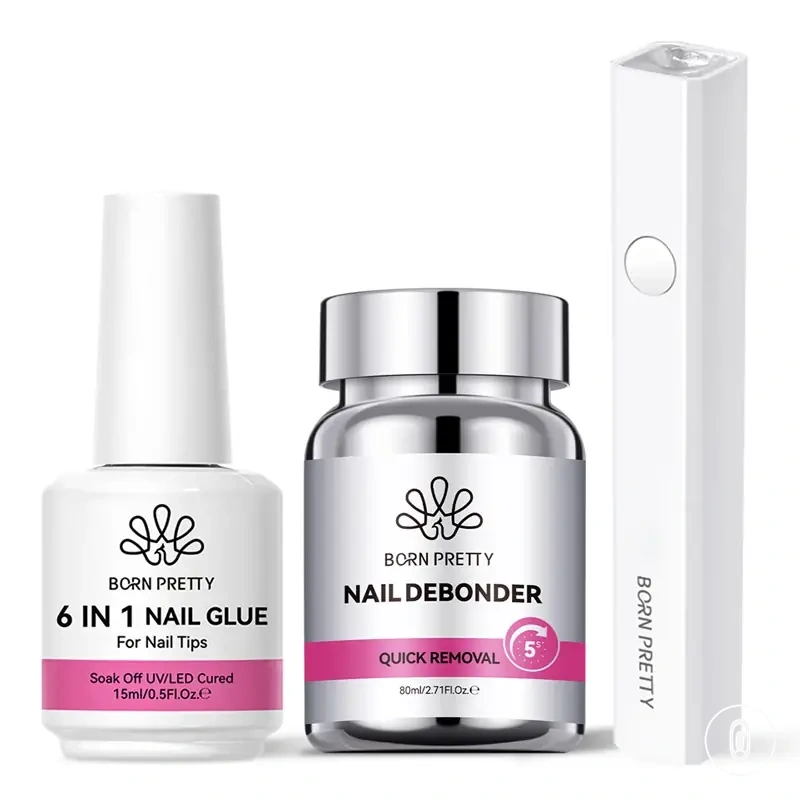
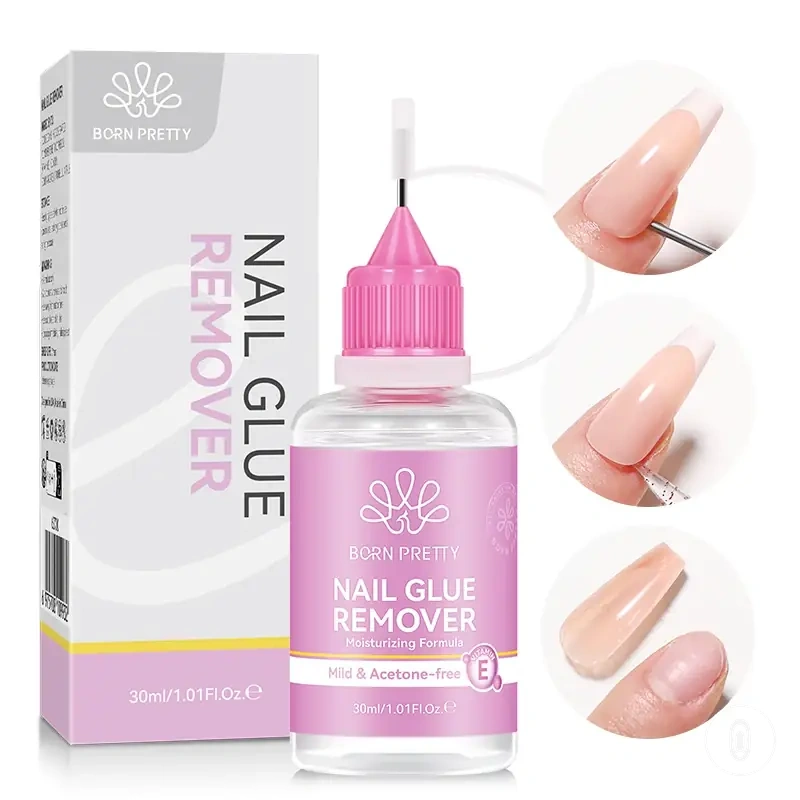
This chart shows the likely causes, diagnostic checks, and next steps when gel extensions do not soften after soaking, helping you decide whether to correct conditions or stop and seek professional help.
Removal Mistakes That Damage Natural Nails
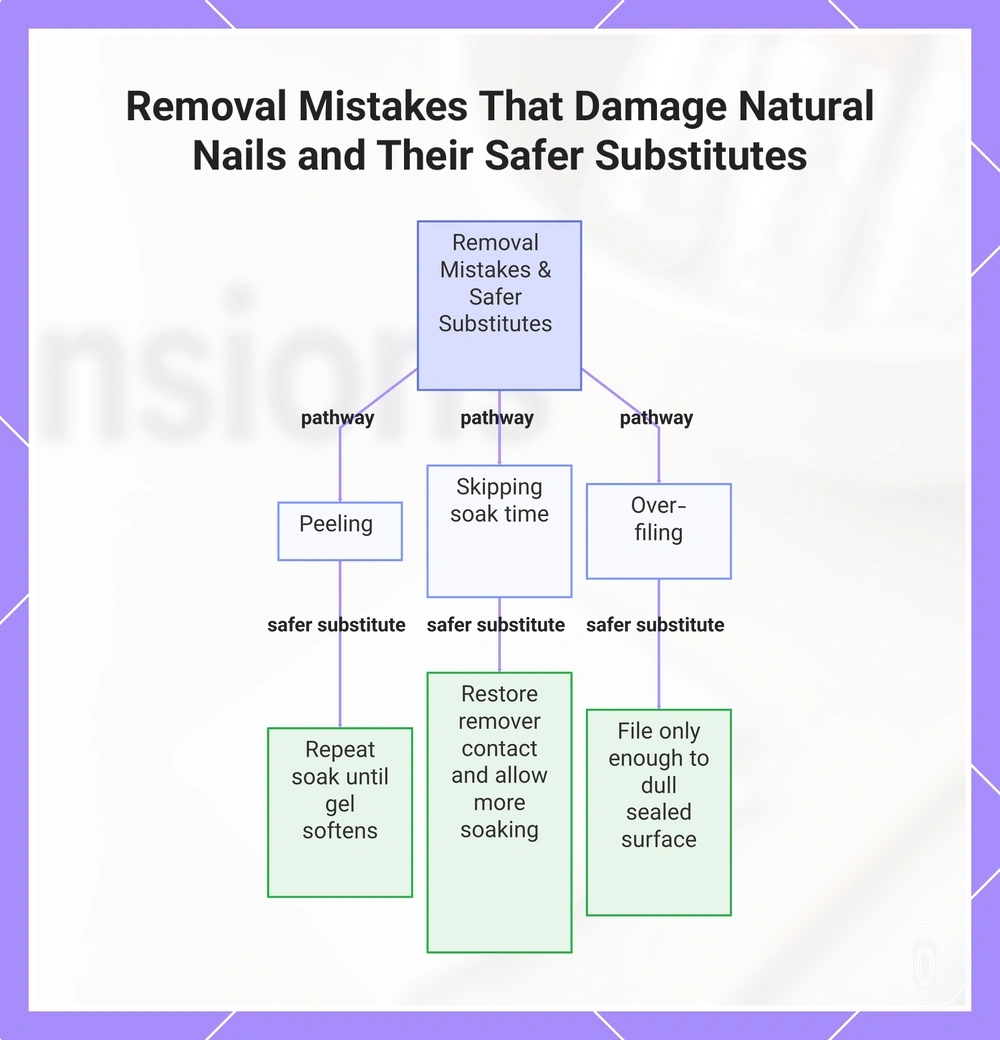
Removal mistakes can increase nail damage when force replaces proper softening. Poor soaking contact may leave gel attached, while impatience can lead to peeling, prying, or excessive pressure. Force, impatience, and over-filing are the main damage pathways.
When gel still resists removal, peeling or prying may lift layers from the nail plate instead of separating only the product. Skipping soak time can leave attached gel firm, while deep filing or aggressive metal pressure may contribute to thinning, sensitivity, and pain. These actions increase nail plate damage because the product has not softened or released sufficiently.
Use a safer substitute whenever resistance or pain appears instead of increasing pressure. Stop, reassess the soak response, and continue only when the gel has softened enough for gentle removal. The related guide explains further removal mistakes and their safer alternatives.
- Peeling: May lift layers from the nail plate. Safer substitute: Repeat the soak until the gel softens.
- Prying: Can increase nail plate damage and pain when gel remains attached. Safer substitute: Use gentle pressure only after the product releases.
- Skipping soak time: Leaves attached gel resistant to removal. Safer substitute: Restore remover contact and allow more soaking before checking again.
- Over-filing: May thin the nail plate and increase sensitivity. Safer substitute: File only enough to dull the sealed surface.
- Aggressive metal pressure: Can stress the nail surface when resistance remains. Safer substitute: Keep metal pressure light and stop if the gel does not move easily.
- Ignoring pain: May allow unnecessary stress to continue. Safer substitute: Treat pain as a stop cue and reassess the removal process.
This chart shows three common removal mistakes that damage natural nails and the recommended safer substitutes for each.
Natural Nail Care After Gel Extension Removal
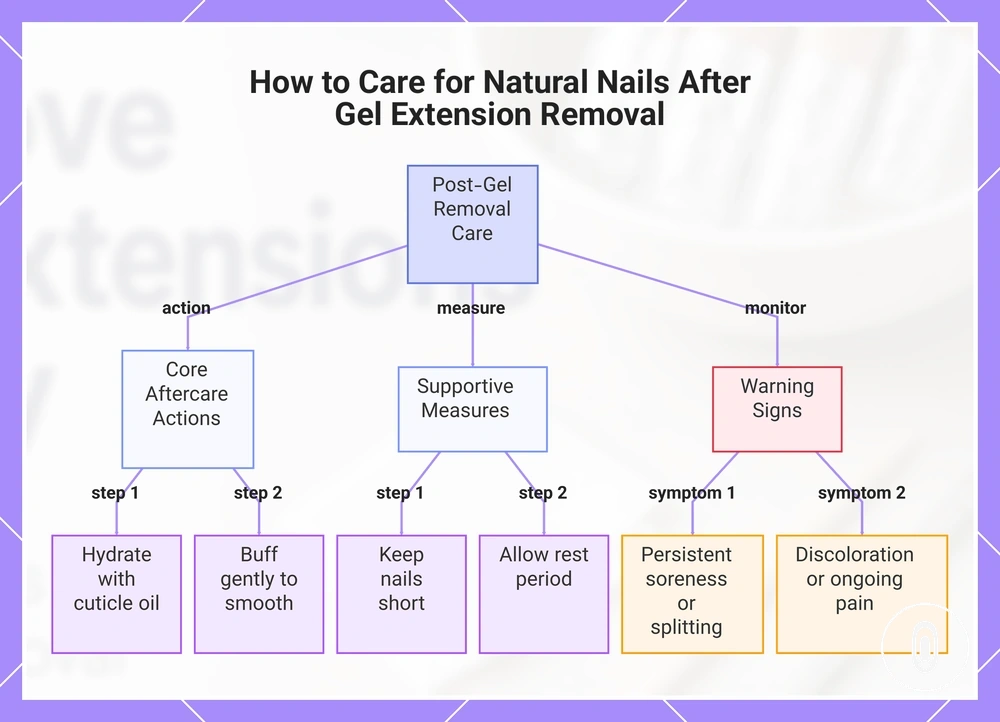
Aftercare supports the natural nail after gel extension removal by helping manage dryness, smoothing the nail surface, and reducing unnecessary stress during recovery. Care should match the nail's condition rather than follow a fixed timeline, so aftercare focuses on hydration, gentle buffing, keeping a short length, and allowing a rest period when needed.
If the natural nail feels dry, rough, sensitive, or slightly thin after removal, choose care based on the visible condition. Cuticle oil can help support hydration, while gentle buffing may smooth minor roughness without excessive abrasion. Keeping the nails at a short length may reduce stress on a weakened nail during a rest period. Dryness, roughness, sensitivity, and mild thinning are common post-removal conditions.
When only mild cosmetic changes are present, gentle aftercare is usually more appropriate than repeated filing or aggressive polishing. Continue using cuticle oil, protect the natural nail from unnecessary stress, and allow time for normal nail care. For ongoing nail care guidance, see maintenance before removal.
Warning signs such as persistent soreness, splitting, discoloration, or ongoing pain should not be treated as routine cosmetic dryness. If these warning signs continue or become more noticeable, pause additional cosmetic treatments and seek appropriate advice rather than treating them as part of normal aftercare.
Here are product examples that may make comparison easier. Before buying, always review the compatibility criteria, essential features, and product details.
- Apply cuticle oil regularly to help maintain hydration of the natural nail and surrounding skin.
- Use gentle buffing only to smooth minor roughness, not to thin the nail surface.
- Keep nails at a short length if sensitivity or thinning is present.
- Allow a rest period before applying new enhancements if the natural nail appears weakened.
- Monitor for warning signs such as persistent soreness, splitting, discoloration, or ongoing pain instead of treating them as normal aftercare needs.
This chart outlines the essential aftercare actions, supportive measures, and warning signs for natural nails recovering from gel extension removal.